HelloKittyYourName. So, my project will be named HelloKittyStellaK
HelloKittyYourName. So, my project will be named HelloKittyStellaK
Component Designer of the appinventor environment.
At this point, click on Open Blocks Editor, on the top right of the Designer.
You may need to answer some questions as the Blocks Editor starts. Do so.
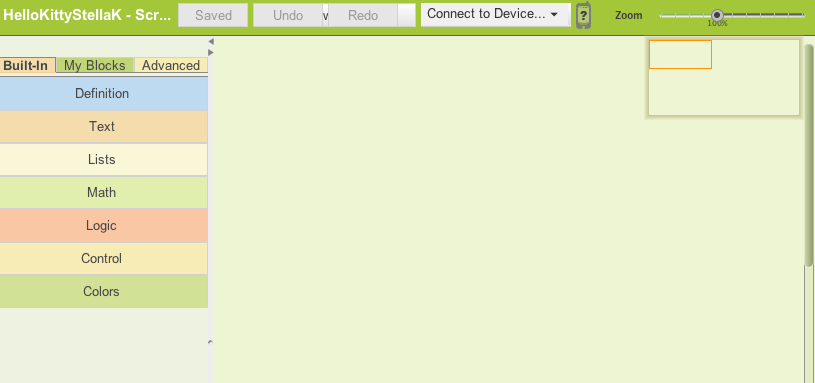
If all goes well, you will see a new window, looking like this:
From the Blocks Editor window, under Connect to Device choose the phone.
(It appears as a String, starting with "HT" .)
At this point you could choose to create a New Emulator and connect to it, instead
of a real phone.
If you got to this point with no complains, your computer is set up to run appinventor. Are you ready to start programming your first app?
Palette on the left of the window: contains all the possible
components you can use to build an interface, grouped in categories like Basic,
Media, Sensors and more. Today we will components from the three
categories just mentioned.
Viewer, next to the Palette. Here you will see a rough indication
of what your app will look like on your phone.
Components part that lists all the components your current project is using.
Starts out with Screen1, which is added automatically when you start a new project.
Notice how you can rename or delete a particular component.
Media part. Here you can upload images and sounds, to be used by the app,
as we will do today for the Kitty app.
Properties part, which show the properties associated with the selected component
in the components list. At this point, it shows all the properties associated with the Screen1 component.
Components area, in the Basic group, click on
Label and drag it into Screen1. Rename it to PetLabel (no spaces in the names
of components.) Notice its properties. Change some of them, like the BackgroundColor,
FontBold, FontSize, etc.
live testing.
Button, to Screen1, which will hold the kitty image. Rename it to
KittyButton. You may want to delete
the text on it. You also want to give it an image, i.e. the kitty image, which will show right on it.
To do so, you need to upload the image to the cloud.
Media click Upload new... and browse around your file system to locate
the kitty.jpg file. Click "Open" and then "OK". Now your image is uploaded on the Cloud,
and you can use it as Image on the button. Since you are at it, upload the "meow.mp3" file as well.
Sound component to your app. You will find it under Media.
Rename it to "MeowSound". Set its Source to the meow.mp3 file.
Blocks Editor to add some behavior to our components.
Go to the Blocks Editor Window. Click on My Blocks on the left. You will see five "drawers" there, one for
each component in your app, and one for "My Definitions" (ignore this for now).
You want to add some behavior to the kittyButton. You want the button to respond to the user's click. Specifically, when the user clicks on the button, the meow sound should play.
Click on the KittyButton drawer, and then on the KittyButton.Click event.
Click the MeowSound drawer, and then the MeowSound.Play method.
Connect the two as follows:
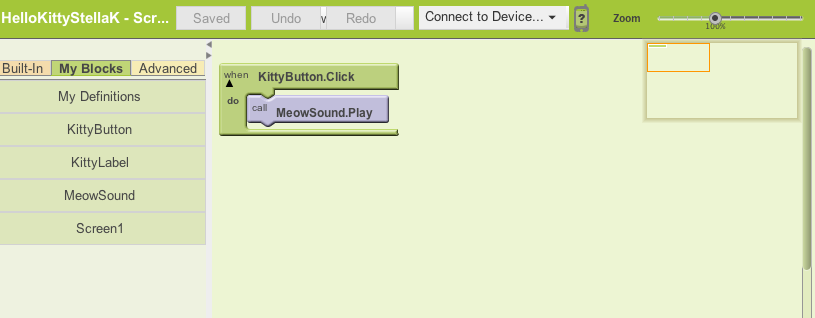
Try to "pet" the kitty now. What happens?
Can you detect the phone's shaking, and react to it by having the kitty meow? Hint: You need to use
the accelerometer sensor to detect the phone moving.
installed yet on your phone, it is merely playing on your phone while it is stored
in the cloud: Appinventor is a Cloud Computing Tool.
To install the app on your phone, go to the Designer Window, and under
Package for Phone choose Download to Connected Phone. This process may take a bit of time, however at the end,
you should be able to see your first app installed on your phone, among the rest of the apps there. You can start it, stop it
and delete it as you would with any other app.
Package for Phone choose Download to this Computer. An .apk file will be created.
Upload this to a web accessible folder in a server (like the public_html folder in your cs account).
Other people can open the app's URL in a browser, on their phone, and download it from there. They need to have
their phone's
Applications-->Unknown Sources box checked!