Are you moving the camera or the scene? In some sense it doesn't matter, but sometimes it can be very confusing. If the scene is a globe and I'm looking at North America from space, and I do
glRotatef(45,0,1,0);am I now looking at Europe or the north Pacific? Think about this, and we'll discuss it in class.
That's why it's called the GL_MODELVIEW matrix: it combines both modeling and viewing.
Last time we discussed both perspective and orthographic (parallel) projections. Having mapped the scene to the image plane using either of these projections is not the end of the story. The 2D image is then mapped onto the window that we opened at the beginning of our program. More precisely, it is mapped onto a viewport. That is, you don't have to draw on the entire window. You can draw instead on a "viewport," which is a rectangular region of the window. You specify this with the following call:
glViewport(left,bottom,width,height)
The arguments are in pixels, relative to the surrounding window, where the origin is in the bottom left corner of the window. This is the first time we've used pixels in this course! Consult the man page for more information. If you want to use the whole window, you certainly may. That's the default, so specifying a viewport is optional.
Note that, most of the time, the viewport is your whole window, so left and bottom are both zero, and width and height are the width and height of the window.
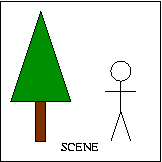
There's a very key idea contained in this mapping from the top of the frustum and the viewport. Consider a frustum that is square and a viewport or window that is decidedly not square: suppose that it is twice as wide as it is high.
The aspect ratio of a rectangular region is the ratio of the width to the height.
Thus, in our example, the aspect ratio of the frustum is 1 (1:1) while the aspect ratio of the viewport is 2 (2:1).
How are movies different from TVs? Why does a movie have to be "formatted to fit your TV?" How is it reformatted?
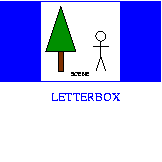
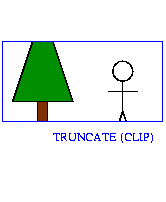
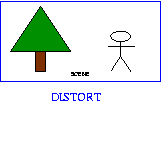
pytw/demos/camera/FrustumModes.py shows the effects of different ways to handle the aspect ratio of the window. Again, use the "?" key to find out the callbacks. In this case, there are keys that change whether you are letterboxing, clipping, or distorting. You can also change the figure being displayed.
Okay, you've got the top of your frustum in the same shape as your viewport, to avoid distortion, but what if the user reshapes the window?
You can handle that with a reshape callback, another of the X11 events to which your program can respond, like the display and keyboard callbacks. The function gets the new width and height of the window.
Look at the way TW handles it in pytw/TW.py
(search for twReshapeFunction
): Essentially, all it does on the
reshape is to set the values of some global variables. One of those
variables, aspectRatio is used in the twCameraShape()
function (which is called by twCamera().
The twCameraShape() function also allows three modes of
viewing: letterbox, distort and clip (truncate).
By using the viewport more than once, you can draw the same scene multiple times or different scenes. An example is pytw/demos/camera/Viewports.py. However:
In short, subwindows are easier.
We saw this earlier in pytw/demos/camera/Perspective.py. You use subwindows as follows:
Let's step back from the rendering process for a minute and look at it from a high level. Here's a standard picture of the complete process of transforming vertices:
The Vertex transformation process, drawn from Chapter 3 of the OpenGL Programming Guide (the Red Book)
We send vertices in at the left (say, the vertices of the barn or the teddy bear) and we get window coordinates out the other end, which are almost, but not quite, pixels. If you draw a line in the framebuffer between the window coordinates, you'll get a line that corresponds to a line in the model. (Filling areas is a bit more complicated, but essentially goes along "scan lines" — horizontal lines in the raster — to fill in the areas, interpolating window coordinates in the process we've described earlier.)
Let's describe these steps of vertex transformation:
win_x = (ndc_x * 0.5 + 0.5) * viewport_width + viewport_left
win_y = (ndc_y * 0.5 + 0.5) * viewport_height + viewport_bottom
win_z = (ndc_z +1) * 0.5
In Normalized Device Coordinates, all coordinates are between -1 and +1. You can think of this as a reshaped frustum, allowing us to do a parallel projection of the reshaped frustum. So, in fact, we can retain depth information until the very end.
You can ask OpenGL to project something for you, yielding window
coordinates in pixels. That is, you can invoke
the gluProject() function, giving it:
The output is three window coordinates. Yes, it tells you z coordinate of the projected vertex, so you can tell whether it is in front of or behind some other projected vertex.
You can also go in reverse, mapping a 2D point on the screen to a 3D point in space. Obviously, that's impossible, because there are an infinite number of points that project to a point on the screen. More precisely, there is a line segment (from the near face of the frustum to the far face) that projects to a point. To resolve the ambiguity, the unprojection function requires starting with a "depth" of the point on the window, which you may not have.
That is, the gluUnProject() function takes (compare
to gluProject():
The output is three vertex coordinates in your model!
In interacting with the mouse (we'll get to that soon), we often want to know the relationship between where the mouse clicked (mouse coordinates in pixels) and the objects in the scene. That relationship is exactly the projection/unprojection relationship.
Next week, we'll look at how we use the mouse to rotate the scene.
Meanwhile, here is a demo that allows you to click with the middle mouse button, and it draws a line from the front of the view volume to the back of the view volume: pytw/demos/camera/Click.py. It uses the idea of unprojection, where it "unprojects" the location of the mouse-click to find the two vertices to draw the line between.
© Scott D. Anderson
This work is licensed under a Creative Commons License
Date Modified: