jsFiddle Examples for Google Maps
Geocoding with HTTP requests
It is possible to send requests to the geocoding service, without the need
for the Google Maps itself. It will be a normal API call, just as the ones in AM1.
In the below example, I show how you can use a dedicated jQuery method, .getJSON
to replace the method ajaxRequest that we discussed for AM1.
jsFiddle for Geocoding without Google Maps.
Send more than 10 requests to the Geocoding service
squigglybracketsgirl has encountered a problem with the API, which doesn't allow more than 10 requests at a time. I wrote a solution that waits 1 second (1000 milliseconds) between two requests.
jsFiddle for more than 10 geocoding requests.
I have updated the solution to be a "closure" (see further down in the notes).
This is because putting a setTimeout inside a for loop creates multiples timers, which all
start at the same time. What we want is timers that wait each other, which means, some of
them need to have greater delay. This is why in the solution we multiple the time with the
index i.
Show many markers with different info window messages
Generating markers for different locations is not difficult, you learned how to do that in your tutorial task. What is slightly more challenging is to show information relevant to a marker everytime that you click on it.
I have written a jsFiddle for entering location names and showing markers with info window on the map. Whenever you type the name of the new location, a new marker is showed on the map.
This example works in the following way:
- The map is created at the beginning, together with some objects as global variables, that can be used in any function.
- When the user clicks the button, the typed location is given to the
geocoderobject to find the lat/long coordinates. - The callback function of the
geocodertakes the lat/long values and the formatted address of the location and passess them as arguments to a function written by us,showMarkerOnMap. - The function
showMarkerOnMapcreates a new object of typeMarker, defines an event listener for the click event on the marker object, and also it triggers the event, so that the info window opens on its own.
The Closure
In Javascript, when we define a function within another function, the inner function has access to the objects defined in the outer function. What happens is that the inner function stores within it, the values these objects have at the moment the inner function is defined, in a way "freezing" these values for further use. In our code, the click event listener is behaving as a closure and the outer function that defines the marker and content for the info window are stored in the event handler function, everytime we create a new marker.
The concept of closure is a bit hard to understand at the beginning, but we'll see more examples during the semester.
function showMarkerOnMap(latLng, addressString){
  var marker = new google.maps.Marker({
      map: map,
      position: latLng,
  });

  // the anonymous function associated to "click" is a closure
  google.maps.event.addListener(marker, 'click', function() {
      infoWindow.setContent(addressString);
      infoWindow.open(map, marker);
  });

  // trigger click to open window. Without this line, only the marker
  // will be shown, but the window is not opened.
  google.maps.event.trigger(marker, 'click');
  bounds.extend(latLng);
  map.fitBounds(bounds);
}
Calculate directions between two locations
Most often we'll use the map to calculate directions between two locations and display instructions about driving or walking from one point to the other.
The Google Maps Javascript API makes this process very easy for programmers,
by exposing two dedicated objects: google.maps.DirectionsService and
google.maps.DirectionsRenderer.
- google.maps.DirectionsService will be used to calculate the route between two points.
- google.maps.DirectionsRenderer will be used to display the path and markers on the map, as well as the text directions on a HTML element of the page.
Here is an example of displaying the walking directions between Natick and Wellesley:
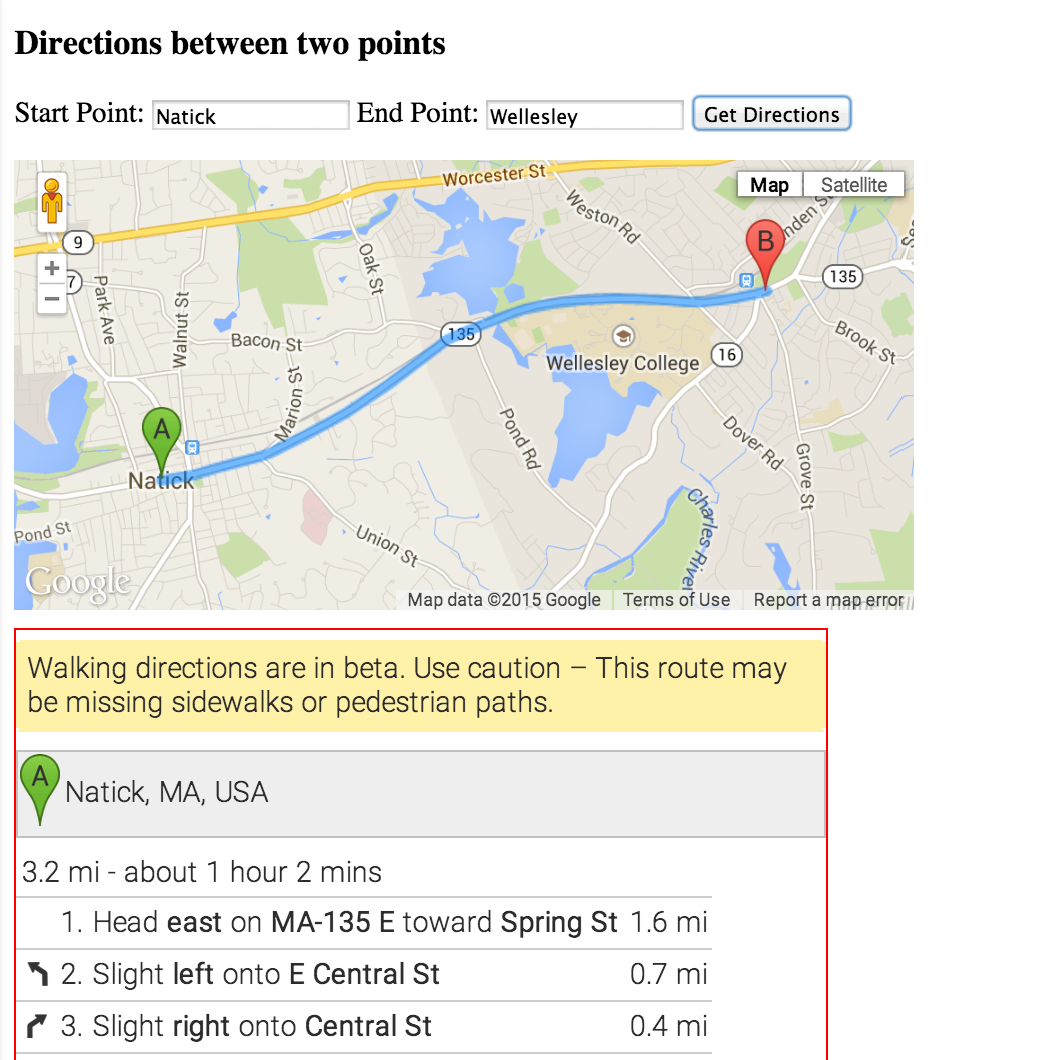
You can try this out with whatever locations you want by using this jsFiddle I created. Careful, the code is defined to give walking directions, see how you can change it to give driving directions.
Draw a route with a Polylines
In the previous example, we showed how to display on the map directions between
two locations by using the google.maps.DirectionsRenderer. One problem
with this approach is that the markers are controled by this object and we cannot
access them to directly. To have more control, we can draw a route with our own code
and thus have more control over the markers. To do this, we need two things:
- Access the property
overview_polylinefrom the response of thedirectionsService.route()API call, which contains an encoded representation of the route. - Create options for a polyline and then add that to the map.
Below is the relevant code needed to perform these steps:
directionsService.route(request, function(response, status) {
  if (status == google.maps.DirectionsStatus.OK) {
      console.log(response); // to inspect in the console
      // grab the polyline that contains the route to draw

      var route = response.routes[0].overview_polyline;
      var polyOptions = {
              strokeColor: '#AA4588',
              strokeOpacity: .8,
              strokeWeight: 8,
              map: map,
              path: google.maps.geometry.encoding.decodePath(route)
       };
        // show the polyline on the map
        var poly = new google.maps.Polyline(polyOptions);

       // use the property bounds to change zoom
        map.fitBounds(response.routes[0].bounds);

       // more things here
    }
  });
}
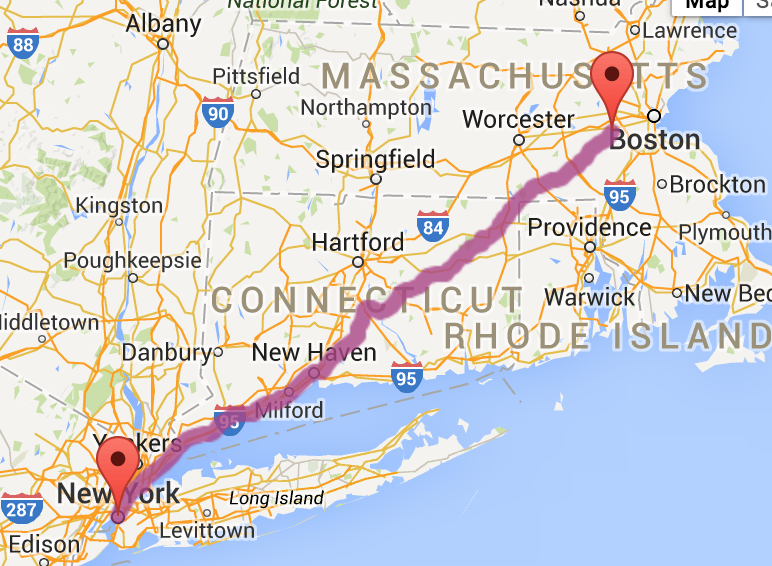
Polyline.You can try this out with your desired locations by using this jsFiddle I created. You can change the options for the polyline, to control the color and weight of the line you're drawing.
Generate Marker Icons
When you want to show multiple markers that differ in colors and labels, you can programmatically generate the icons for the marker. There are many ways to do this, Google has its own ways, but users have also become creative and offered their own APIs. The example below shows using a simple API for generating icons for the markers.
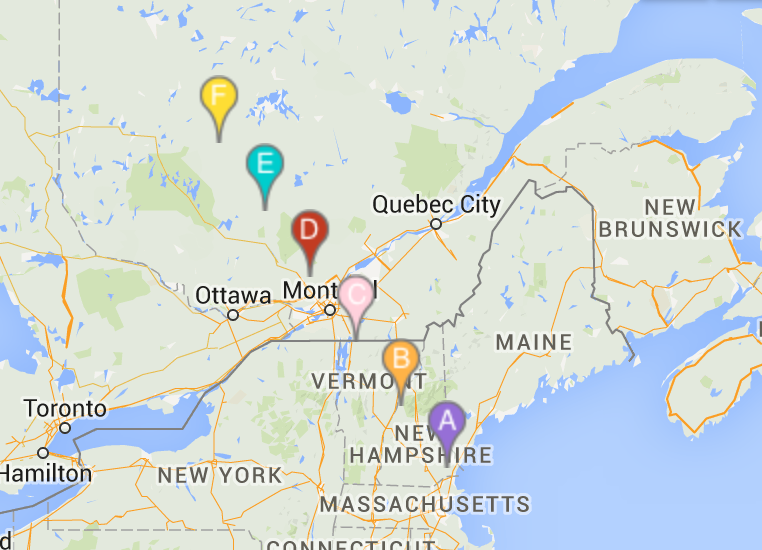
The code can be found
in this jsFiddle I created for this
purpose.. Study the code to see how the URLs of the icons are assembled.