CS307: Texture Mapping 2: Repetition, Texture Coordinates & Synthetic Textures
Plan
- Repeating image textures
- Textured pyramid:
- creating a synthetic texture (slides)
- adding texture coordinates to a Geometry
Repeating Image Textures
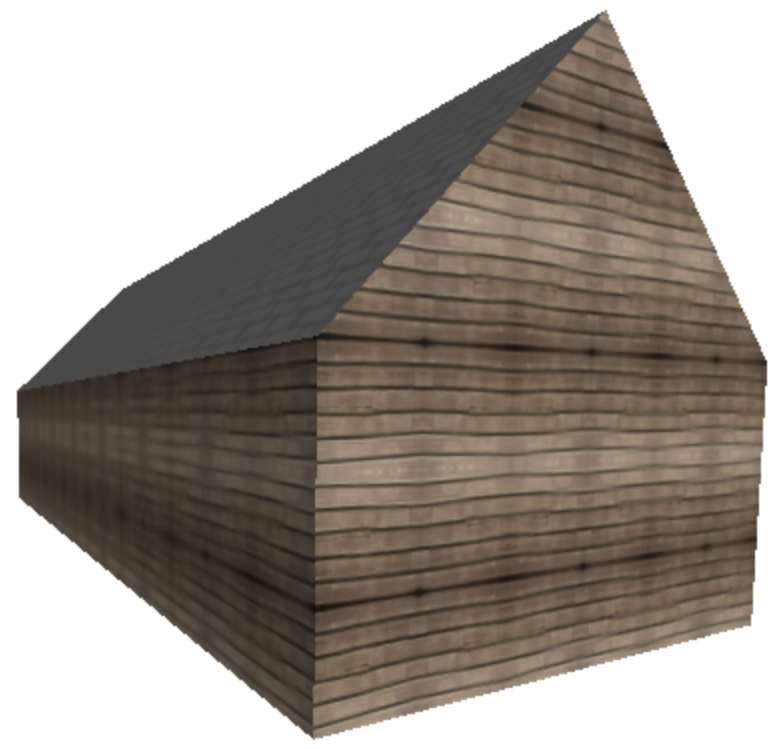
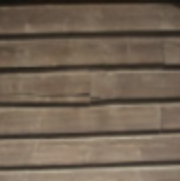
Suppose we want to create the appearance of a natural repetitive texture, such as that shown on the sides of the barn below. We can achieve this effect by tiling the surface with multiple copies of a small snippet of texture, like that shown to the right of the barn.
In Three.js, there are at least two ways to repeat a texture on an object surface:
- set the
repeatproperty of aTHREE.Textureobject to indicate the number of times to repeat the texture in the horizontal and vertical directions - set the texture coordinates
sandtassociated with verticies in the Geometry to have values larger than 1
In both cases, we also need to specify how the texture is wrapped horizontally and vertically.
In the following code, texture is a THREE.Texture object.
The wrapS and wrapT properties control how the texture
is wrapped in the horizontal (s) and vertical (t) directions.
The pattern is then repeated two times in the horizontal direction and three times in
the vertical direction. The needsUpdate property often needs to be set to
true when working with repeated textures, so we also set it here.
texture.wrapS = THREE.RepeatWrapping;
texture.wrapT = THREE.MirroredRepeatWrapping;
texture.repeat.set(2,3);
texture.needsUpdate = true;
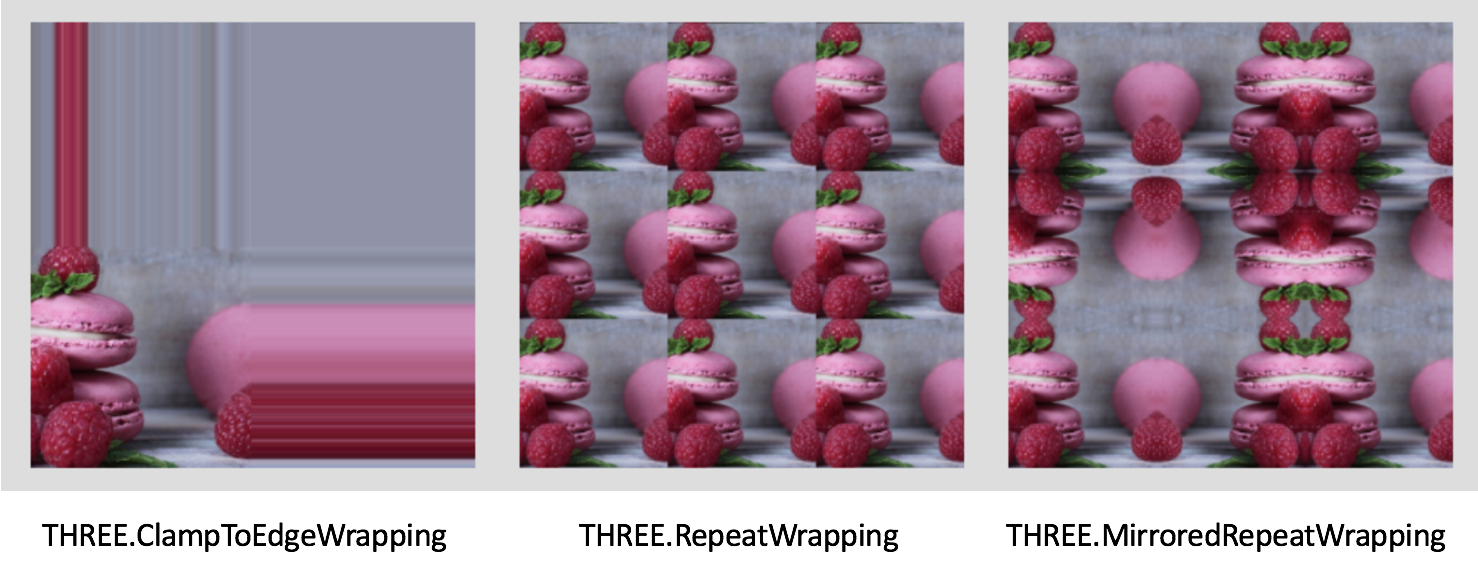
This picture from wrap-mode.html illustrates the three wrapping methods that can be used:
To see how repetition can be done by directly manipulating texture
coordinates (s,t), we'll create our own texture and apply
it to a simple Geometry that is created from scratch.
Textured Pyramid
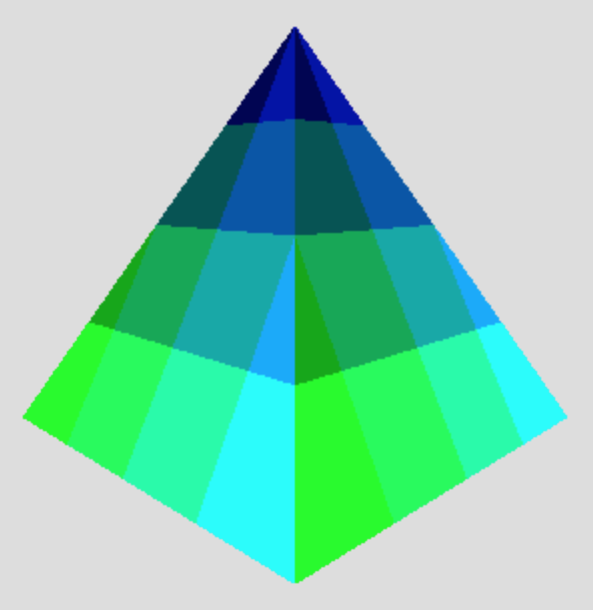
The first exercise will build on code for creating this textured pyramid:
There are three key functions that we'll examine in detail:
createPyrGeometry()creates the vertices and faces for the Geometry, a pyramid with a square base and four triangular sidesmakeTexture()creates aTHREE.DataTextureobject that contains a 4x4 texture pattern of colors that combine different amounts of green and blueaddTextureCoords()adds texture coordinates to the Geometry, associating(s,t)coordinates with each of the three vertices for each triangular face
There are three texture-mapped materials (they're initially the same) associated
with the faces of the object as indicated by the assigned materialIndex.
The following figure shows the (s,t) coordinates for the texture (left)
and texture coordinates assigned to the three vertices of one face of the object (right):
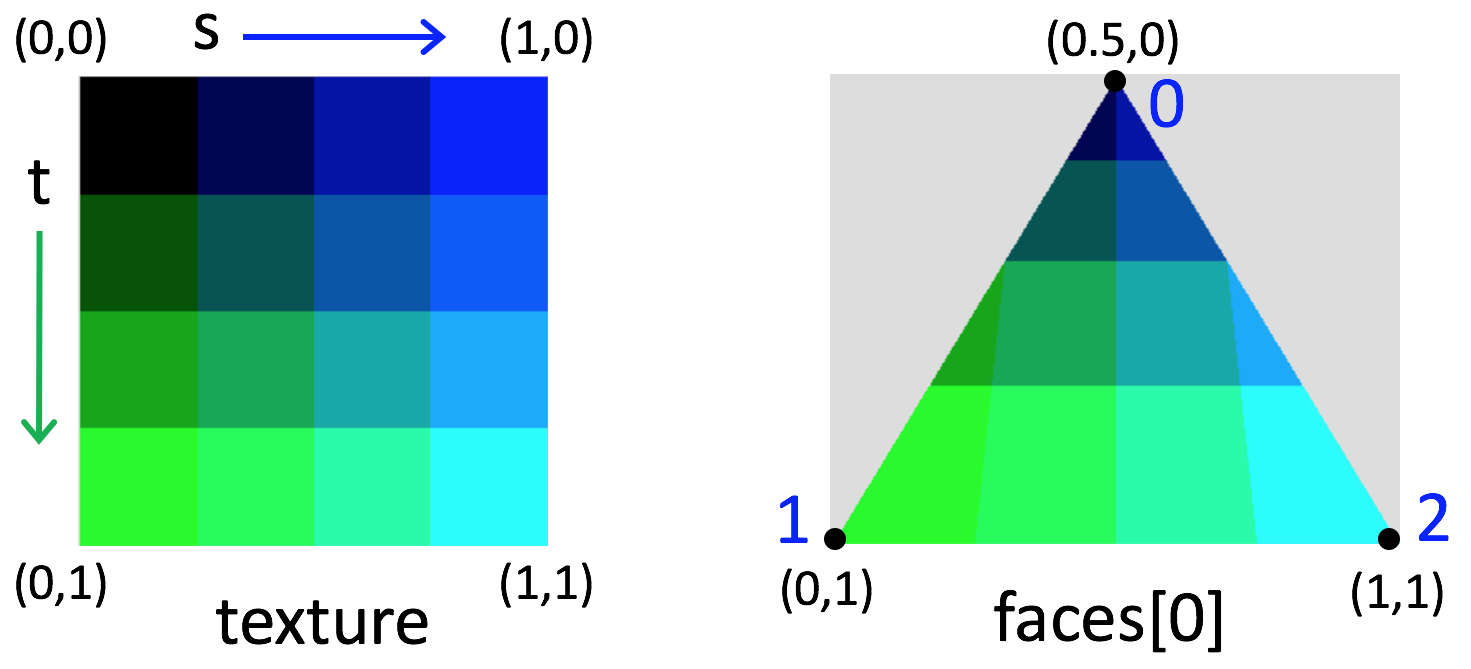
A THREE.Texture
object has a boolean property named flipY that flips the texture
in the vertical direction if the value is true. For the synthetic texture
above, t would run from 0 at the bottom to 1 at the top in this case.
Exercise: Repeating the pyramid textures
This exercise explores the two methods for repeating textures noted earlier. To begin, download this starting code for the textured pyramid.
Approach 1: Set the repeat property
Modify the makeTexture() function to enable repetition of the
texture:
- add two inputs to the function, to specify the wrapping style and number of repeats (you can assume that the texture will be repeated the same number of times, and use the same wrapping method, in the horizontal and vertical directions)
- after the
THREE.DataTextureobject is created, add code to set thewrapSandwrapTproperties to the input wrapping style, and set therepeatproperty to the input number of repetitions (in both directions) - modify the three calls to the
makeTexture()function (in the creation of thepyrMaterialsarray), using multiple wrapping methods and numbers of repeats
Carefully examine your result to be sure you understand why it looks the way it does!
Here is a sample solution
Approach 2: Modify the texture coordinates directly
Texture repetitions can also be done by directly manipulating the texture
coordinates defined in the addTextureCoords() function:
- first modify your three textures (created with the calls to
makeTexture()) to have only one repeat - in the
addTextureCoords()function, there are 6 calls to thefaceCoords()helper function, to add texture coordinates for the three vertices for each of the six triangular faces of the pyramid — modify the inputs to this function by multiplying all of them by 4 (i.e., 0.5 becomes 2 and 1 becomes 4)
What do you observe in your result? What does this tell you about the
relationship between the values of s and t and the
number of repeats?
Here is the new solution. Be sure to view all of the sides and bottom of the pyramid.
Combining both approaches
What happens if we combine both approaches? Modify your code from Approach 2 to increase
the number of repetitions specified in the calls to the makeTexture() function.
How do the two methods for specifying repetitions interact?
Texture Mapping, Surface Color, and Light
Texture mapping adds a pattern of varying lightness or color to a surface. What if
the surface itself also has a color with hue, i.e. the color property for
THREE.MeshLambertMaterial or THREE.MeshPhongMaterial is not
just white or some shade of gray?
And how does texture mapping on a surface interact with light sources in the scene?
The reading said, "the texture is multiplied by the color of the surface." For a single surface location:
- let (RP, GP, BP) refer to the RGB color specified for the Phong material
- let (RT, GT, BT) refer to the RGB color of the texture at this location
- the resulting color is then given by (RP x RT, GP x GT, BP x BT)
More importantly, if any of the R, G, or B values are 0, then the surface will not reflect any of that color component, so the corresponding color component in the image will be 0!
(Optional) Exercise: Texture, surface color, and lights
Experiment with the interaction of texture, surface color, and lights in the pyramid scene:
- in the
makeTexture()function, first add some red to the texture at each location — this can just be a constant value between 0 and 255 (view the result before moving on) - change the three materials to Phong material and give them a color with a hue, i.e. not white or a shade of gray (be sure to use non-zero RGB values here)
- add some ambient light to the scene
How does the texture mapping interact with surface color?
This sample solution uses three different surface colors that have the effect of "toning down" the amount of red, green, and blue, respectively.
Note: You can also change the color appearance of surfaces by adjusting the color composition of the ambient light. Try this!
Next Time
Next time, we'll finish up our exploration of texture mapping with these topics:
- the interaction of texture, surface color, and lighting
- mapping textures onto different kinds of surfaces
- advanced techniques such as the use of bump maps and normal maps