CS307: Transparency, Text, Shadows, Anti-Aliasing
Plan
- Rendering scenes with occlusion: z-buffer & painter's algorithms
- Representing transparency & rendering transparent surfaces
- Demo: transparency tutor
- Text in Three.js
- Exercise: snow globe
- Shadows
- why are shadows important?
- shadow maps
- adding shadows in Three.js
- Exercise: mystery objects casting shadows
- (if time) Anti-aliasing in Three.js
Rendering Scenes with Occlusion
To understand why transparency is hard, we need to understand how opaque objects are rendered. Throughout the course, we've taken for granted that we can draw multiple objects that may "overlap" in the image, and the rendering will show them properly overlapping. How is this possible?
There are two algorithms:
- the z-buffer algorithm (depth buffer algorithm)
- the painter's algorithm (depth sort algorithm)
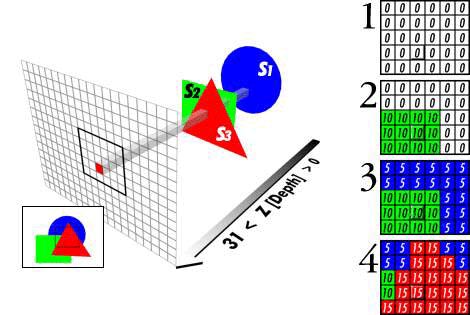
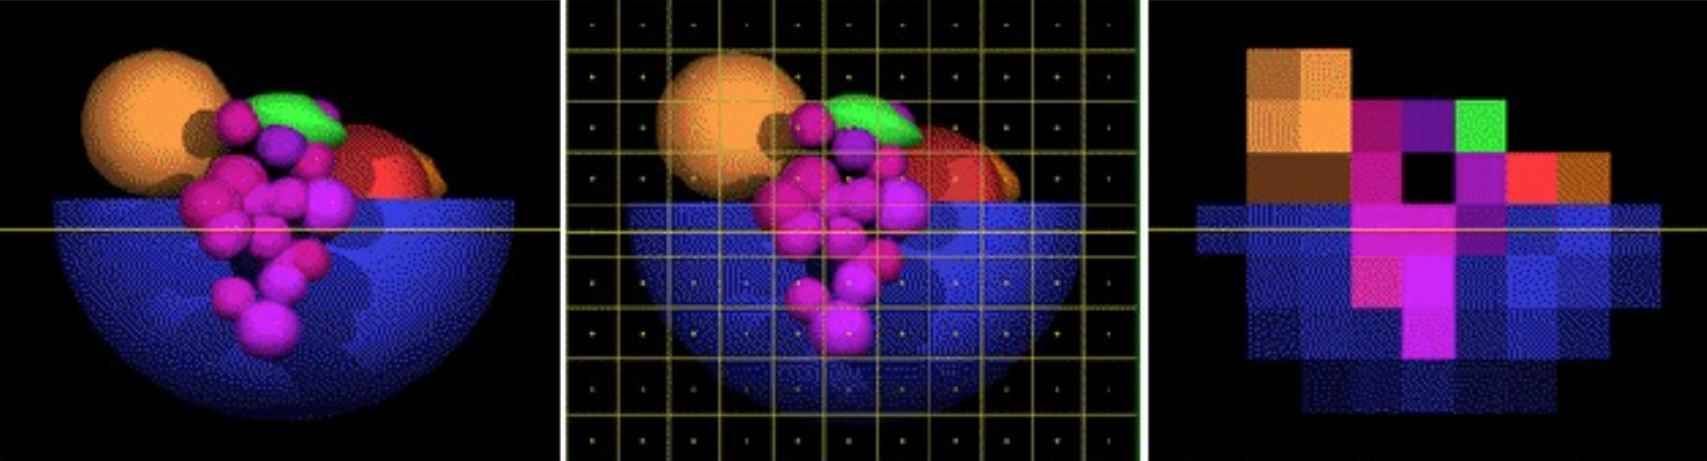
The z-buffer algorithm proceeds as follows:
- Initialize each pixel of the z-buffer to the maximum (most distant) depth in the scene
- Initialize the framebuffer (image buffer) to the background color
- For each new surface (or each triangular face of a new object):
- calculate the depth value of each pixel
- if the new depth value at a pixel is less than (closer to the camera than) the current depth value in the z-buffer, replace the depth in the z-buffer and color in the framebuffer at this pixel with those of the new surface
After all the surfaces have been processed, each pixel of the framebuffer stores the color of a visible surface at that pixel.
In the diagram below, the depth buffer and framebuffer are shown together on the right, larger depth values are closer to the camera, and the objects are rendered in the order S2, S1, S3:
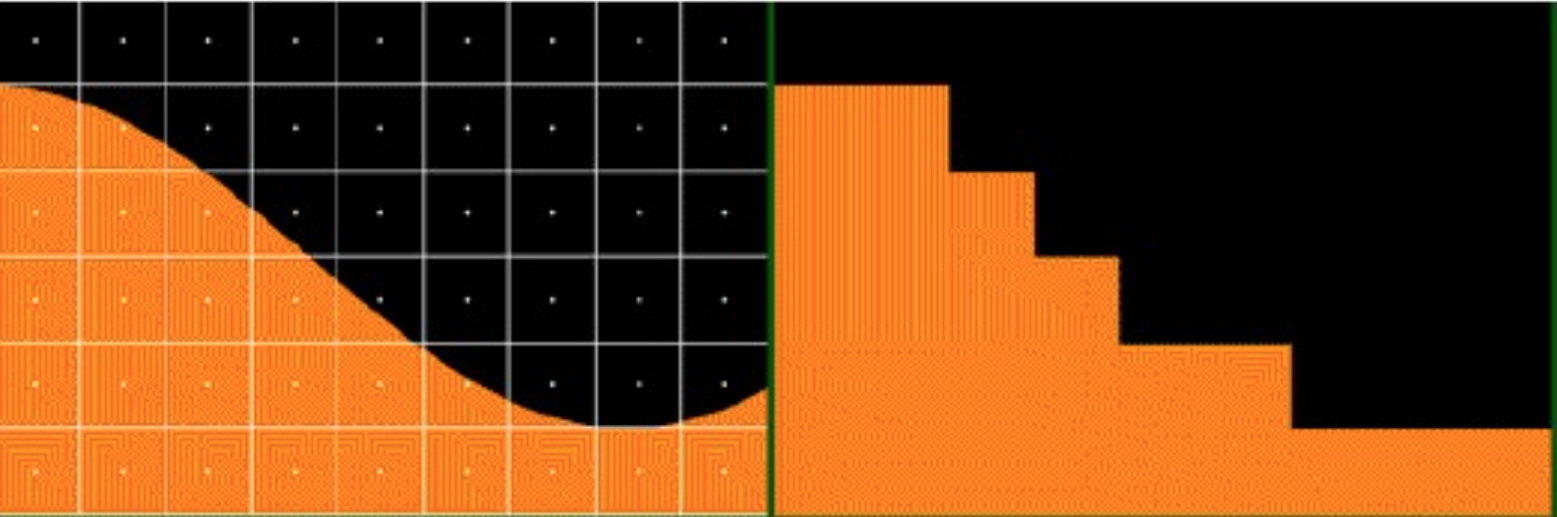
As suggested by the picture below (from Patrick Hurley), the painter's algorithm proceeds as follows:
- sort surfaces/polygons by their depth (Z value)
- draw objects in order, from farthest to closest
Scenerios such as the following pose a challenge for the painter's algorithm — which object is in front? Would the z-buffer algorithm handle this example correctly?

We've been using the z-buffer algorithm successfully, but it doesn't work so well with transparency, because it's not clear what the depth of a transparent pixel is, or how it should interact with things at other depths.
So, now it's time to use a little
of the painter's algorithm, in
the sense that we're going to draw the transparent things last and not
update the depth buffer.
Representing Transparency & Rendering Transparent Surfaces
Transparency is represented with an "alpha" value with the color or material, e.g. RGB$\alpha$, in the range from $0$ to $1$:
- $\alpha=1$ means perfectly opaque
- $\alpha=0$ means perfectly transparent
In Three.js, we can set the transparent and opacity
properties of a Material:
var mat = new THREE.MeshBasicMaterial( {color: 0x00ffff,
                                        transparent: true,
                                        opacity: 0.5} );
To render scenes with opaque and transparent objects, Three.js does the following :
- initialize the z-buffer (depth buffer)
- draw opaque objects first
- turn off the depth buffer
- draw transparent objects from farthest to nearest
How is the color of a transparent object combined with the color of background surfaces as it is rendered?
Let (RF, GF, BF) refer to the color currently stored in the framebuffer at a particular pixel, and let (RS, GS, BS, $\alpha$S) refer to the color and opacity of the new transparent surface to be added at this pixel. The new color stored at this pixel is given by the following expression:
$\alpha$S (RS, GS, BS) $+$ ($1 -$ $\alpha$S) (RF, GF, BF)
Transparency Tutor
Let's explore these ideas with this transparency tutor in Three.js:
Text in Three.js
Three.js has a basic capability to create 3D text using the
THREE.TextGeometry
class. Oddly, this is a subclass of THREE.ExtrudeGeometry, because 2D text is
extruded to make 3D text.
There are a limited number of fonts available, and the desired font must be loaded using the
THREE.FontLoader
class that is similar to the THREE.TextureLoader class used to load images for
texture mapping.
The following demo adds 3D text to a scene:
Here is the key code:
var loader = new THREE.FontLoader();

path = 'https://cs.wellesley.edu/~cs307/threejs/r80/examples/fonts/';

loader.load(
   path + 'helvetiker_regular.typeface.json';
   function (font) {
      var textGeom = new THREE.TextGeometry('Wellesley College',
                                            {font: font,
                                             size: 6,
                                             height: 2,
                                            } );
      var textMat = new THREE.MeshBasicMaterial({color: 0x0000ff});
      var textObj = new THREE.Mesh(textGeom, textMat);
      textObj.position.set(-28,2,2);
      scene.add(textObj);
      TW.render();
   } );
Exercise: Snow Globe
In this exercise, you'll create your own snow globe:
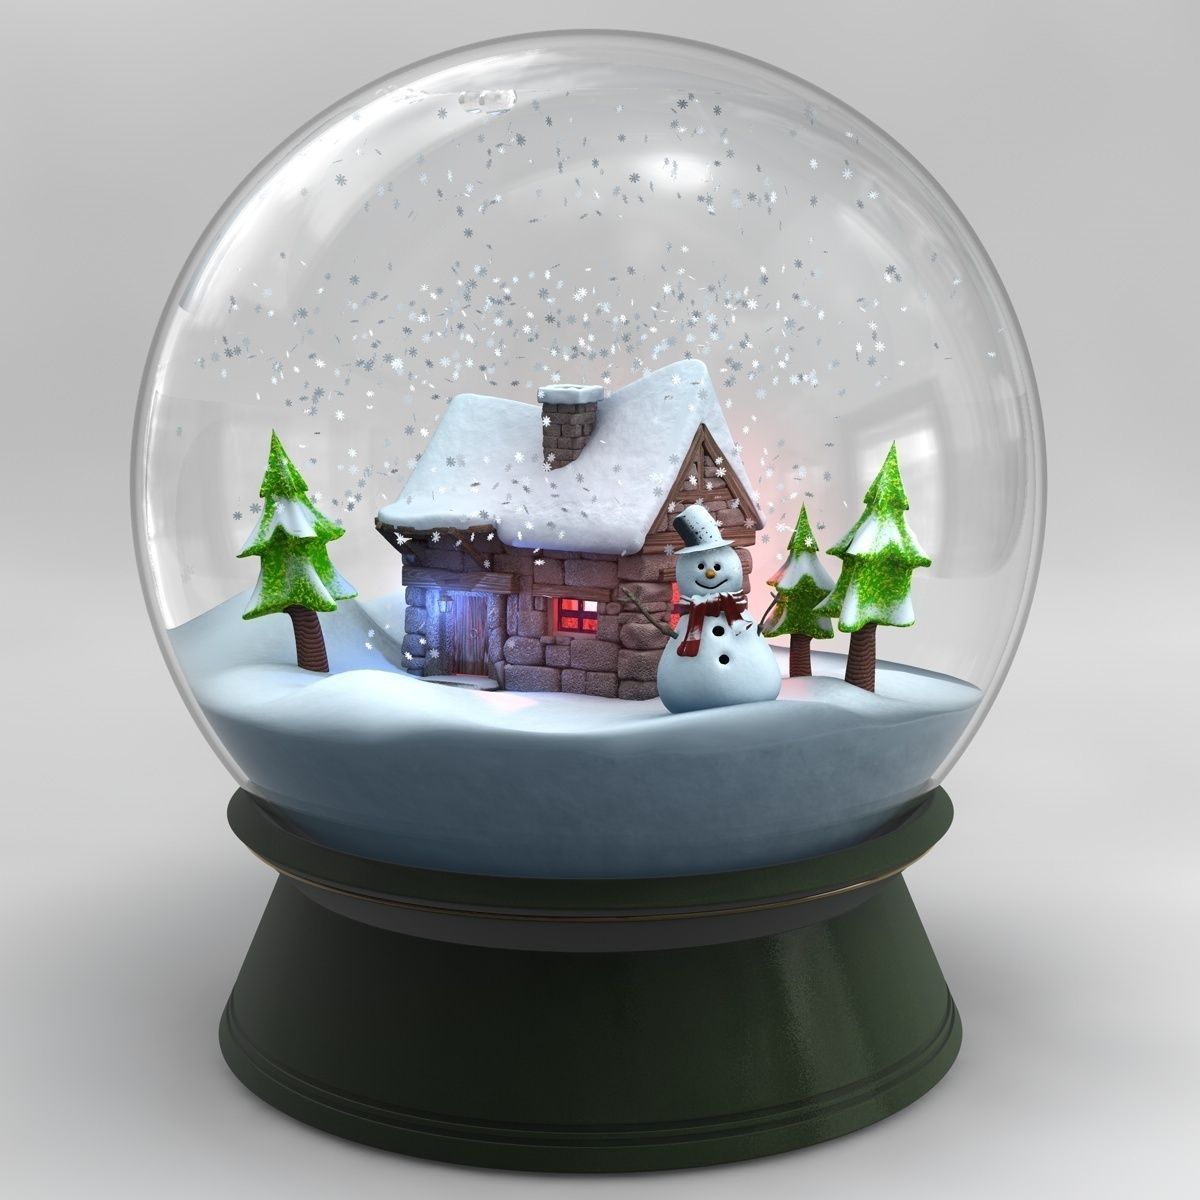
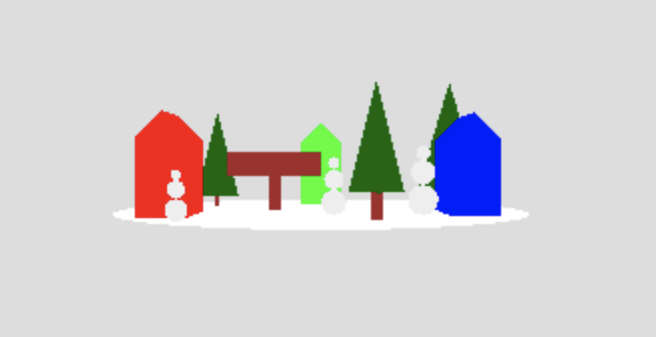
The starting point for this exercise is this snowGlobe-start.html code file, which creates a town scene on a circular ground of snow:
Your task is to build the scene into a snow globe, something like this:
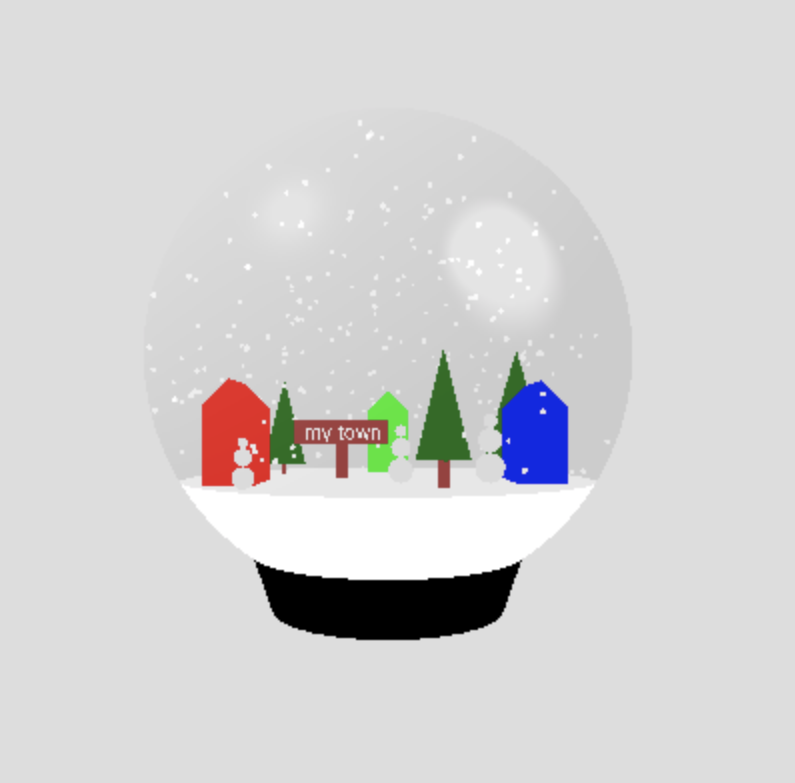
The things you should add to the code are described in comments near the end of the file, and include the following:
- Add a shiny, transparent globe around the scene (enter 'a' to see the
location of the origin of the scene coordinate frame)
Hints: use a radius of 10 for the sphere, and transparent Phong material with a color of 0xaaaaaa (or try something a little darker if you don't see the highlights on the globe, like 0x575757)
- Add the black base to hold the globe
- Add a call to the
addSnow()function to add snow inside the globe (examine the code to see what it does) - Add code to load a font and create text to add to the sign near the middle of town (the earlier code snippet can be a useful starting point)
- Add a base of snow to the bottom part of the globe (this is tricky, so I left
it for last — see the documentation for the
THREE.SphereGeometryclass to see all of its inputs)
Here's a sample solution: snowGlobe.html
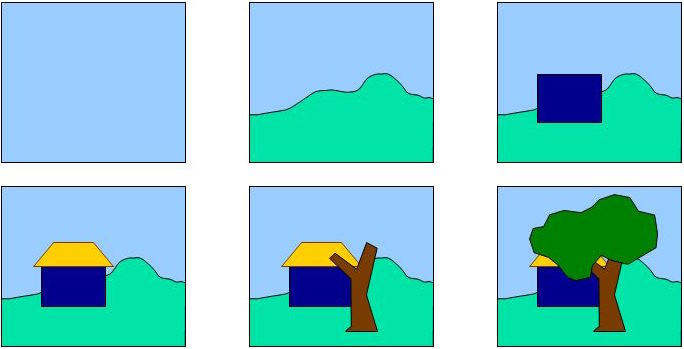
Why are Shadows Important?
Shadows provide important cues to the depth of objects, scene lighting, and contact points between surfaces.
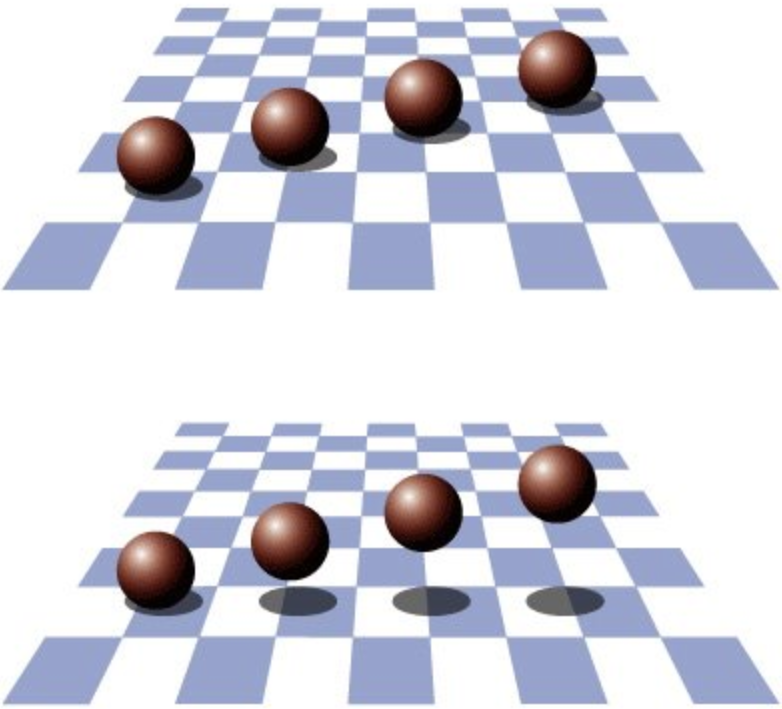
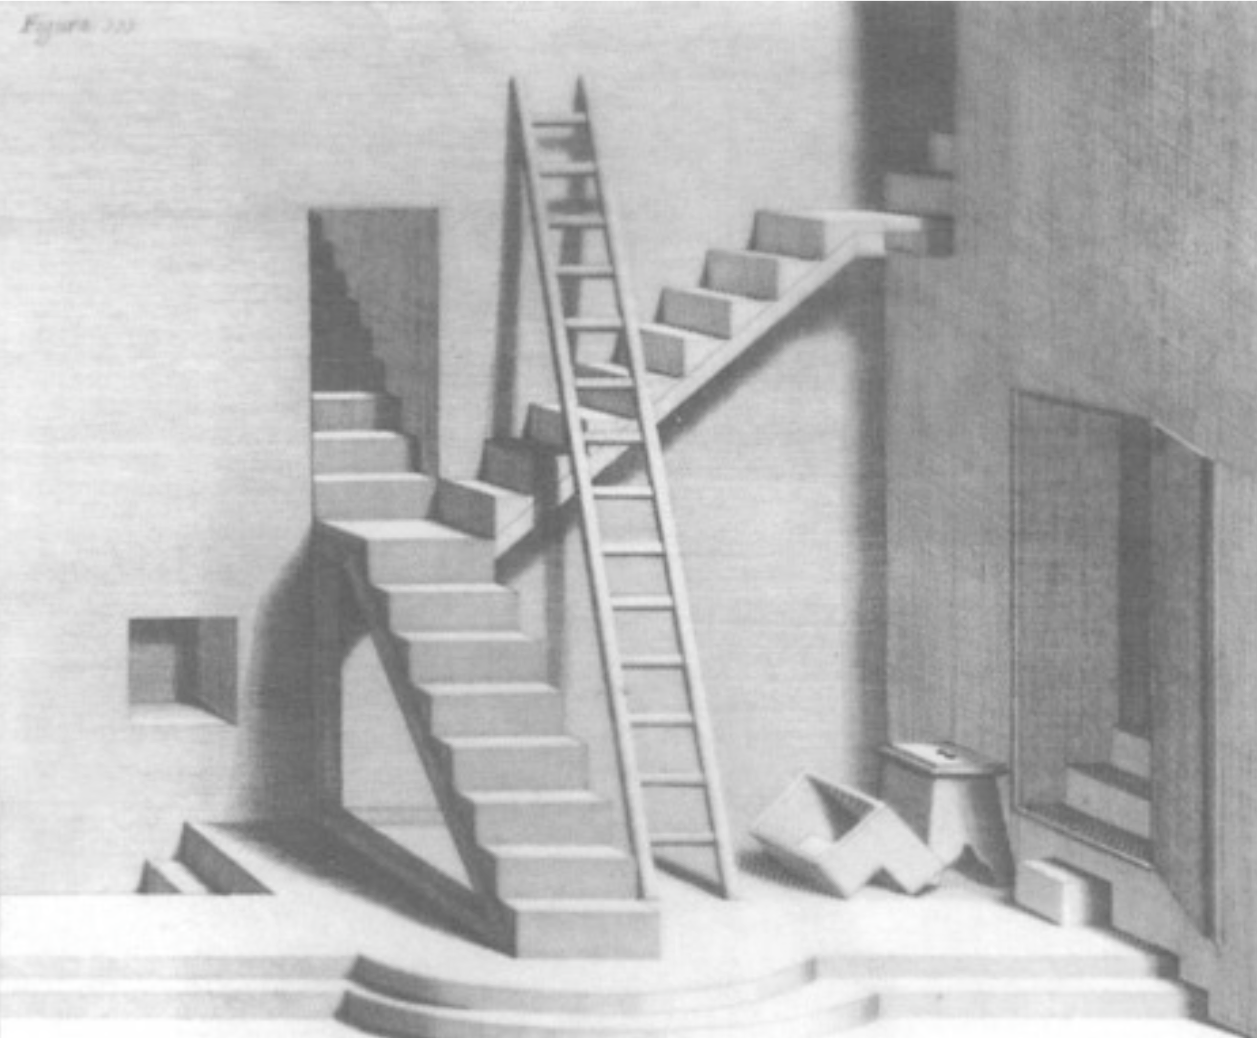
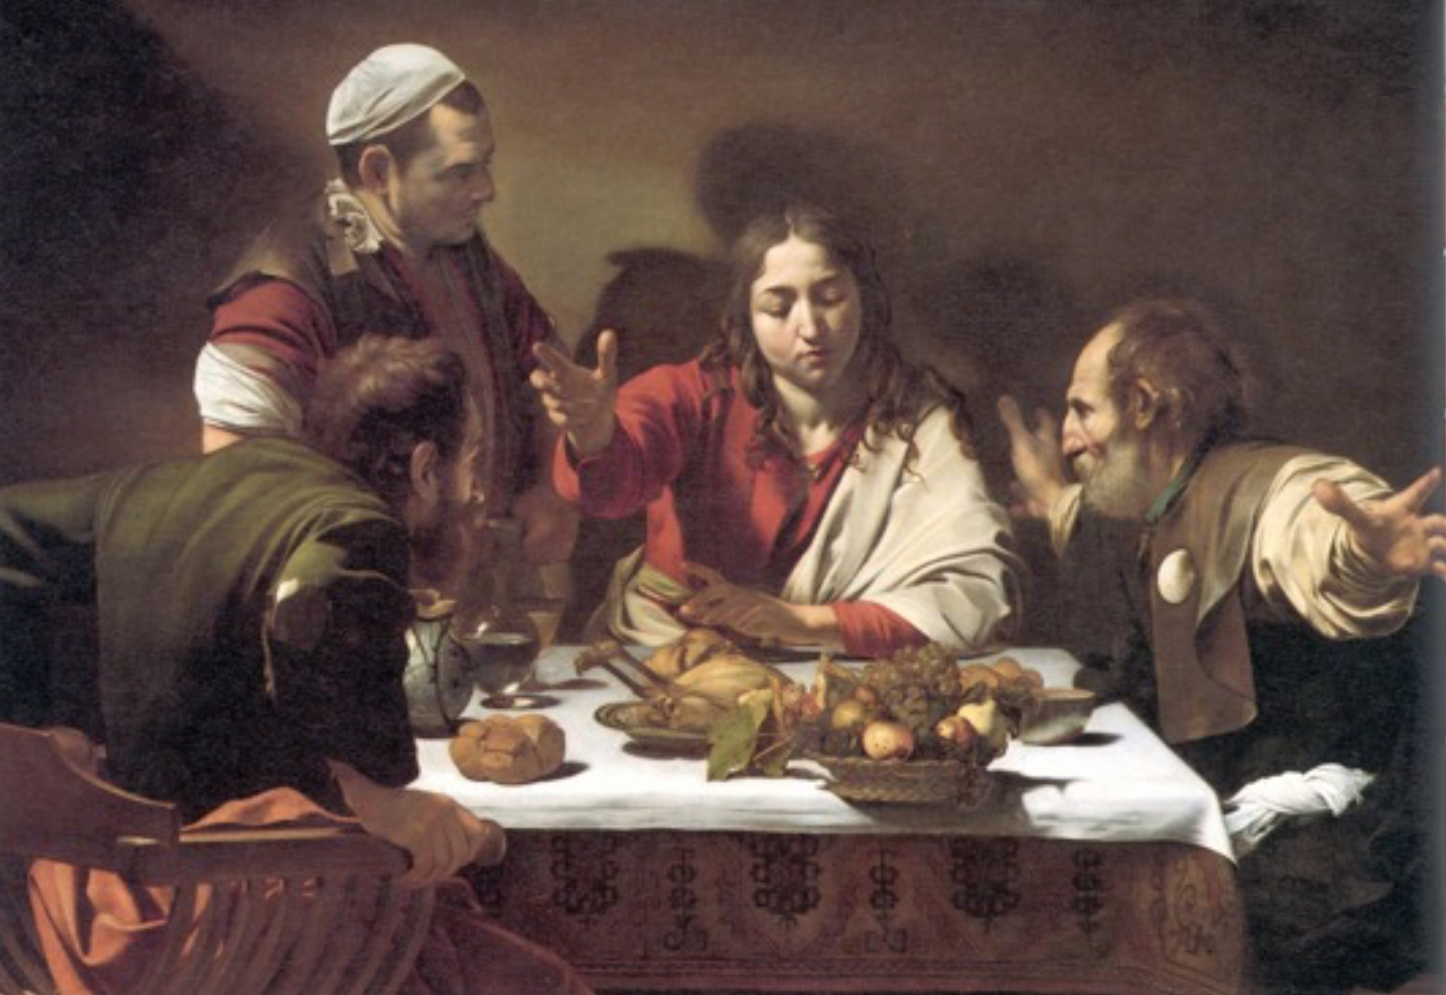
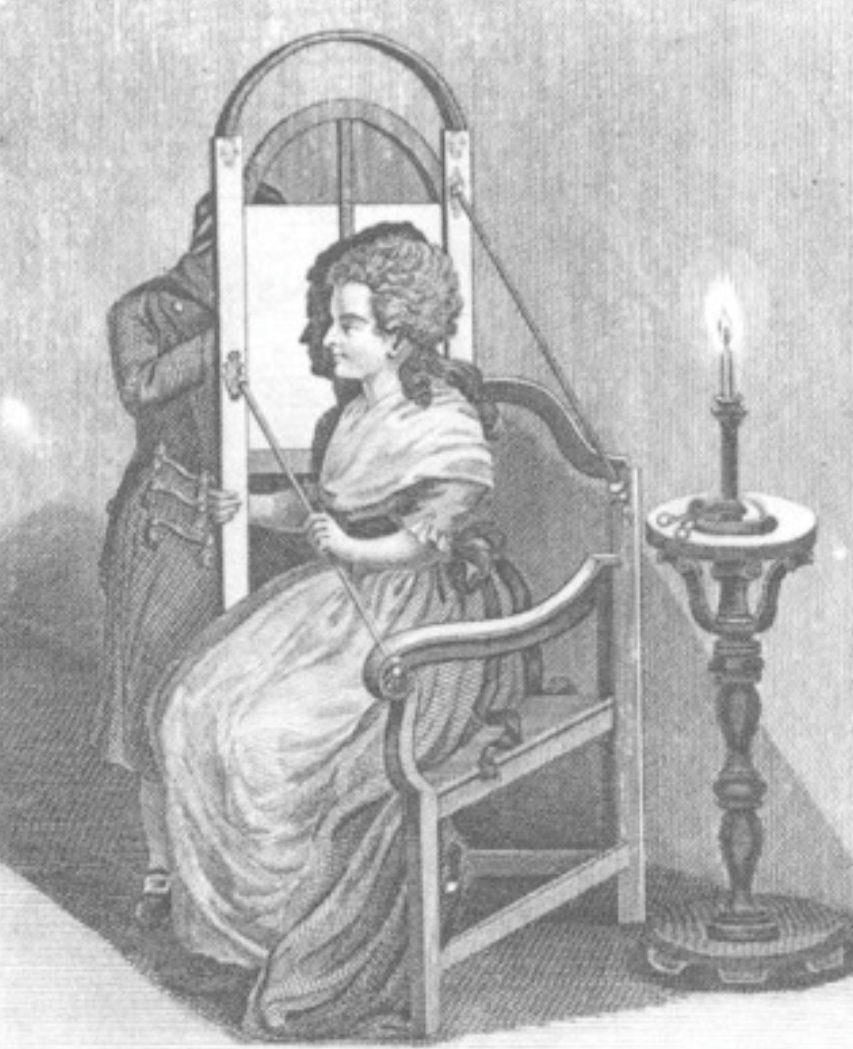
Shadows add realism to paintings and to scenes rendered with computer graphics. They were used as a tool in the early evolution of painting techniques.

Shadow Maps
One common approach to rendering shadows begins with the construction of a shadow map that captures the points on surfaces in the scene that would be "visible" from the light source. You can think of the shadow map as a z-buffer (depth buffer) as seen from the light.
Points that are not visible from the light source should appear in shadow from the perspective of the camera.
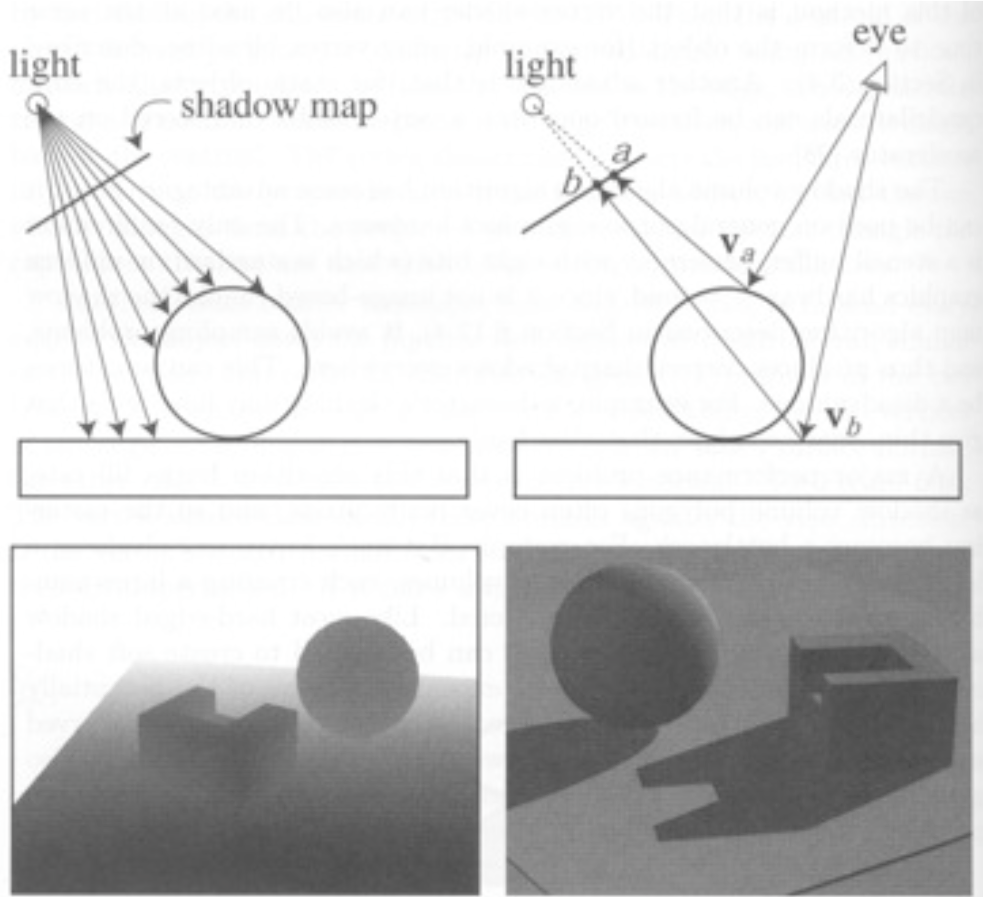
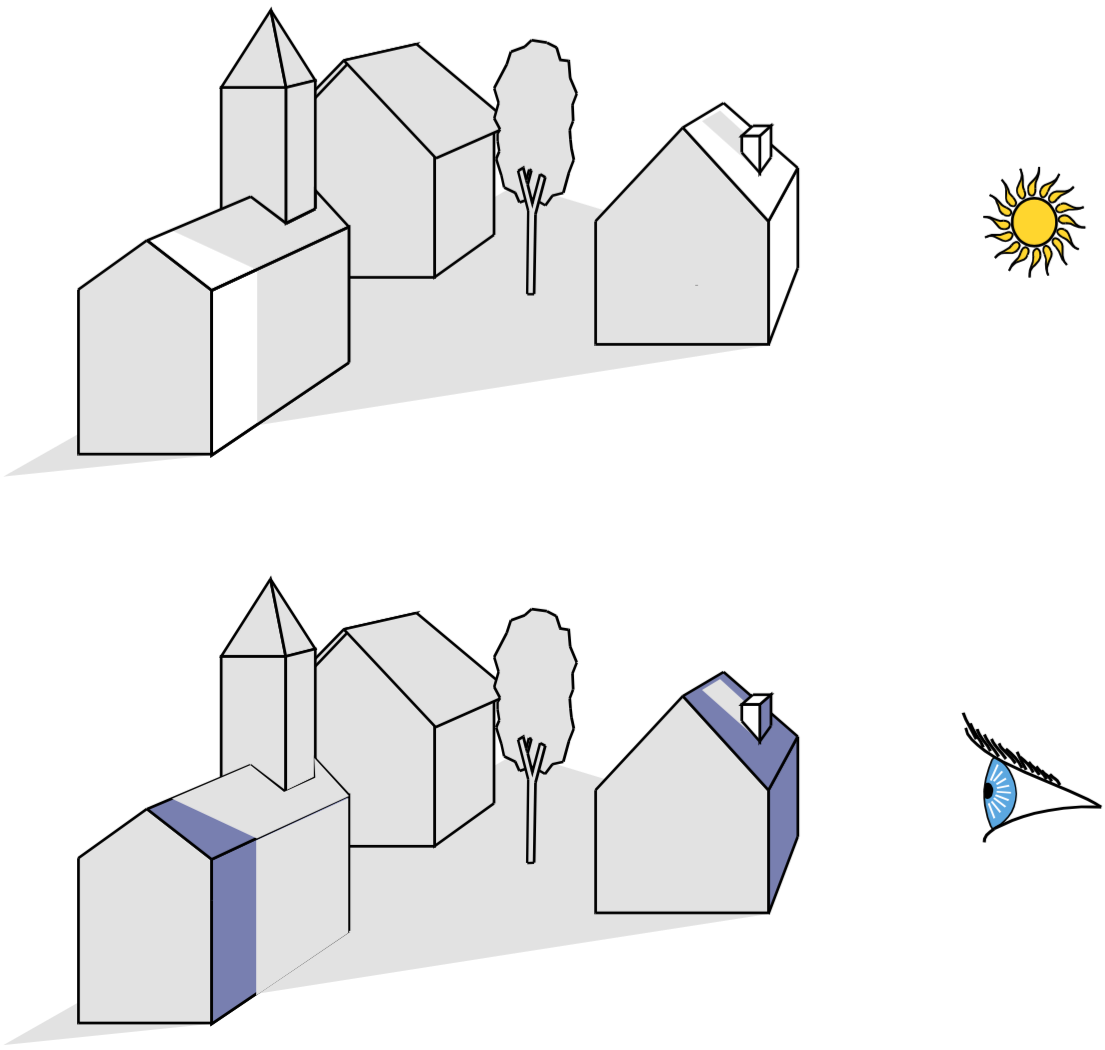
Some graphical scenes with shadow maps as seen from the light source:
Using a shadow map requires a lot of computation, as the renderer must make two passes through all of the objects to be rendered — one pass to compute the shadow map and a second pass to render the final image, checking the shadow map to see if points are in shadow.
Adding Shadows with Three.js
Adding shadows to a scene rendered in Three.js involves multiple steps:
- The renderer must have the shadow map enabled:
var renderer = new THREE.WebGLRenderer();
renderer.shadowMap.enabled = true;
- Each
THREE.Meshobject that can cast a shadow onto a background surface must have itscastShadowproperty set totrue(it appears that this property doesn't work for the parentTHREE.Object3Dclass), for example:var ball = new THREE.Mesh(new THREE.SphereGeometry(10), new THREE.MeshBasicMaterial({color: 0xffffff})); ball.castShadow = true; - Each
THREE.Meshobject that can have a shadow cast onto it must have itsreceiveShadowproperty set totrue(surfaces with Lambert and Phong material can receive shadows):var plane = new THREE.Mesh(new THREE.PlaneGeometry(100,100), new THREE.MeshPhongMaterial({color: 0xffffff})); plane.receiveShadow = true; - Finally, the light source also has a
castShadowproperty that must be set totrue. It appears that in our version of Three.js, onlyTHREE.PointLightandTHREE.SpotLightsources can cast shadows, and rendering is not done properly if there are multiple shadow-casting light sources.var light = new THREE.SpotLight(); light.position.set(10,20,50); light.castShadow = true;
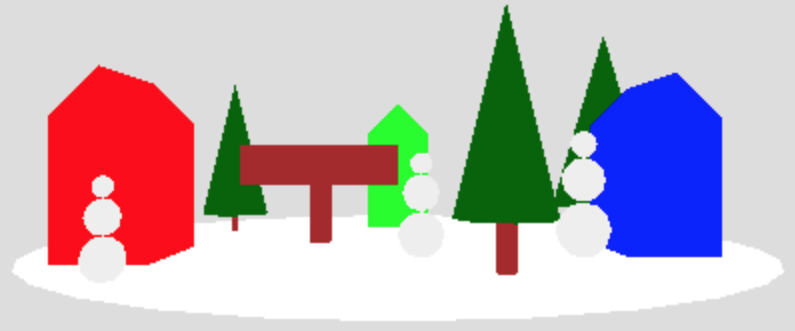
These ideas are incorporated into the following demonstration of our town scene with a sun in the sky that casts shadows on the scene:
town with sun and cast shadows
Exercise: Casting Shadows
"I thought the most beautiful thing in the world must be shadow, the million moving shapes and cul-de-sacs of shadow." — Sylvia Plath, The Bell Jar
Curiously, in Three.js, objects that are totally transparent (i.e. having an alpha value of 0) can cast shadows onto a background surface. This exercise exploits this observation.
Exercise: Mystery Objects Casting Shadows
The starting point for this exercise is this
shadows-start.html code
file that creates a scene with three square planes that meet at the origin of the scene.
Each side of each plane is 100 units long, and there is a single point light source in
the scene whose position is set to (0,10,150).
Your task is to add a (totally transparent) torus, box, cone, sphere, and cylinder to the scene that each cast shadows onto the background planes, producing a shadow pattern that looks like this:

Note the colors of the shadows, which capture the colors of the plane materials.
Tip: while you're developing the code, you may want to set the
opacity property of each new object material to 1 so that you can see the
object in the scene.
Here is a version of the solution with the objects revealed
Anti-Aliasing
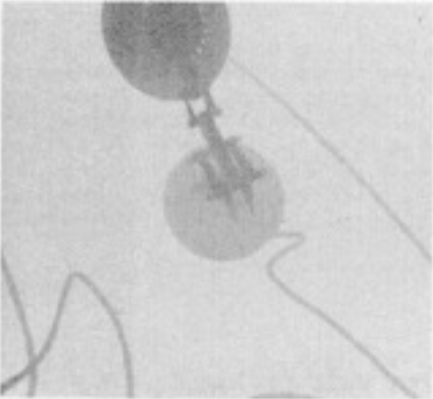
Aliasing is the technical term for jaggies
, caused by the imposition
of an arbitrary pixelation (rasterization) over a continuous real world. The following
are some examples of the effects of aliasing in graphics and photos, borrowed from Fredo
Durrant at MIT:
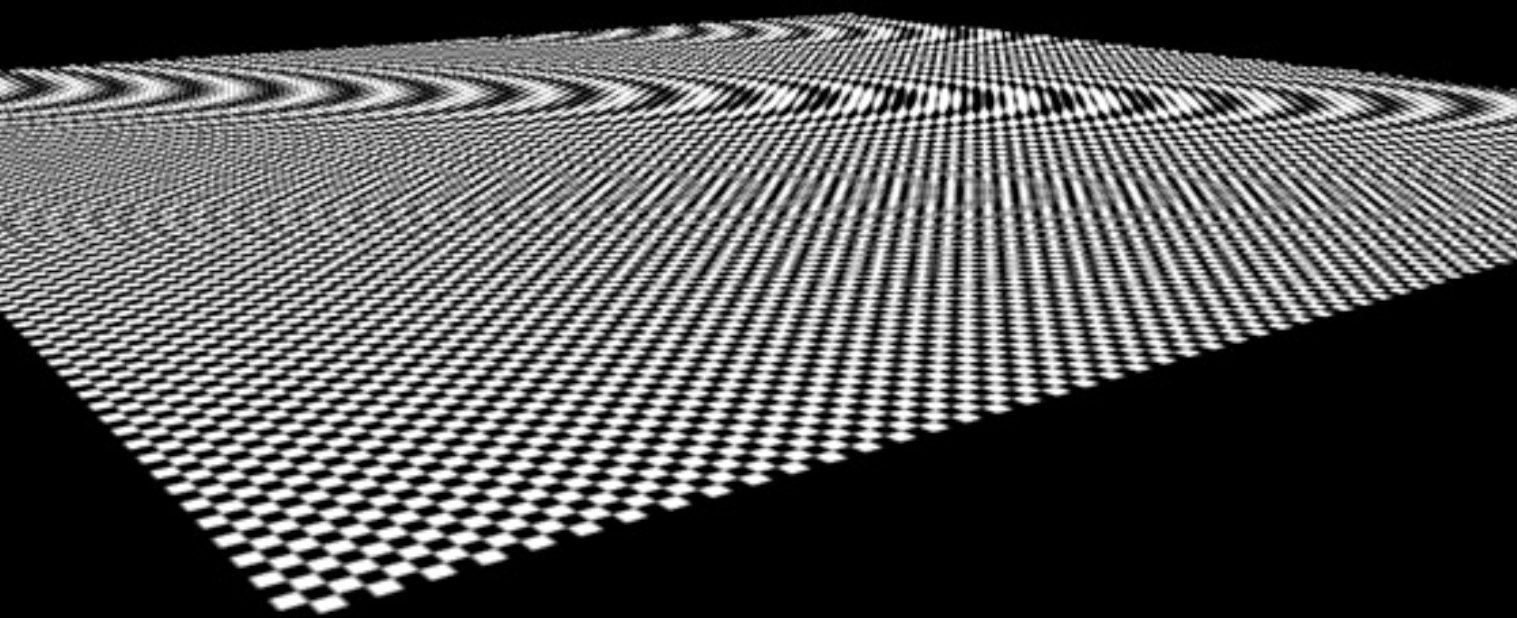
The process of reducing the negative effects of aliasing is referred to as anti-aliasing.
Suppose we draw a roughly 2-pixel thick blue line at about a 30 degree
angle to the horizontal:
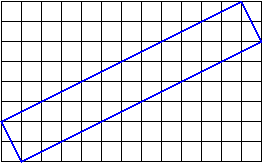
How do we assign colors to the pixels touched by the line?
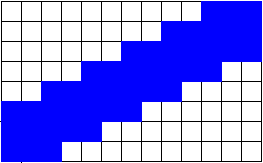
If we only color the pixels that are entirely covered by the
line, we get something like this:
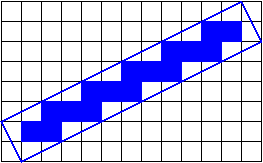
It doesn't get
better if we color the pixels that are covered by any part of
the line:
What we want is to color the pixels that are partially covered by the line with a mixture of the line color and the background color, proportional to the amount that the line covers the pixel.
One way to do this is called jittering
:
- The scene gets drawn multiple times with slight perturbations
(
jittering
), so that - Each pixel is a local average of the images that intersect it.
Generally speaking, you need to jitter by less than one pixel.
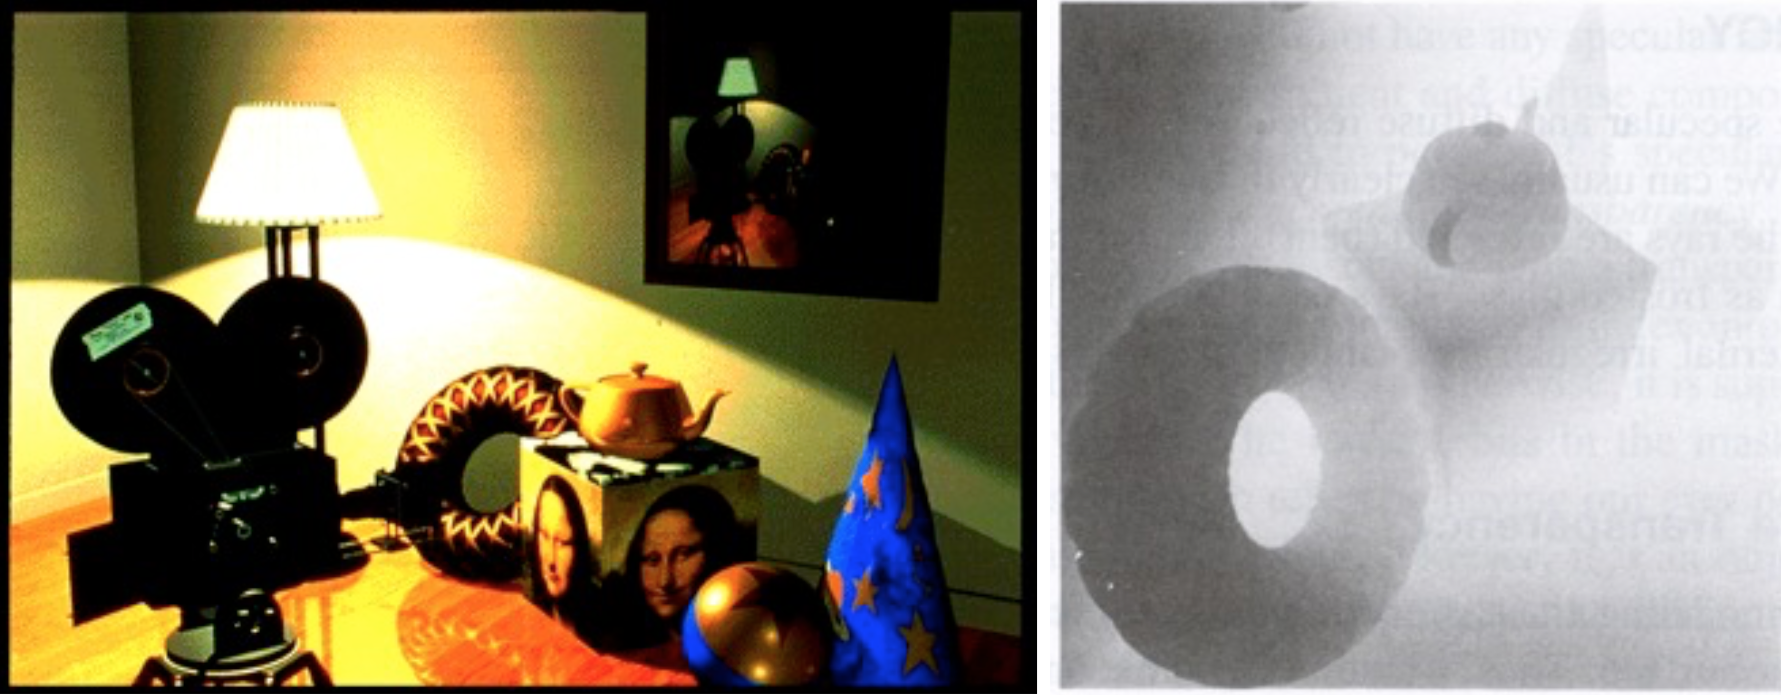
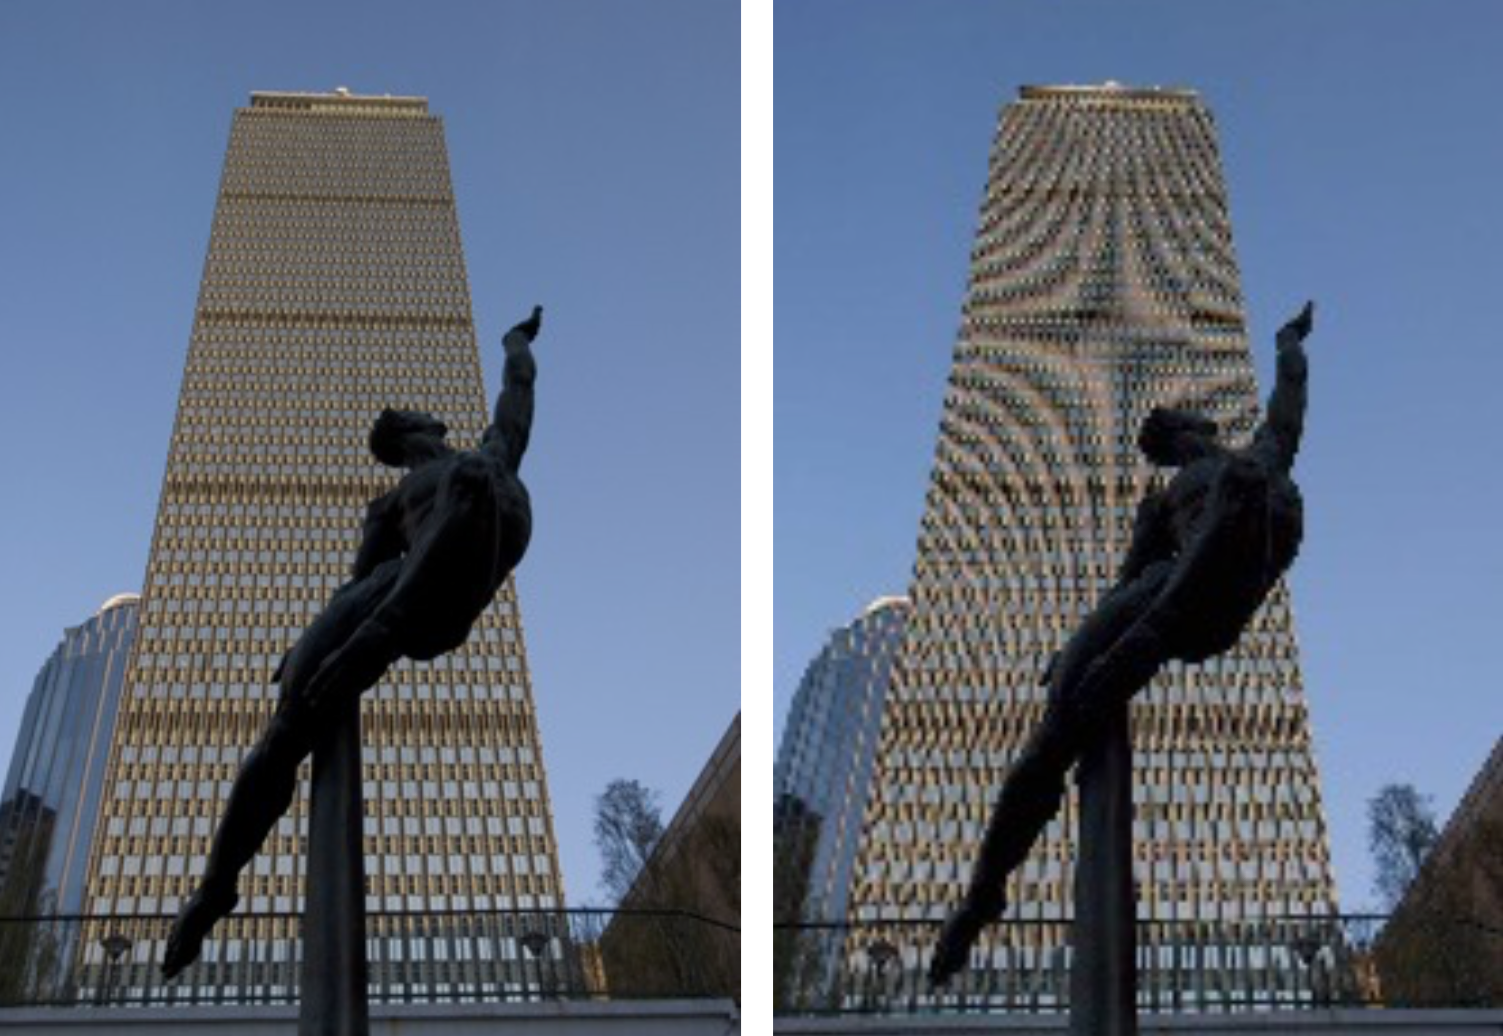
Here are two pictures — the one on the left lacks anti-aliasing and the
one on the right uses anti-aliasing:

One problem with anti-aliasing by jittering the objects is that, because of the mathematics of projection,
- objects that are too far (from the camera) jitter too little
- objects that are too close jitter too much
A better technique than jittering the objects is to jitter the camera, or
more precisely, to modify the frustum just a little so that the pixels
that images fall on are just slightly different. Again, we jitter by less
than one pixel:
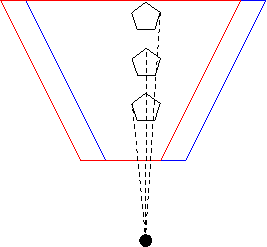
The red and blue cameras differ only by an adjustment to the location of the frustum. The center of projection (the big black dot) hasn't changed, so all the rays still project to that point. The projection rays intersect the two frustums at different pixel values, though, so by averaging these images, we can anti-alias these projections.
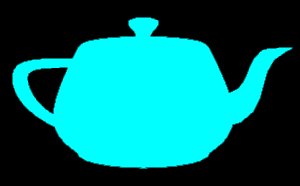
Here's a red teapot, with and without this kind of anti-aliasing, from
an earlier version of this course:
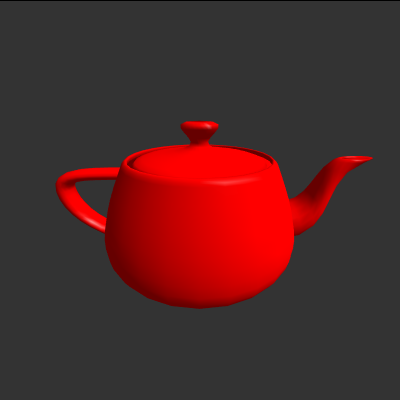
This better approach to anti-aliasing works regardless of how far the object is from the center of projection, unlike the object-jitter mentioned earlier.
Anti-Aliasing in Three.js
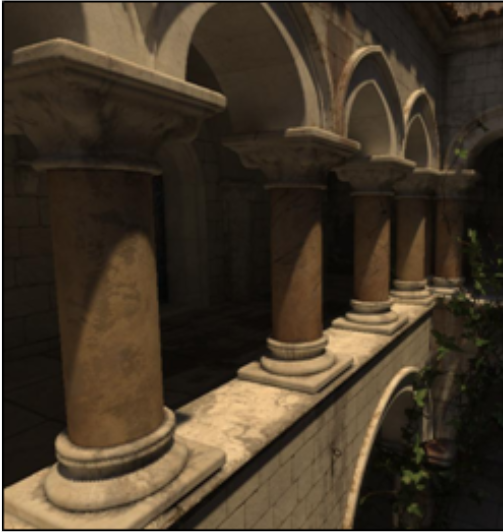
Modern graphics cards will do a kind of anti-aliasing for you, typically Multi-Sampling Anti-Aliasing. In Three.js, anti-aliasing is a feature of the renderer:
var renderer = new THREE.WebGLRenderer( {antialias: true} );
Compare our town scene with anti-aliasing to the earlier rendering without: