Project 0
In the first task of this project, you are asked to fill out a Google form so that the instructor can get to know you better. In the latter tasks, you will install Anaconda and become familiar with the software environment used in the course. You will also gain experience with the different Python libraries that you will use throughout the semester. Finally, you will install TensorFlow, a powerful deep learning framework that we will use this semester.
This project will not be graded and, other than submission of the Google form in the first task, there is nothing that you need to turn in.
Task 1: Getting Acquainted
Please fill out this Google form to help the instructor get to know you.
Task 2: Anaconda Installation
We're using Python (specifically, Python3) in this course because
- It facilitates rapid prototyping of programs while still being a robust widely-used language
- There are several libraries and functionalities well-suited to deep learning
For running our Python code, we will use Anaconda, which is freely available. To install Anaconda on your computer, go to the Anaconda download page (you can skip registration if you like) and download and install Anaconda for your computer (Windows/MacOS/Linux). Once Anaconda is installed, you should start it up. If you are given a choice of which version of Python to install, choose version 3.10.*
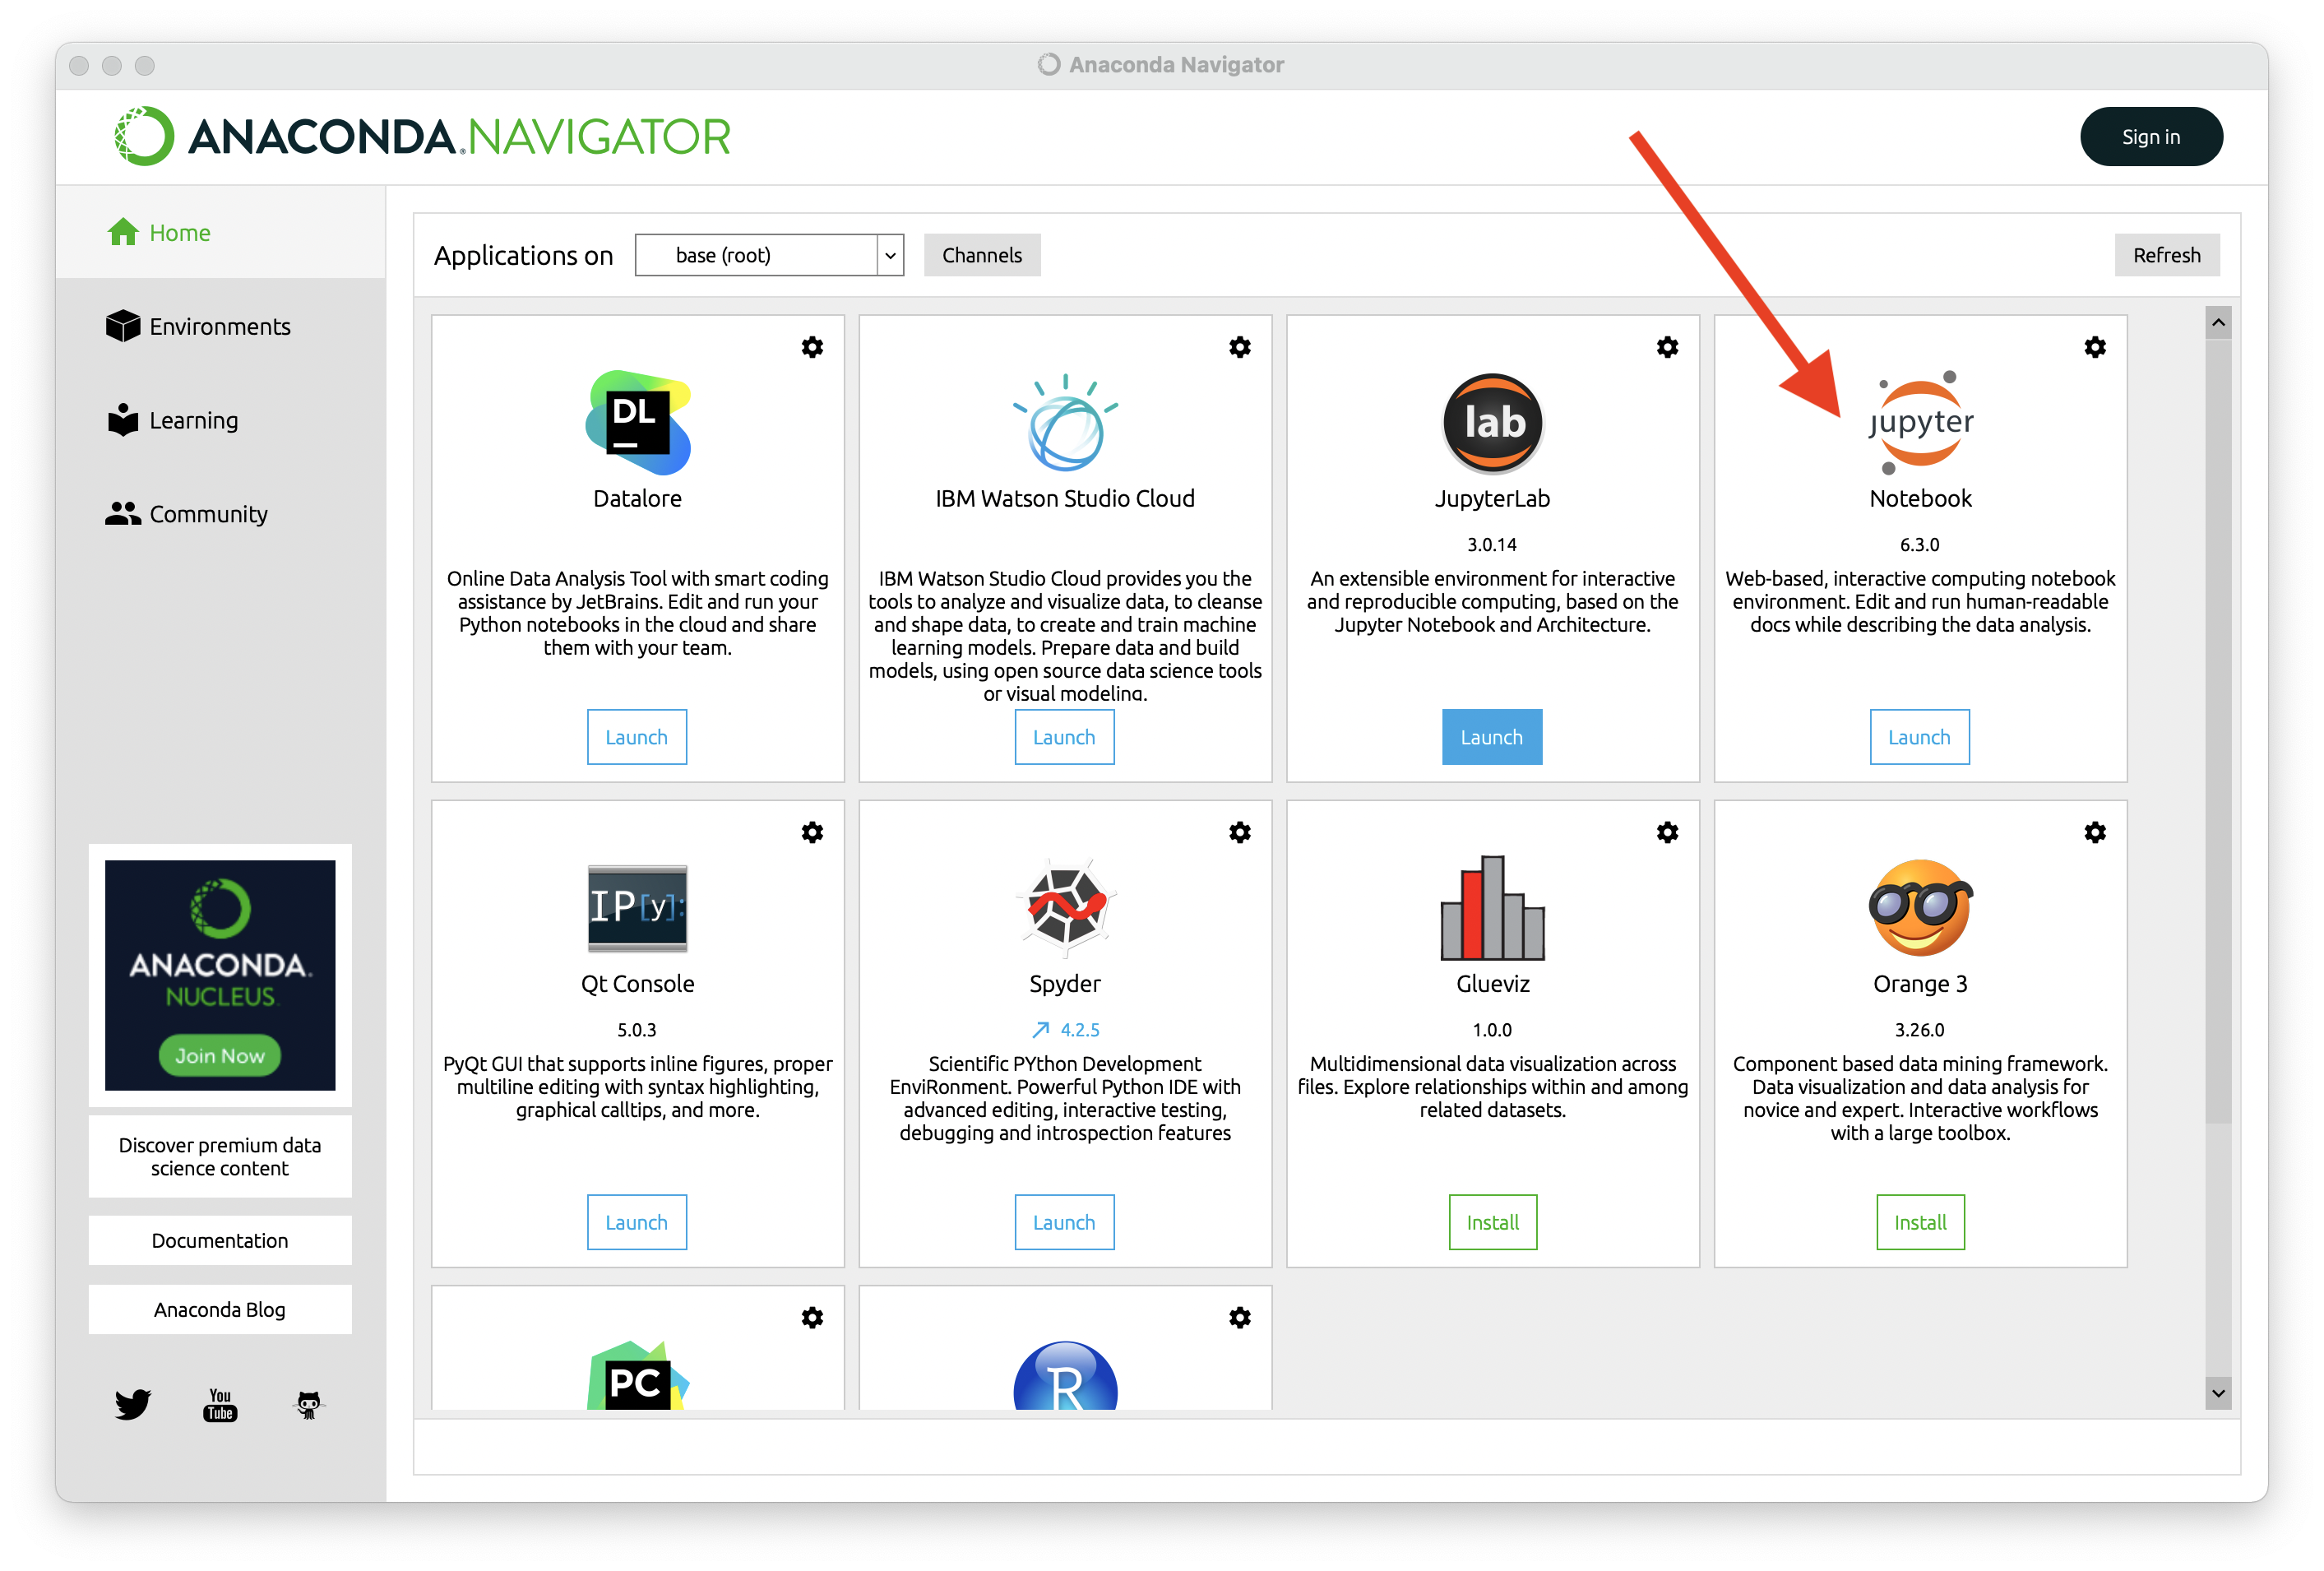
Anaconda Navigator should look something like the image above, and for this
class, the only tool that we will use is Jupyter Notebook (indicated with an
arrow in the image above). We will use Jupyter Notebooks to develop our code throughout the course. Notebooks are useful because they allow code and commentary to be interleaved. When you launch Jupyter Notebook, it should open up
a terminal window that displays diagnostic information in text, and it should
also automatically open a tab in your main browser. In this browser tab, you can open .ipynb files to display notebooks in your browser. When you download a notebook from the course website, you can edit, run, and save it in your browser.
Task 3: Python and NumPy Tutorial
Download the Project 0 Notebook from the course website. You can open the Jupyter Notebook in your browser either by double-clicking on the .ipynb file or by starting up Anaconda as described above and opening the .ipynb file from the appropriate browser tab. This task involves working through the Notebook tutorial. The tutorial provides a refresher on Python programming as well as an introduction to some of the libraries that we will use throughout the course, such as numpy and matplotlib. There is nothing to turn in here, but you should go through the tutorial to make sure you are comfortable coding in Python with the relevant libraries.
Task 4: Installing TensorFlow
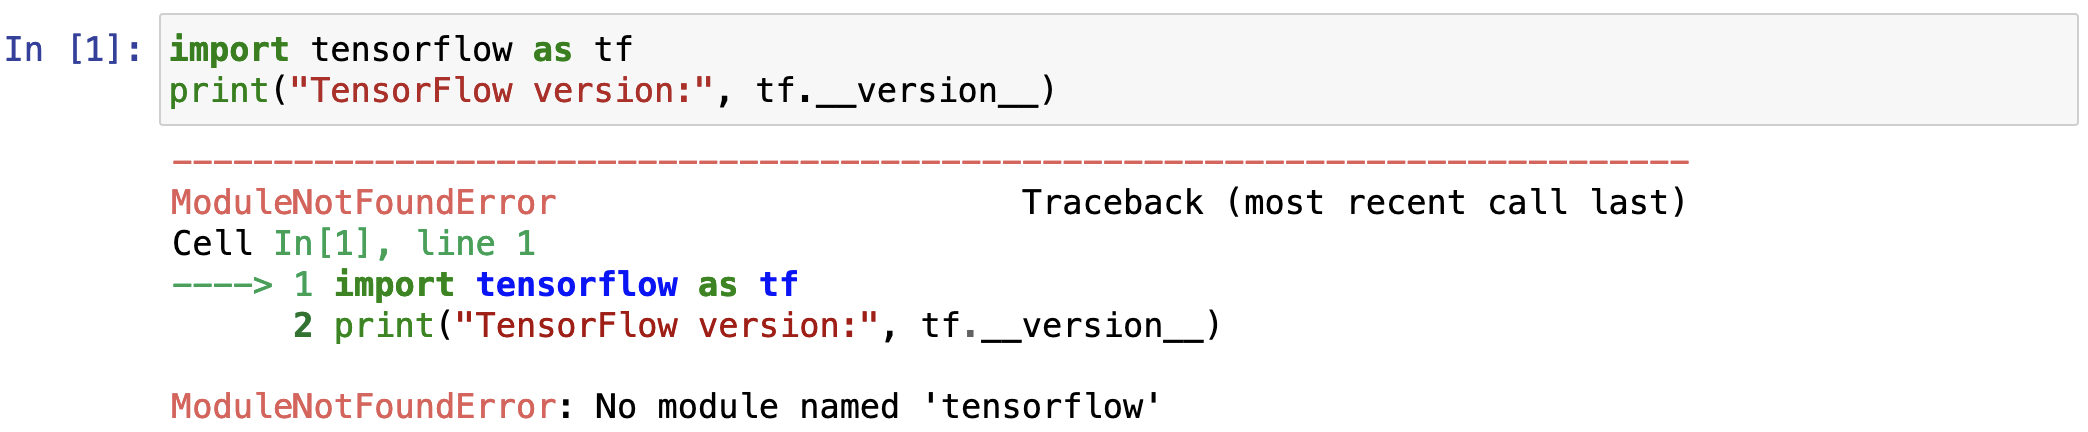
A few weeks into the course, we will start using TensorFlow, which may or may not already be installed with your version of Anaconda :). Let's check to see if you already have TensorFlow installed. Download the Check TensorFlow Notebook. Open up the .ipynb file and execute the code. If the code results in the version of TensorFlow being printed out, as in the image below (you can ignore the warning in pink), then you have TensorFlow installed.

If you have TensorFlow installed, see what version is printed out. We want version 2.12.* as in the image above. If you have version 2.12.* (congratulations!), you can stop here. If you have a different version of TensorFlow, then you should uninstall this version and proceed with the instructions below for installing the correct version of TensorFlow. If you do not have TensorFlow installed, you should see an error message indicating that there is no module named 'tensorflow' as in the image below, and you should proceed with the instructions below to install TensorFlow.
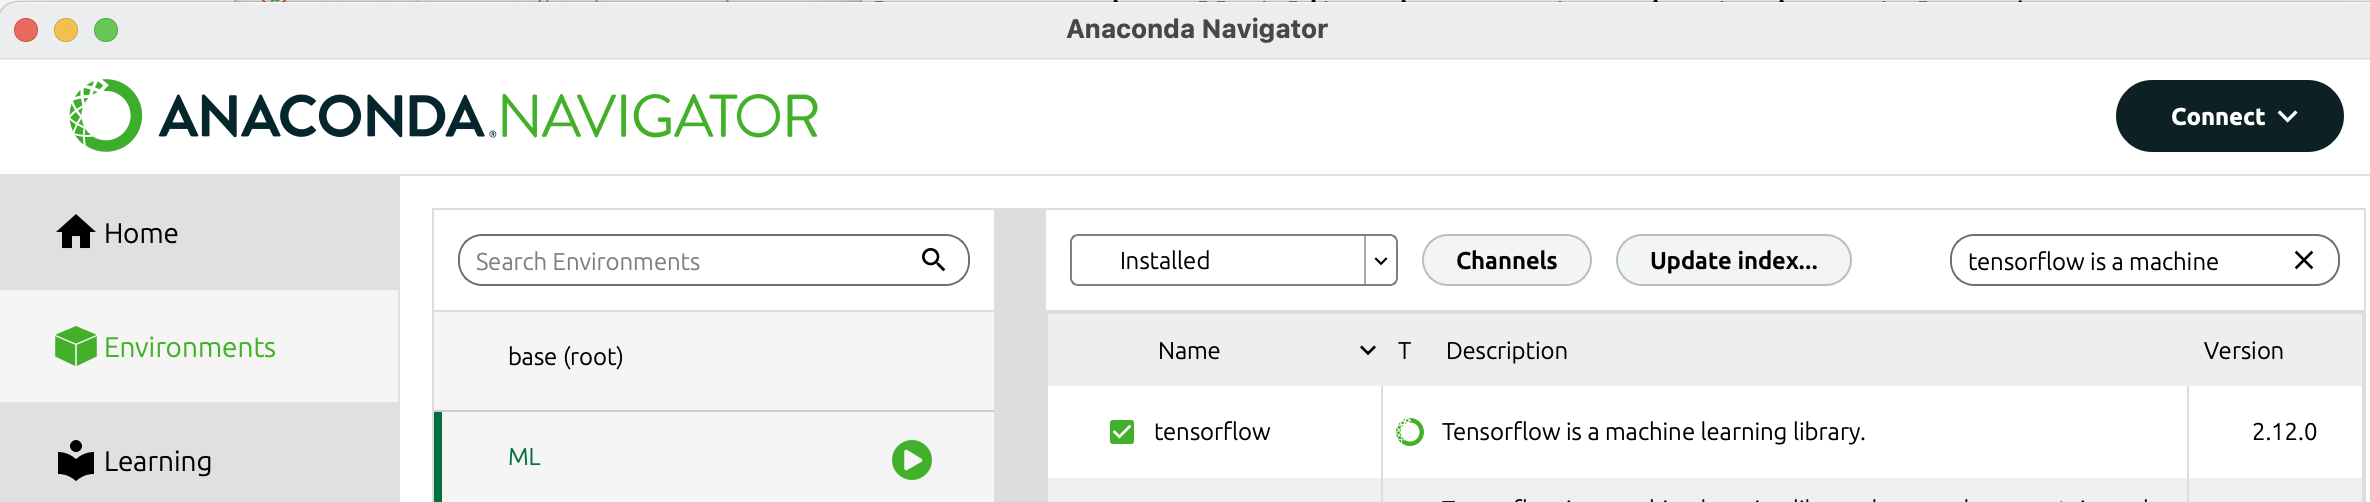
To install TensorFlow in your base environment, open the Anaconda-Navigator application on your computer, go to your "base" environment, and search for "tensorflow" among uninstalled libraries, as shown in the image below.
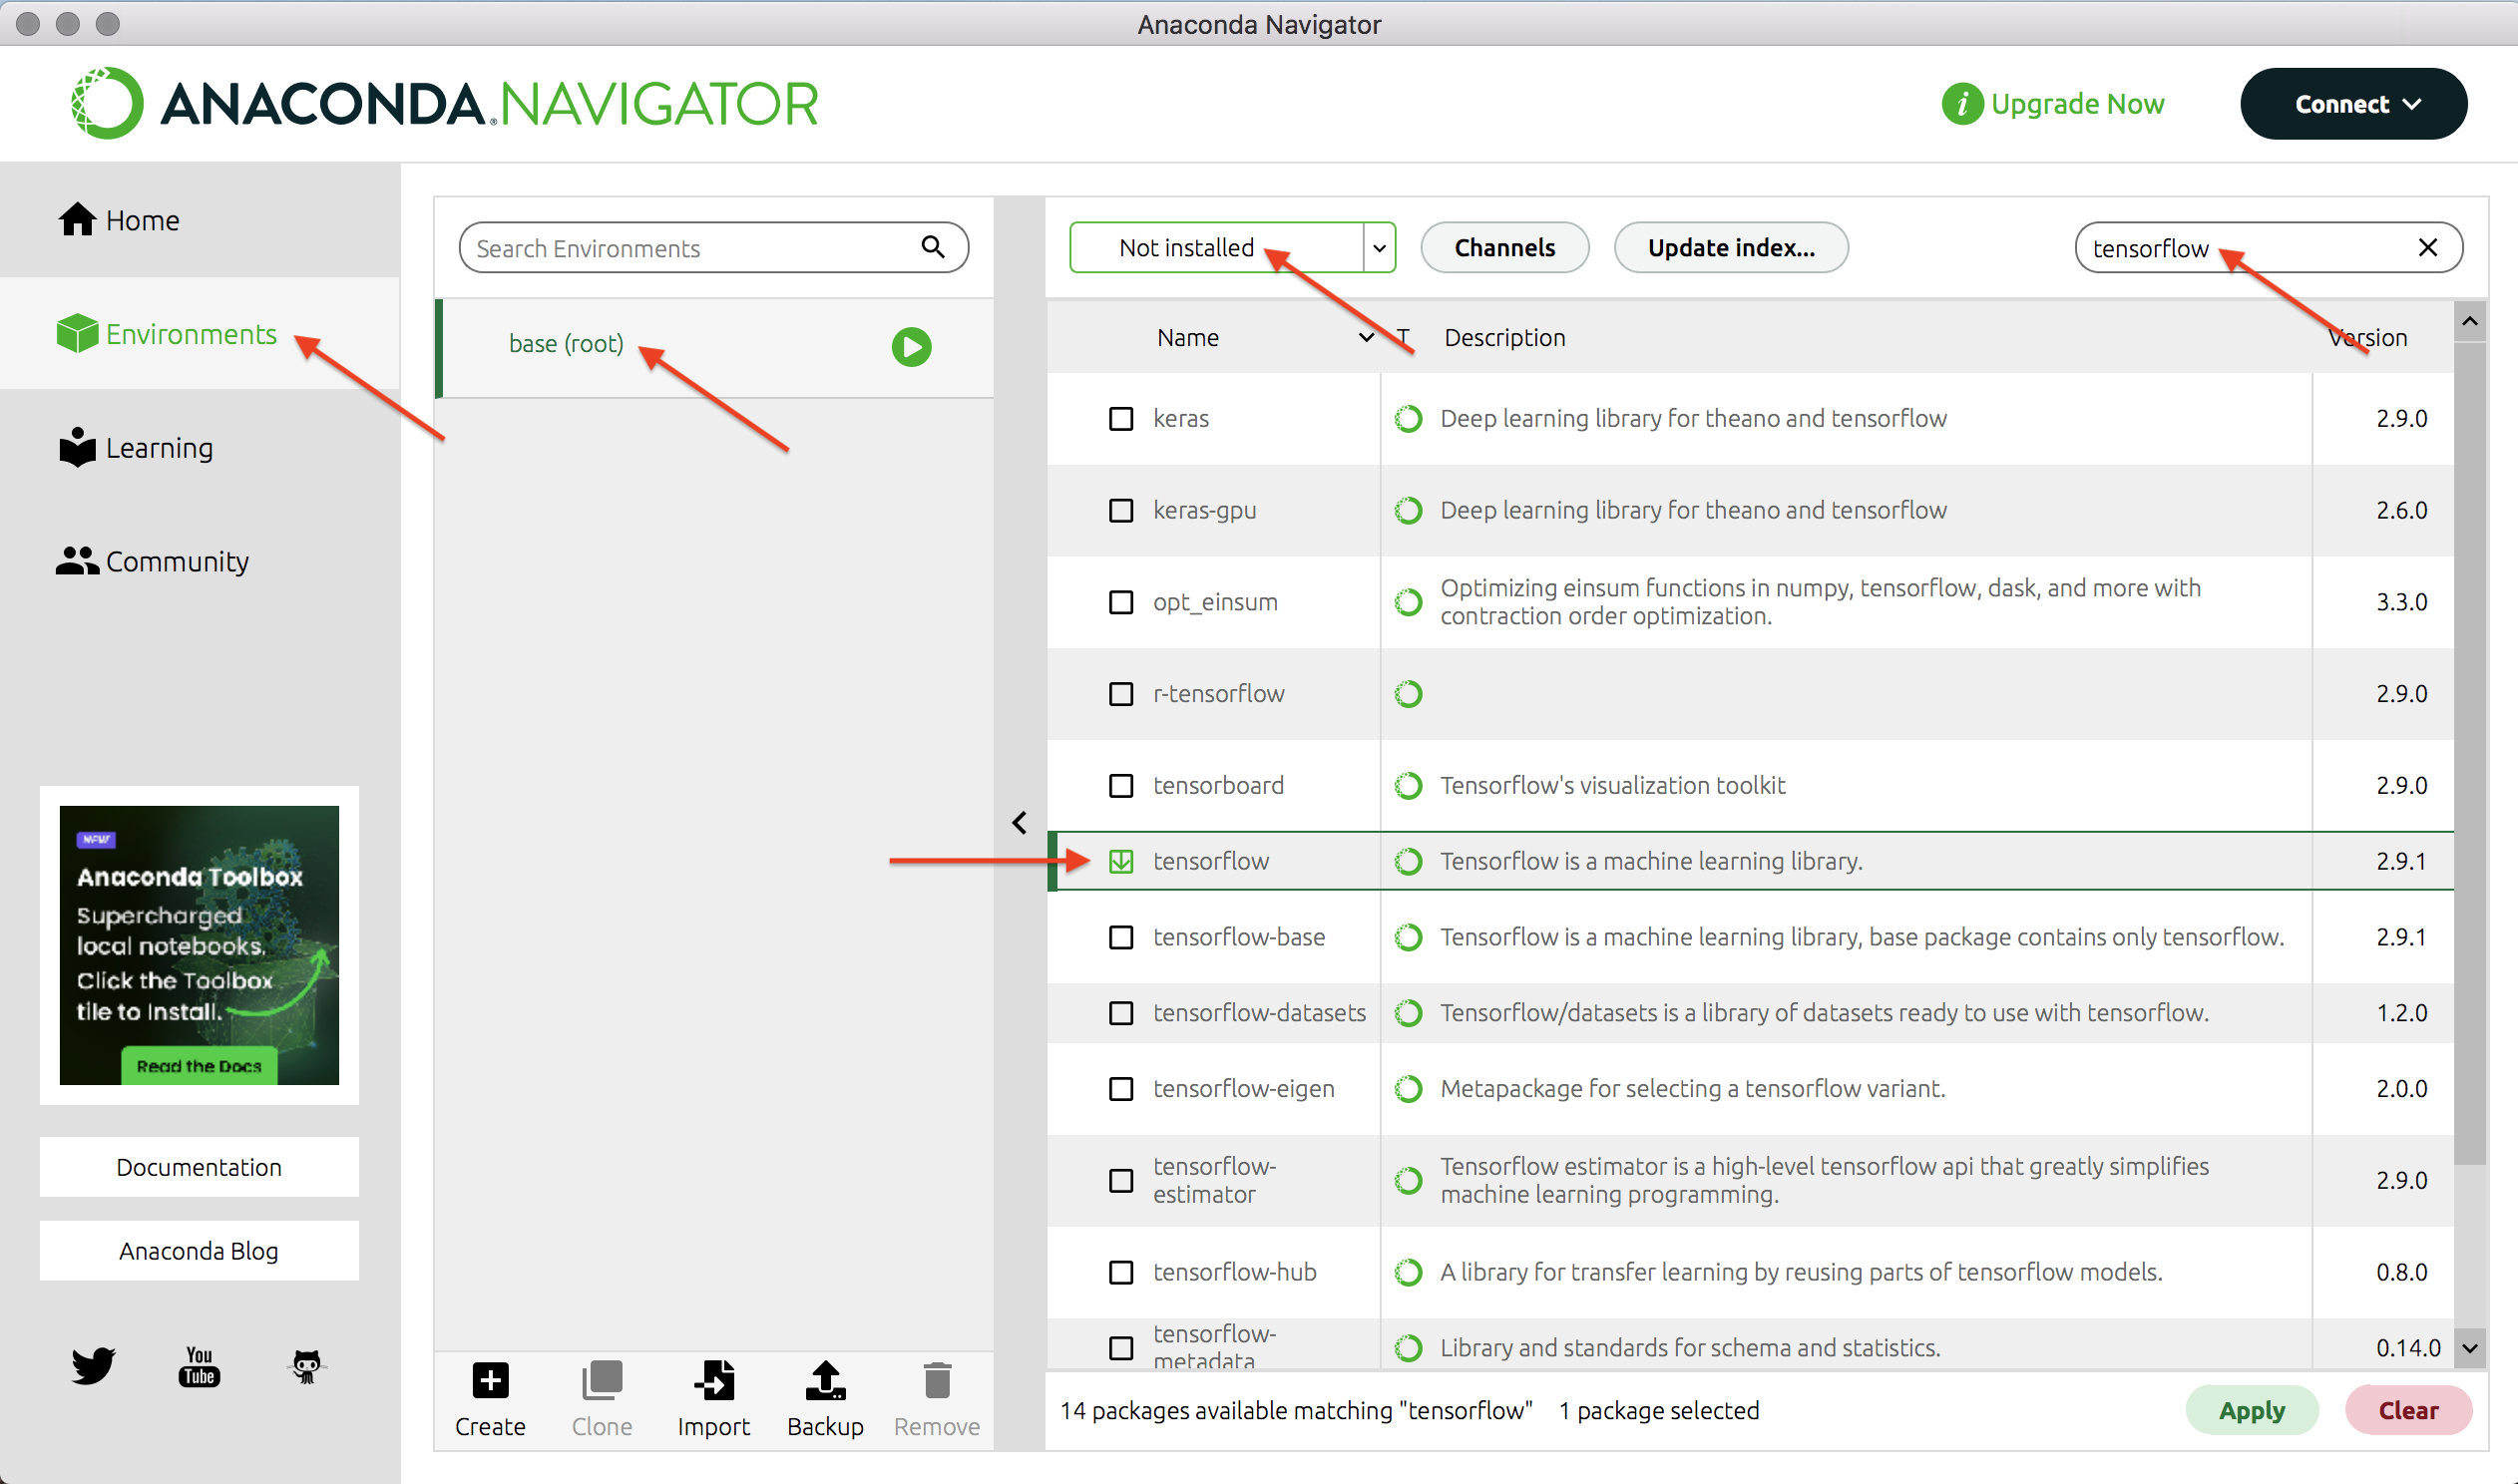
By default, Anaconda likely will not install the correct version of TensorFlow, e.g., in the image above it will install version 2.9.1. To install the correct version for this course, version 2.12.*, right click on the box next to tensorflow and select version 2.12.* as shown in the image below.

Once you have selected the correct version of tensorflow, click the Apply button in the lower right corner to install it.
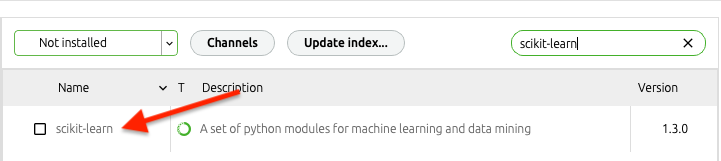
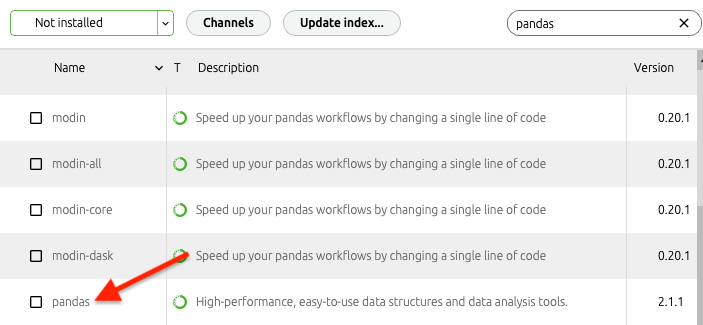
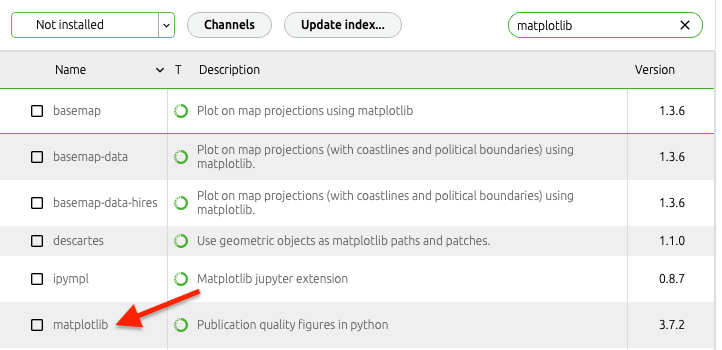
Similarly, if not already installed, you should install scikit-learn, pandas, and matplotlib.
To confirm that TensorFlow is installed, execute the Check TensorFlow Notebook and ensure that the correct version of TensorFlow is printed out. If TensorFlow is installed (congratulations!), then you can stop here.
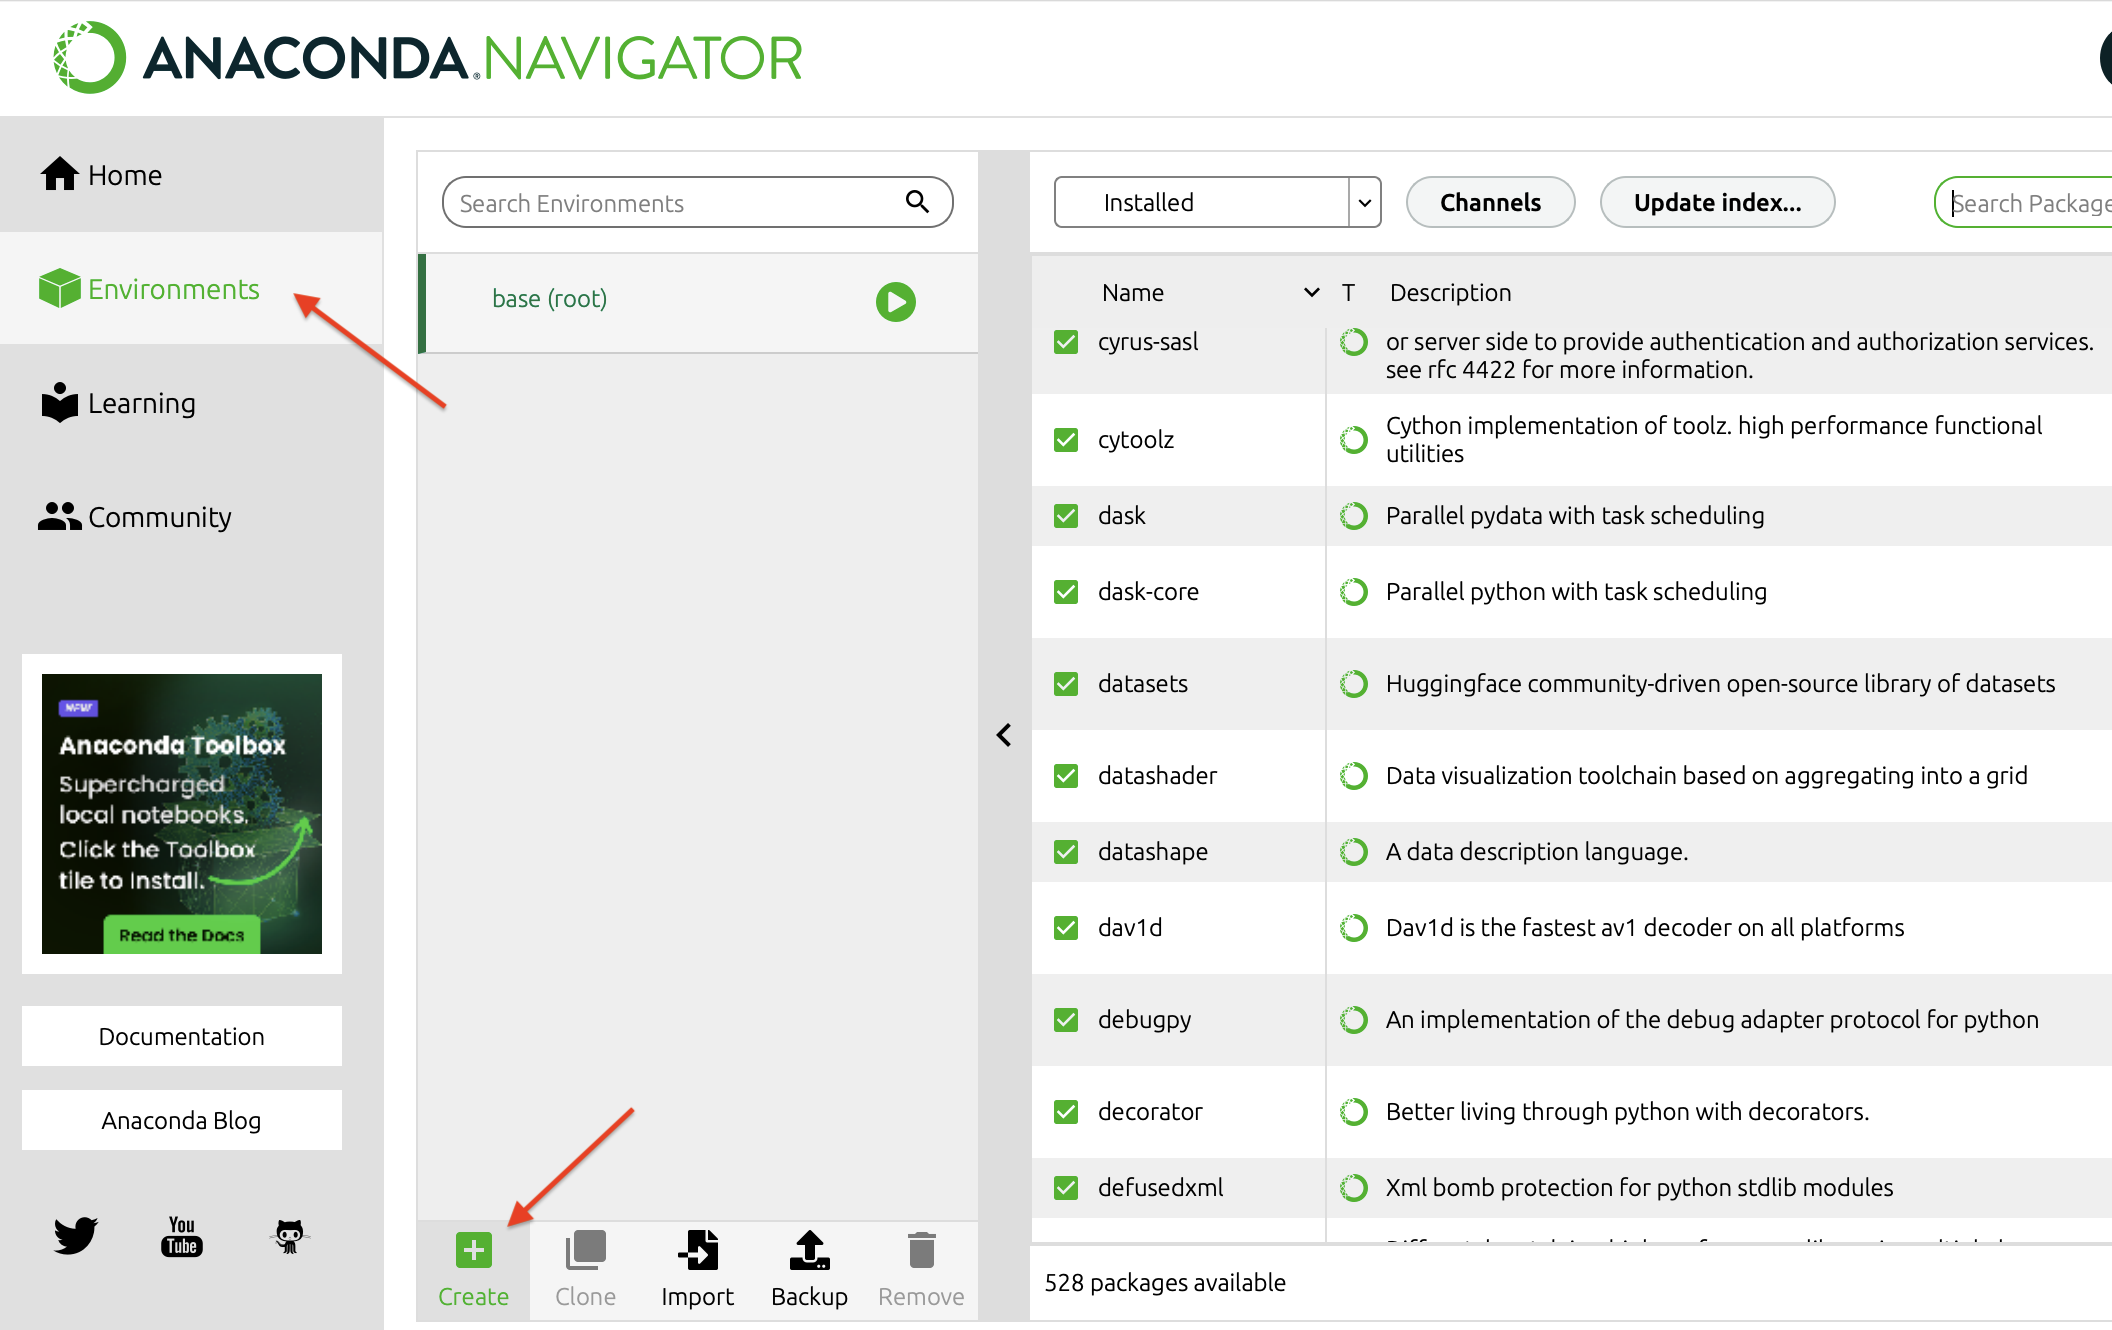
If TensorFlow didn't install correctly for some reason, then you should consult the error message that you received during the installation process. One common cause for errors is that the version of TensorFlow that you are installing is incompatible with the version of Python that you are using in your base environment. If this is the case, one solution is to create a new environment with a different version of Python. You can create a new environment as shown in the image below by opening the Anaconda-Navigator application on your computer, going to the "Environments" menu item, and selecting "Create".
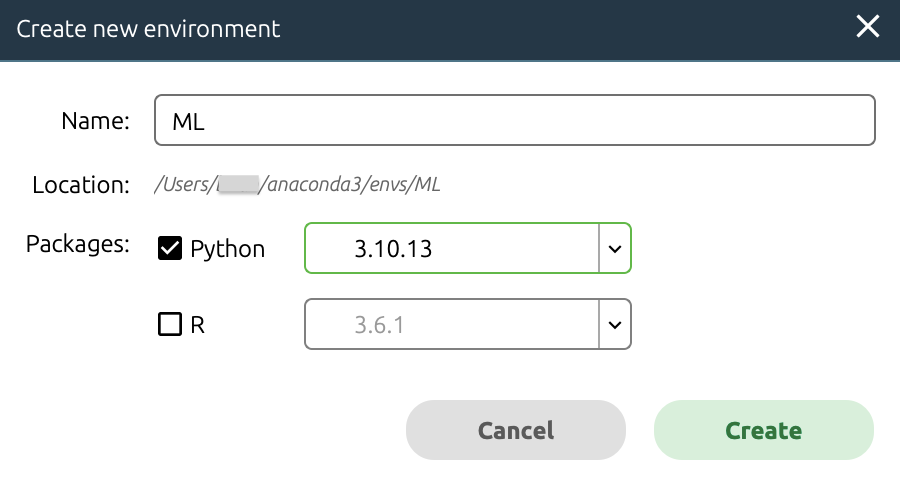
You should be prompted to name your environment and select your version of Python. As shown in the image below, we opted to name our environment "ML" and we use Python version 3.10.13.
In this new "ML" environment, assuming you selected an appropriate version of Python :), you should follow the steps described above to install TensorFlow, scikit-learn, pandas, and matplotlib.
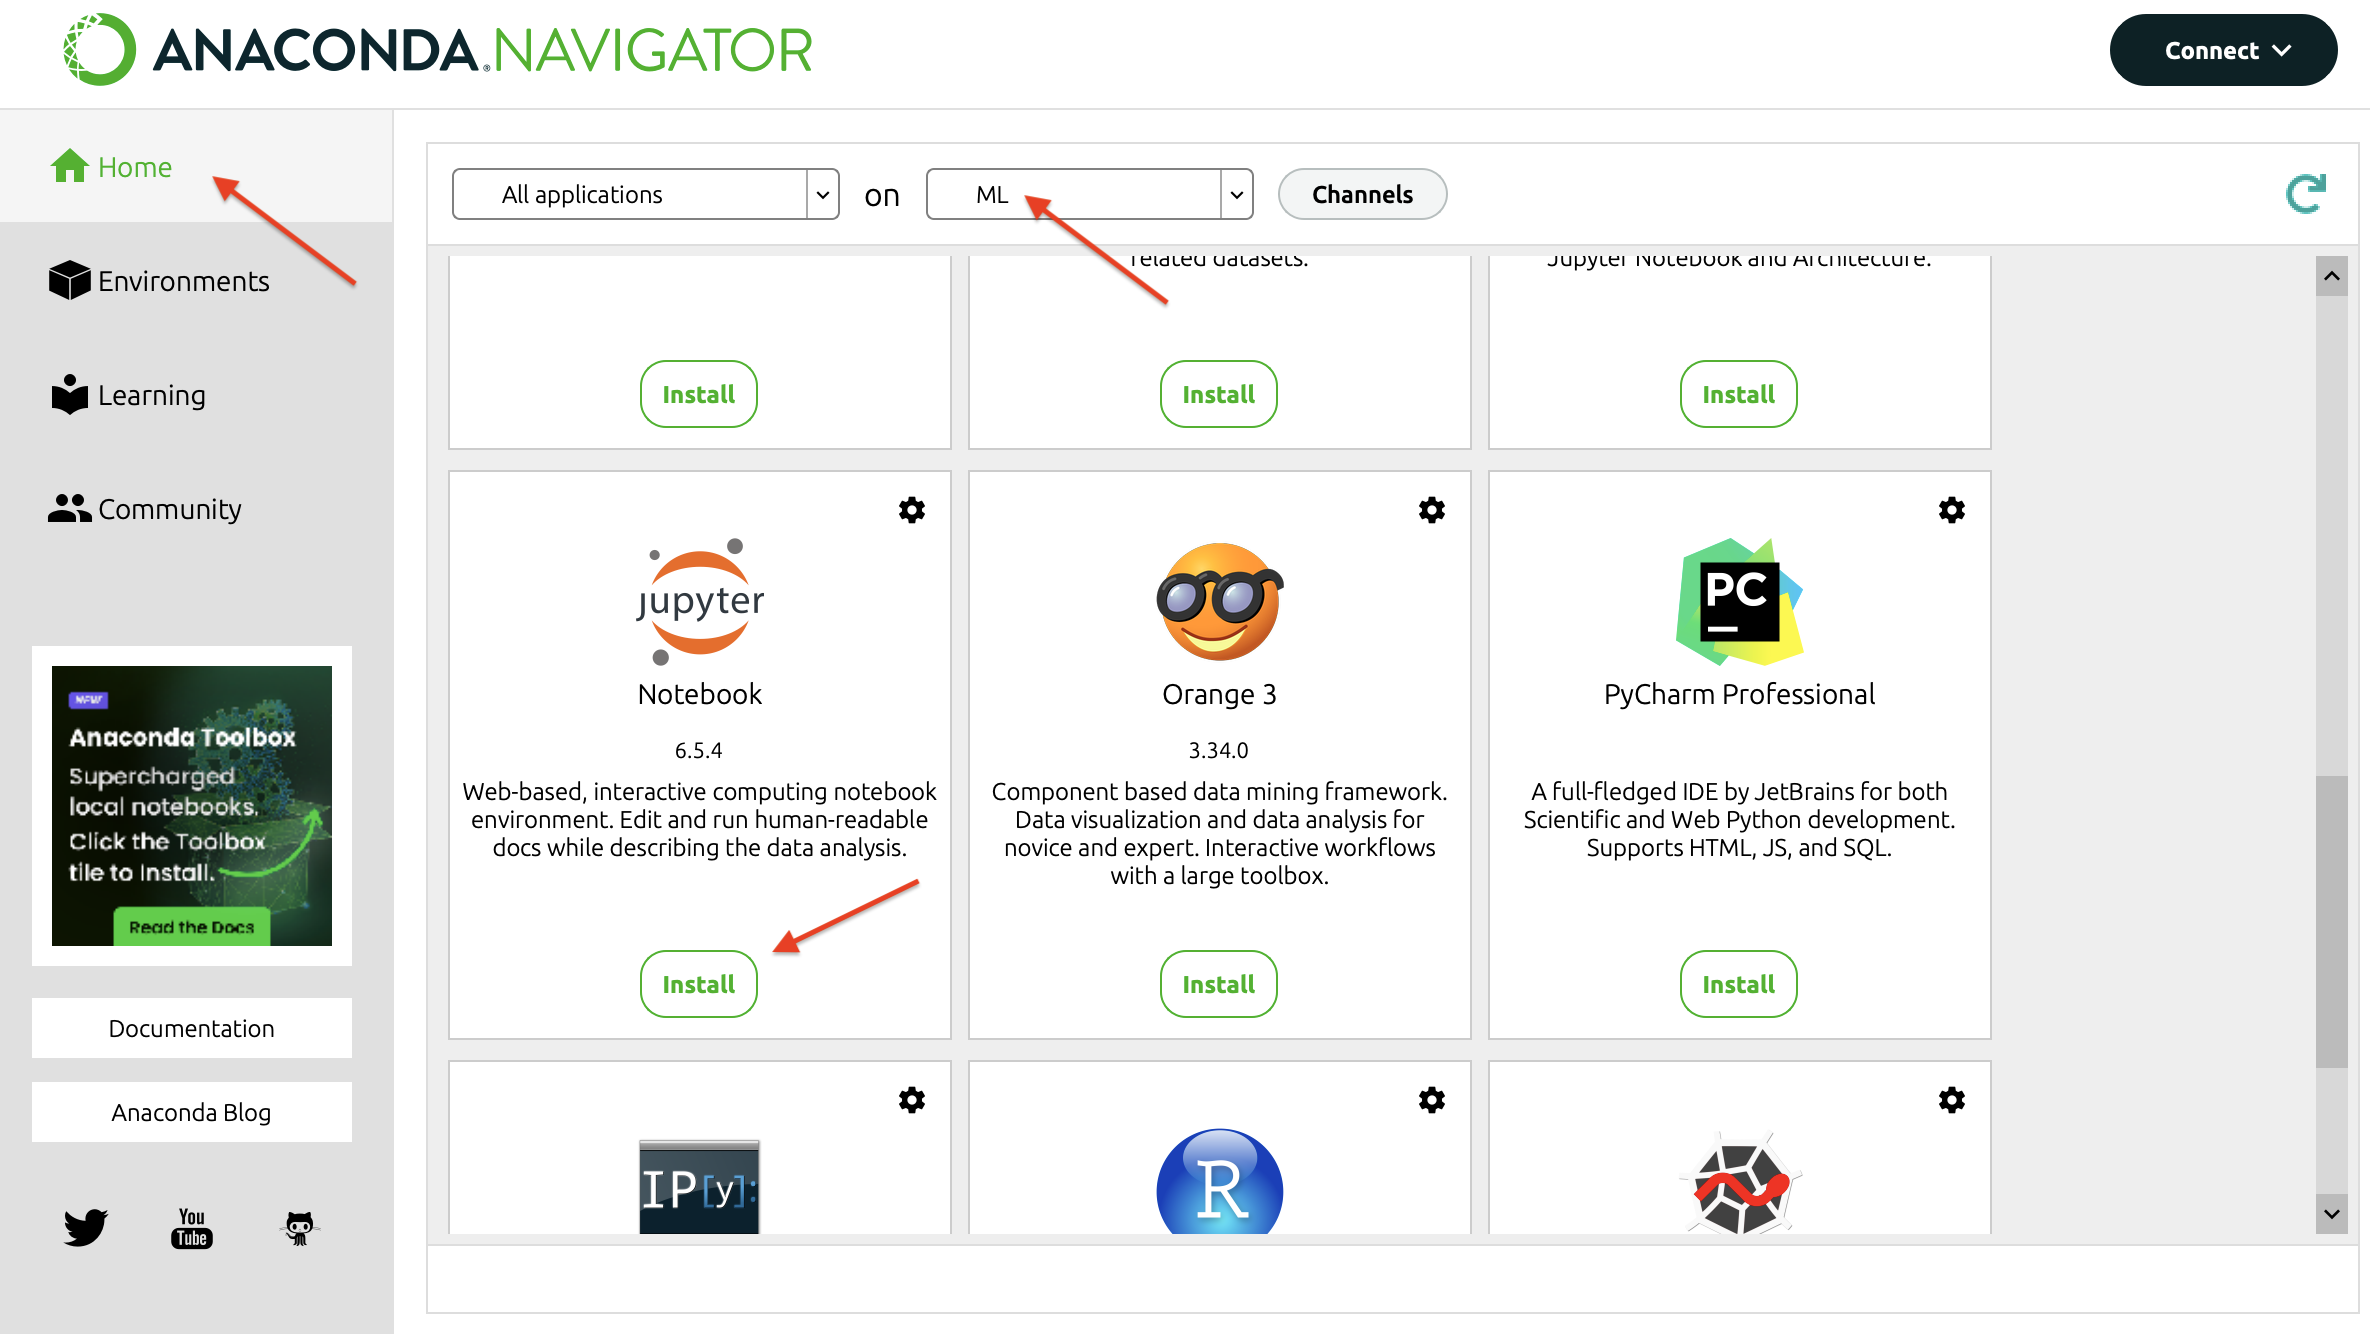
Once the libraries are successfully installed, go to the "Home" menu as shown in the image below, make sure your new environment "ML" is selected and "Install" and then "Launch" the Jupyter Notebook app.
To confirm that TensorFlow is installed, execute the Check TensorFlow Notebook and ensure that the correct version of TensorFlow is printed out. Congratulations, TensorFlow should be installed successfully on your machine. We will start using it a few weeks into the course.