Working with the Google Calendar API
OAuth - Open Authorization
If we want our apps to be able to access a user's personal data and also perform operations on their behalf (add entries to their calendar), we need to have the user's authorization and the third-party service (in our case Google) has to know that the user has given us permission to do this. This whole process is specified by the OAuth standard, a fairly complex process of exchanging credentials among the three involved parties. If you are interested, here is a plain English explanation at a very high-level, without looking at the details.
We have been already using OAuth, without knowing it, when we developed AM2 in Facebook.
You might remember that before logging in the user the first time, Facebook showed a dialog pox
to request our permission for the app to access our data. What happens behind the scences is that
once we give such permission, everytime we log in to the page, Facebook issues an oauthToken,
which then is attached to every API calls our app performs. We can see these two aspects in the console/
Network tab, as the two screenshots below indicate:


FB.api("/me", ...) request,
we can see in the Network tab of the console that the oauthToken is attached to the
URL of the HTTP request.Similar to this process we saw in AM2, we will have to do the same for AM4 with Google Calendar.
Get a Client ID
There are a few steps that we need to perform in the developer console that you have used either for Google Books or Google Maps.
- Create a new project with an appropriate title, such as "Chosing Wellesley Courses", or "Course Planner", etc.
- Go to the APIs section and turn "on" the Calendar API, which we need for this AM.
- Go to the "Credentials" section and click on "Create new Client ID", where you choose "Web Application".
- You'll be directed to a form to enter your email address and a meaningful name for your project.
- You'll be asked to enter the Javascript origins, enter
http://cs.wellesley.eduand leave empty the redirect URIs field. - In the Credentials tab, also click on "Create new Key", we'll need both of them.
- Keep this tab open, because you'll need to copy your client ID and api key in your Javascript file.
This part was similar when we registered our Facebook app in AM2.
Differently from Facebook though, Google doesn't provide us right away with the code that we can enter in our app, because Google has many APIs for different products.
Setting up the Javascript code
There is confusing information about Google APIs, given that they work with different libraries. We are interested in the Javascript API, thus, our entry point will be this:
Google APIs Client Library for JavaScript (Beta). This documentation has an overview of the steps our application has to go in order to receive the authorization. There is also an example for using the Google+ API.
I have modified the given example to work with the Google Calendar API. Here are the steps:
- In your HTML file, you'll have a
<script>tag to load the Javascript API: - We will also need at least one "hidden" button in the HTML, to be activated whenever the user is not logged in on Google.
- In the Javascript file, we need some global variables to store the keys we generated when registering the app.
- We also need four Javascript function that are called in different phases of the authentication process. See the code for these functions below:
<script src="https://apis.google.com/js/client.js?onload=handleClientLoad"></script>Notice that when the library is loaded, it will invoke the function
handleClientLoad.
/* PART 1 - Authorization and login.

// Global variables, the values come from the Developer Console
// Put your OWN clientID and apiKey
var clientId = 'YOUR CLIENT ID';
var apiKey = 'YOUR API KEY';
var scopes = 'https://www.googleapis.com/auth/calendar';


/* Function invoked when the client javascript library is loaded */
function handleClientLoad() {
  console.log("Inside handleClientLoad ...");
  gapi.client.setApiKey(apiKey);
  window.setTimeout(checkAuth,100);
}

/* API function to check whether the app is authorized. */
function checkAuth() {
  console.log("Inside checkAuth ...");
  gapi.auth.authorize({client_id: clientId, scope: scopes, immediate: true},
                      handleAuthResult);
}

/* Invoked by different functions to handle the result of authentication checks.*/
function handleAuthResult(authResult) {
    console.log("Inside handleAuthResult ...");
    var authorizeButton = document.getElementById('authorize-button');
    var addButton = document.getElementById('addToCalendar');
    if (authResult && !authResult.error) {
          authorizeButton.style.visibility = 'hidden';
          addButton.style.visibility = 'visible';
          //load the calendar client library
          gapi.client.load('calendar', 'v3', function(){
            console.log("Calendar library loaded.");
          });
    } else {
          authorizeButton.style.visibility = '';
          authorizeButton.onclick = handleAuthClick;
        }
}

/* Event handler that deals with clicking on the Authorize button.*/
function handleAuthClick(event) {
    gapi.auth.authorize({client_id: clientId, scope: scopes, immediate: false},
                        handleAuthResult);
    return false;
}

/* End of PART 1 - Authentication Process. */
Example: Adding an event
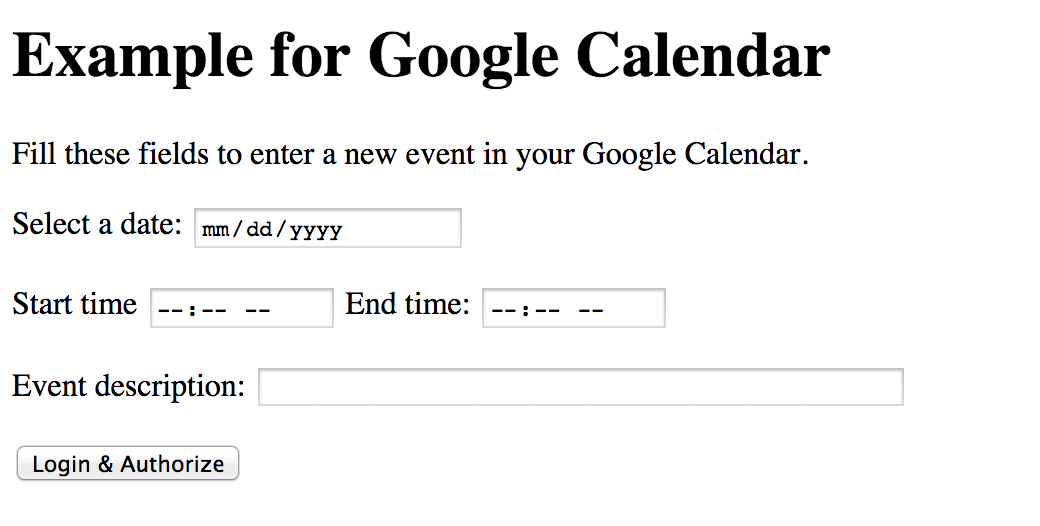
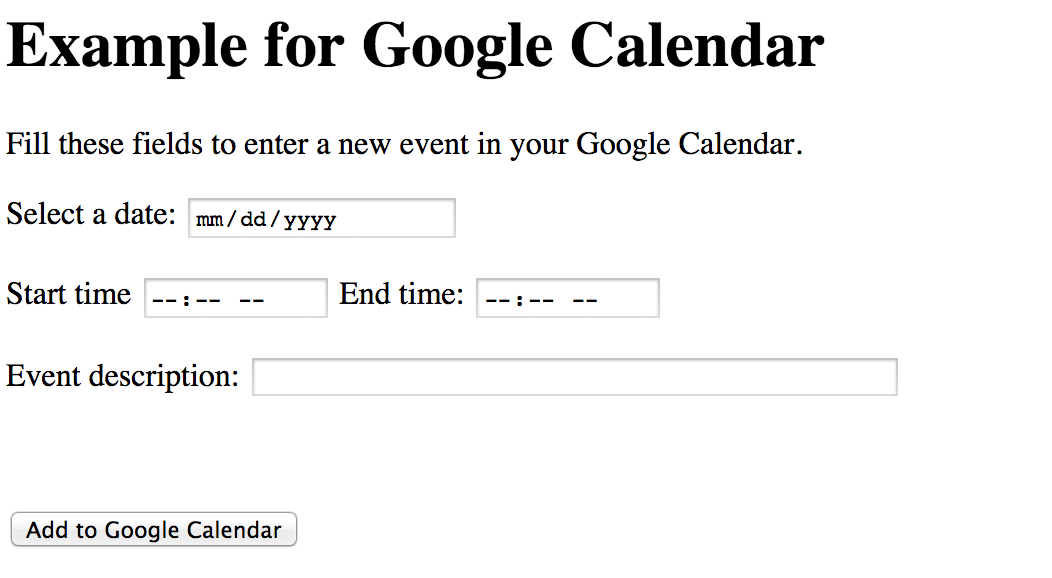
I've created a simple example, that will check first to see if you are logged in, and shows the "Login&Authorize" button first. If you have authorized the app, it should show "Add event to calendar". See the two screenshots below:
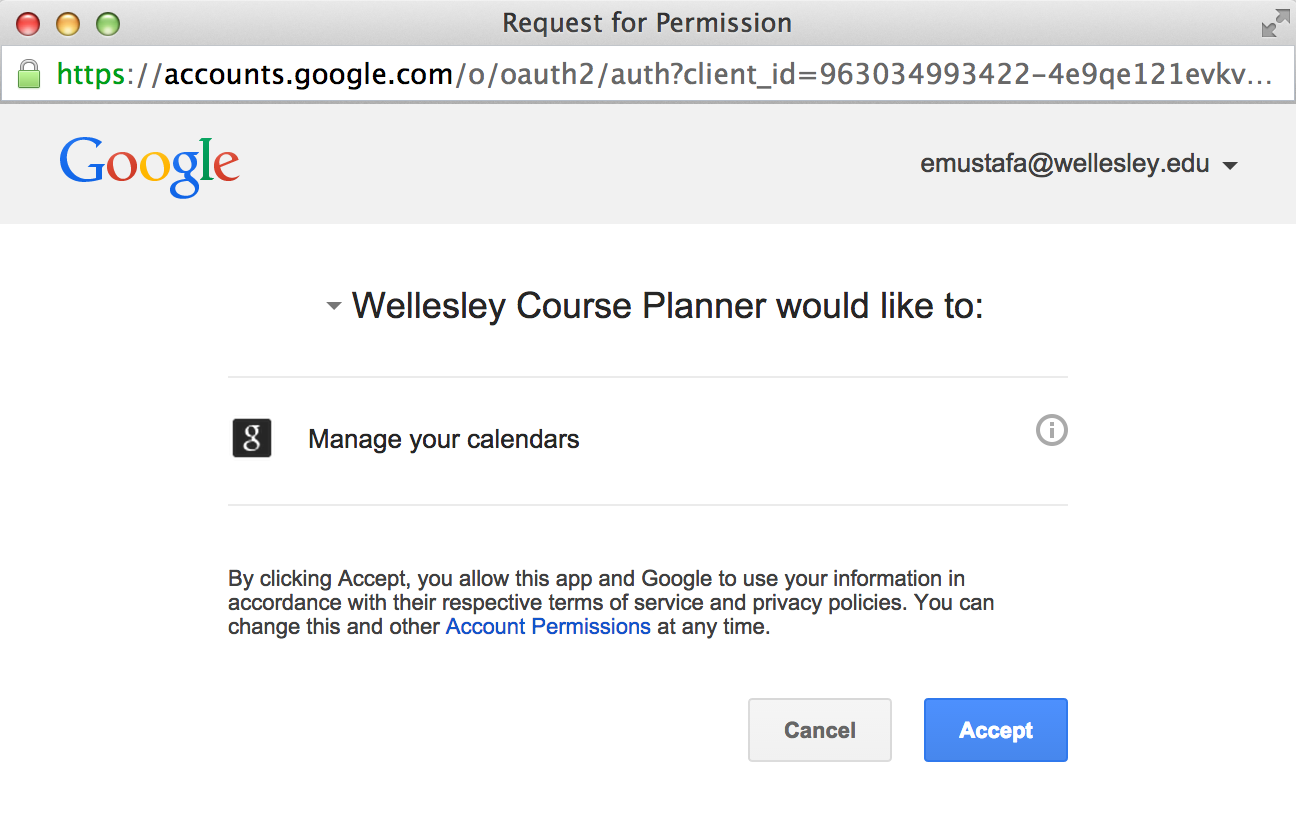
If it is the first time you are using the app, Google will show the following screenshot (with the name you have chosen for your app).
Once the user fills the form and clicks on the "Add event to calendar", a request
is created and sent to the Calendar of the logged-in user. Given that we stored the
information about the event in an object eventData, the code for talking
to the API is shown below:
// Make an API call to create an event.  Give feedback to user.
function createEvent(eventData) {
// First create resource that will be send to server.
  var resource = {
      "summary": eventData.eventTitle,
      "start": {
        "dateTime": new Date(eventData.date + " " + eventData.startTime).toISOString()
      },
      "end": {
        "dateTime": new Date(eventData.date + " " + eventData.endTime).toISOString()
        }
      };
  // create the request
  var request = gapi.client.calendar.events.insert({
    'calendarId': 'primary',
    'resource': resource
  });

  // execute the request and do something with response
  request.execute(function(resp) {
    console.log(resp);
    alert("Your event was added to the calendar.");
  });
}
You can try this example yourself.
Finally, you can read about other methods in the Google Calendar API. While the examples are not in Javascript, the way the methods work are similar in the other languages such as Java or Python.