More Google Calendar API
Create a new calendar
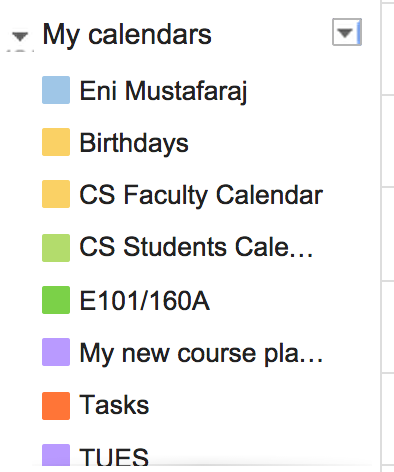
If you look at the list of "My Calendars" in your Google Calendar, you might have several of them (if you are part of groups that have shared calendars). For example, the screenshot below shows some of my calendars.
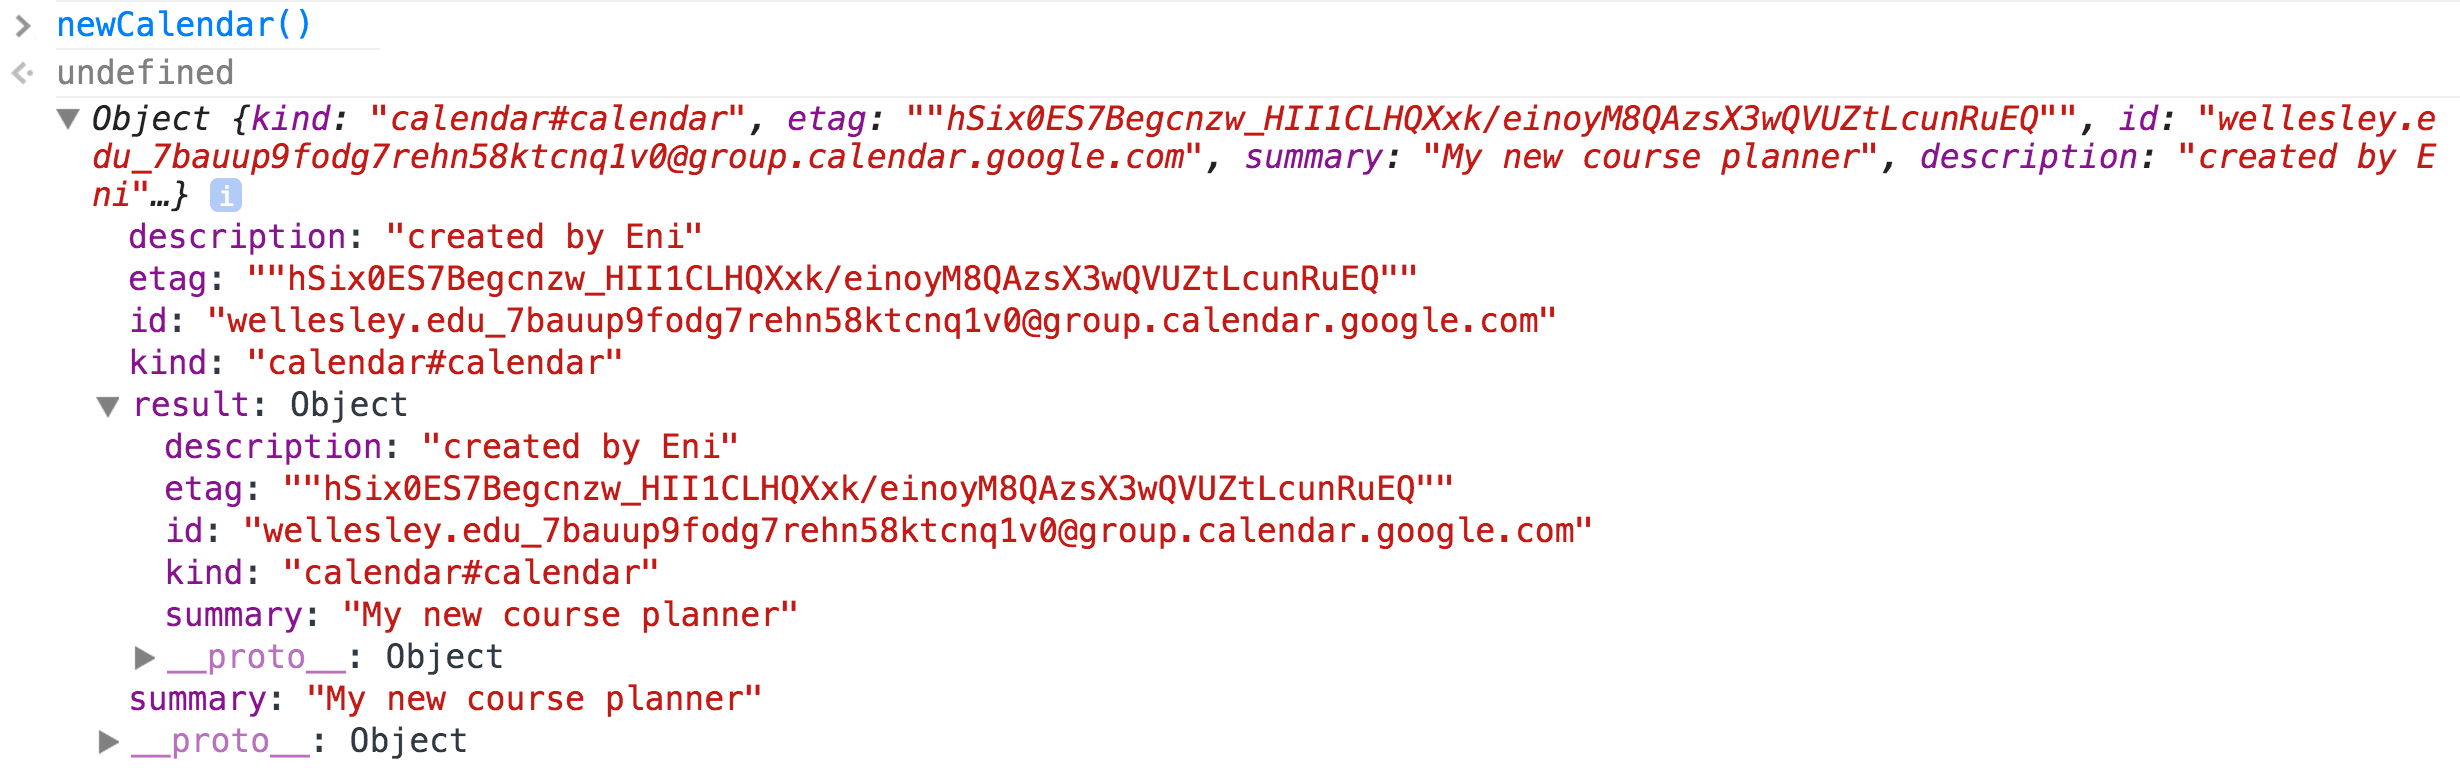
One of this calendars, "My new course planner", was created with the code below (after I changed the description and summary).
You might have noticed that the students who created the The Course Planner, had the following code in one of their JS files:
// More advanced capabilities of this website would include adding events to a
// separate calendar rather than the user's primary computer.  Such an advancement
// would require creating another calendar.  This function creates that calendar for
// the user.  The only reason we are not using it at this time is because there seems
// to be no way to obtain a calendarID, which is necessary to add events to it.
function newCalendar() {
    var request = gapi.client.calendar.calendars.insert({
      "resource" :
            {"summary": "WC Planner Tentative Schedule",
            "description": "brought to you by Wellesley Course Planner",
            "timezone" : "America/New_York"}
    });
    //alert(request);
    request.execute(function(){});
}
Their problem is that they didn't make use of the callback function within the
request.execute to receive the response from the server.
Your Task
Open the example from last lecture and
after making sure that you see the button "Add event to calendar", in the console, enter the
function above, modify it to receive the response from the API, and
then invoke the function newCalendar(). You should be able to see the response
(if you print it on the console) within 1-2 seconds.
If you are successful, you should see in the console the response, similar to this:
Where do the events go?
In the The Course Planner app, the code for creating the datetime values needed for the resource that will be added to the calendar, is created with the following function:
// This function converts the JSON data given into a day of the week.
function makeDay(str) {
    if (str == "Mon") {
        return "September 9, 2013 ";
    } else if (str == "Tue") {
        return "September 10, 2013 ";
    } else if (str == "Wed") {
        return "September 11, 2013 ";
    } else if (str == "Thu") {
        return "September 12, 2013 ";
    } else if (str == "Fri") {
        return "September 13, 2013 ";
    } else {
        return "September 14, 2013";
    }
}

// The function is called in the addEvents() function

var x = allCourses[collectedKeys[i]]; //the course JSON
//...
d1 = new Date((x.Days[j]) + x.Times[0]);
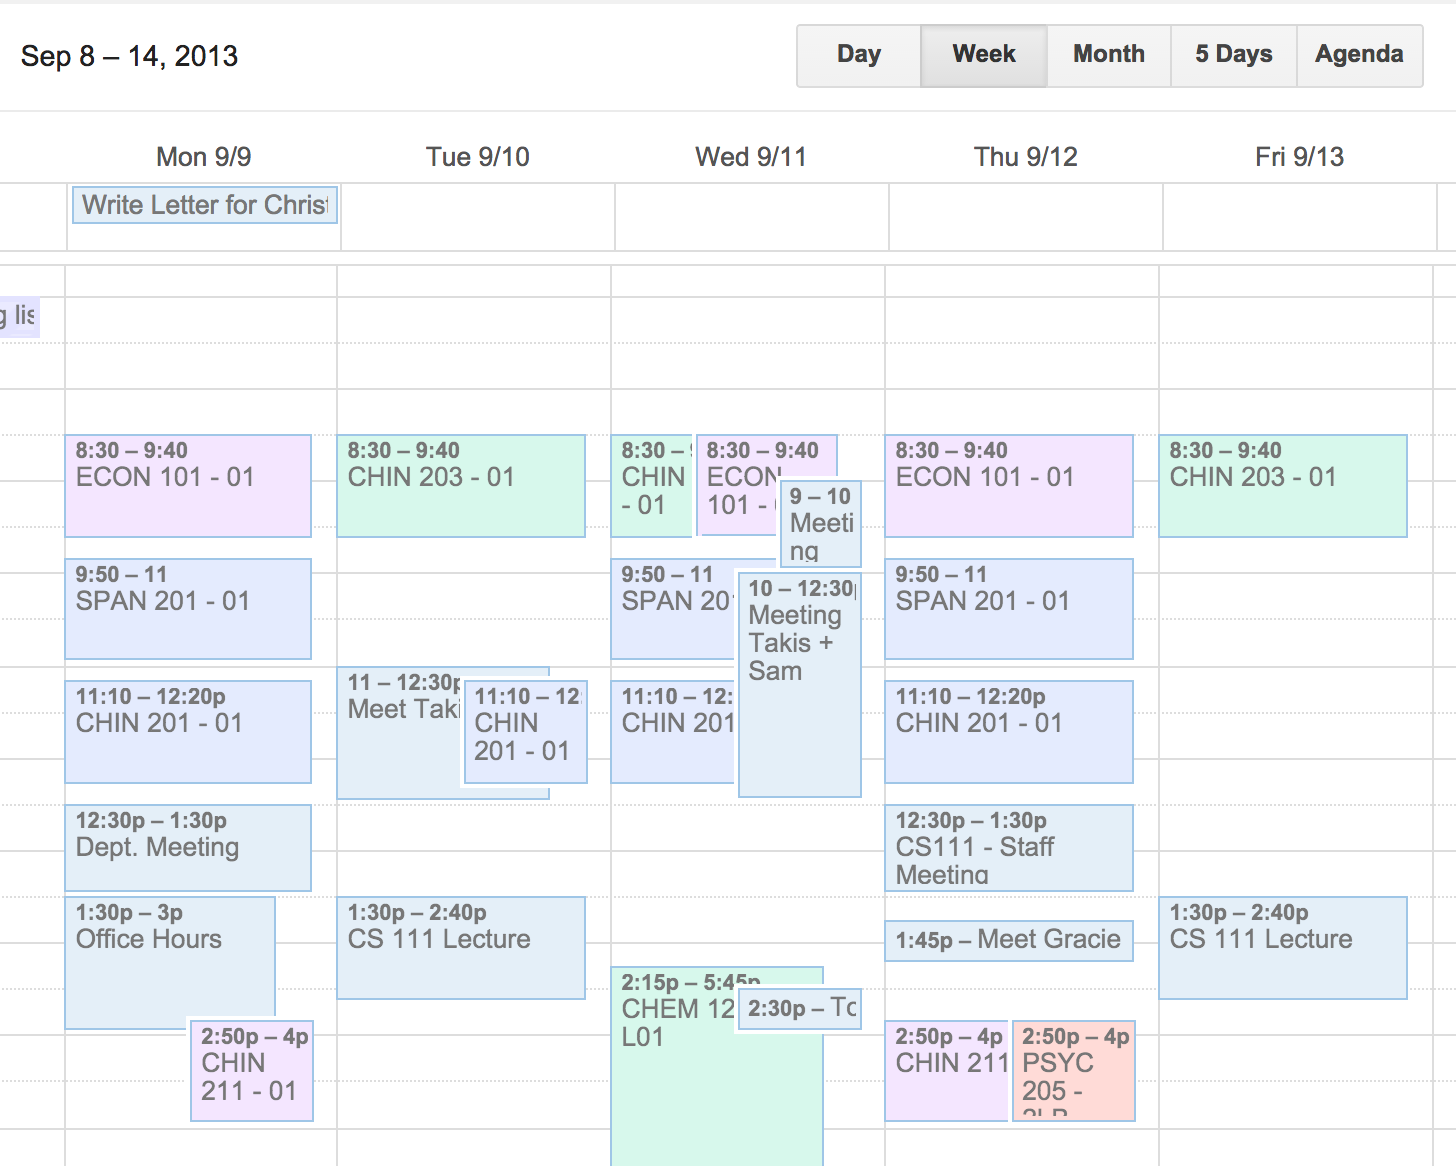
Thus, if you use the app, you'll need to go with your calendar to September of 2013 to see the new insertions. Below is a screenshot that shows courses I added in my calendar.
Knowing about succes
The WC Planner code didn't make use of callback functions, thus, when the courses are added to the calendar, the user doesn't recieve any notification. In terms of user experience, this is not good. There are two things that they could have done to improve this situation:
- Have a callback function in the
request.executethat keeps track of every item entered in the calendar. - Use
setIntervalto periodically check whether all the courses that the user chose were added to the calendar. Once this process is completed, notify the user of the succes and clear the interval.
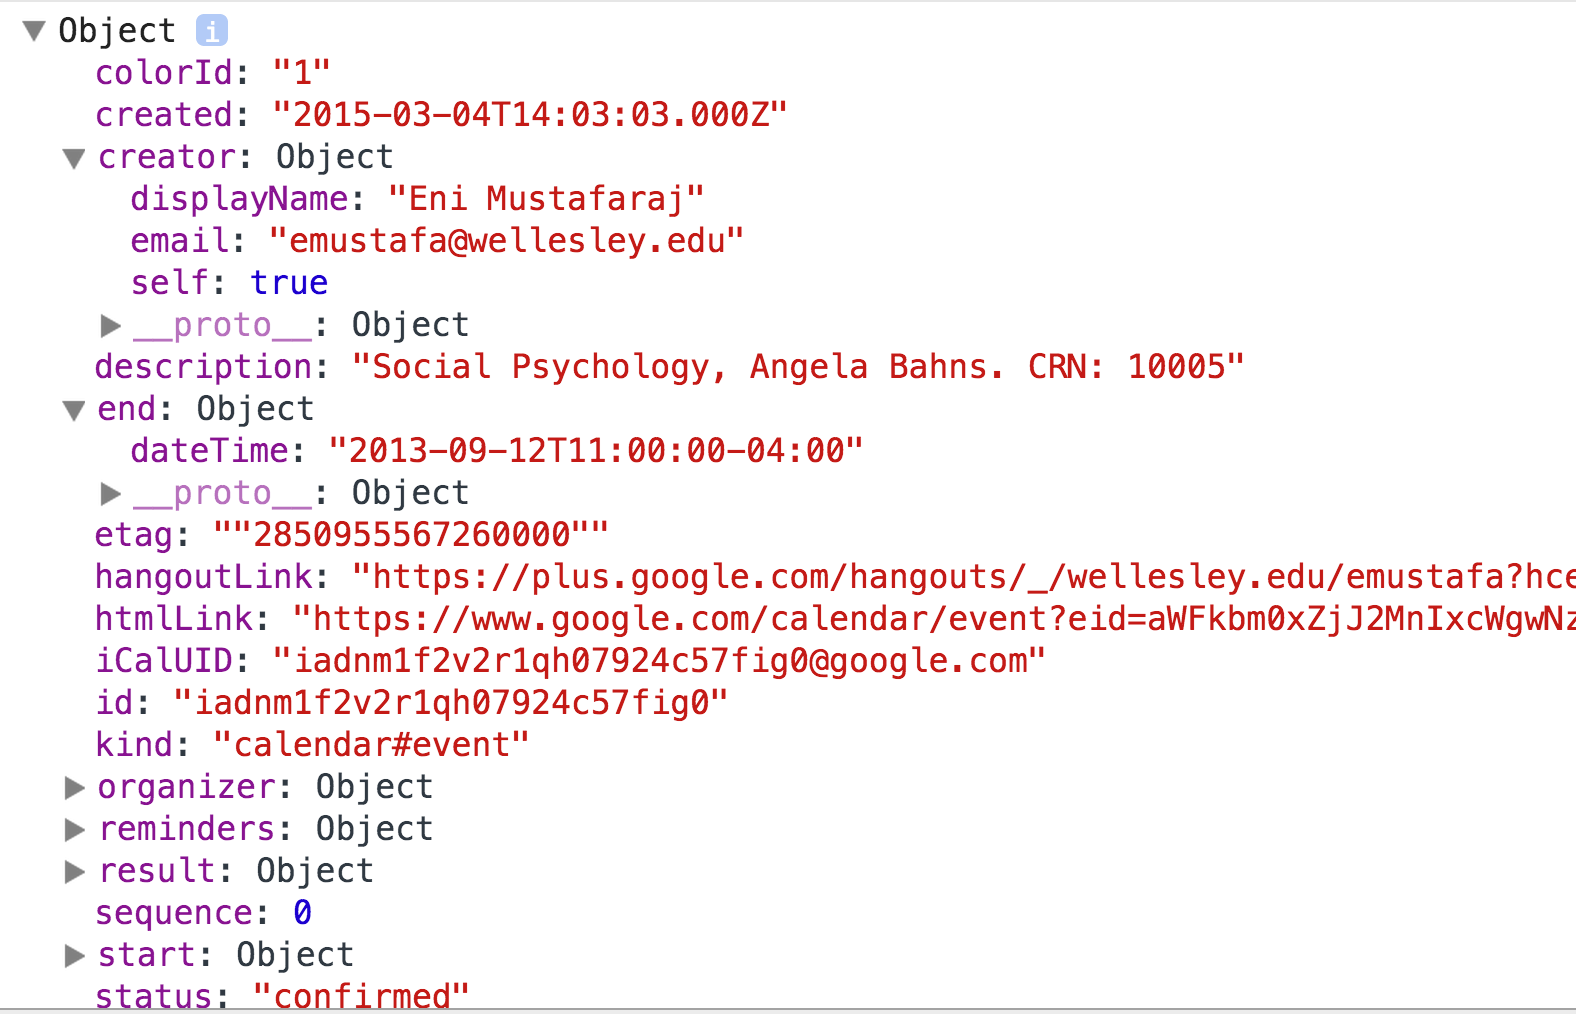
If the following code by WCPlanner is modified to display the response by the API on the console, one would be able to see the complete details of the created event, together with the information about the calendar and its owner (see screenshot below).
var course =eventArray[i];
var request = gapi.client.calendar.events.insert({
      'calendarId': 'primary', //inserts event to user's primary calendar
      'resource': course //the event is the course object (each event in eventArray)
});

request.execute(function(){});
Your Task
If you completed the task in the first section about creating a new calendar and get its ID from the API response, you can use that ID value in the code above, when creating the resource. This way, your new events will show up in the new calendar.