Meteor - Doing more
Create a New App
Let us start by reminding ourselves how to create a Meteor app. You should all already have a Meteor developer account, in order to deploy the app.
- Create an app with:
meteor create appNamefrom a terminal window. - Start an app by first
cd appName, and thenmeteor. - View an app locally by opening a browser tab to the URL:
http://localhost:3000/. - Add HTML, JS, and CSS code in the respective files within the
appNamefolder. - Open a new terminal window to work on the MongoDB console. First cd to the app folder, then
type
meteor mongoto access the client console. You can create MongoDB operations from this console. - Deploy an app with
meteor deploy appName.meteor.com - Visit your app at
http://appName.meteor.com. - Stop the meteor local server on the terminal window with
Ctrl+C.
Client and Server
Try to open the HTML file or your new app directly on the browser. What do you see? Why?
We'll look now at the JS file. You should notice two parts:
if (Meteor.isClient) {
 ...
}

if (Meteor.isServer) {
 ...
}
Let's add a console.log statement in each block, with a different message (e.g. Hello Client,
and Hello Server). Where do you think these messages will appear? Enter the expressions
Meteor.isClient and then Meteor.isServer into the console. Do the
results that we saw make sense now?
Suppose we have some data:
var students = [["Susie", 2016], ["MR", 2017], ["Sophia", 2015], ["Jamie", 2018]];
Let us try together to do the following things:
- Create a collection named "students". Where in our JS file can we put a statement to do that? What is that statement?
- Write some code that will store each student's information as separate
documents in the "students" collection. For the moment, let's put that code in
the Server block. Also, in the Client block, let's add this
line:
console.log("Total students", Students.find().count())
Here are some questions to ponder about:
- If we have a console.log statement in the client code that prints out the count
of items in the Students collection, we'll get 0, although if we run the line
console.log("Total students", Students.find().count())in the browser console, we'll get the correct amount. Why do you think is that? - If we make a small change to the code, and repeat the command above in the console, we'll see that the number of students increases. Why?
We can reset the content of the database, by running the command meteor reset
in the Terminal. (First we'll need to quit the server with Ctrl-c).
We can fix the problem of repeated insertion, by adding an IF statement to check for documents, before inserting them.
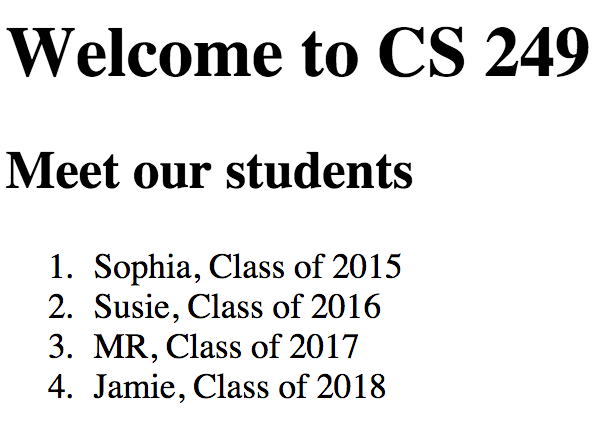
In order to make the list of students show in the HTML page we will need:
{{#each}}...{{/each}} block
that inserts list items for every students, showing their name and class year.{{#each}} block.This is what you should be able to see (left screenshot), once you have completed these two steps. Then, you can try to play with the helper function in order to return results ordered by class year (middle) or by name (right).


Adding Packages
Meteor is made of many blocks which work together to build web applications. If you'll need to use certain special features in your app, such as Google/Facebook accounts, sending email, or styling with Boostrap, you'll need to add these blocks (knowns as packages) to your project. Doing this is very easy. Let us add the Bootstrap package to the app we're building.
- Go to the page: AtmosphereJS, which is a catalog for all Meteor packages.
- Start searching for bootstrap. Notice how the results are being updated as you type.
- Select the second result, twbs:boostrap, to visit its page. You'll notice at the top,
the command for adding this package:
meteor add twbs:bootstrap. - Go to the Terminal and stop the server with Ctrl-c. Then, copy the previous command in the command line. Remember that you're adding this package to your project only. If you create a new project, you'll need to repeat this step again.
- Restart the server with the command
meteor. Reload the page on the browser (because the connection was broken) and notice how the appearance of the page changed.
Important Note
Notice how for the Bootstrap package to have an effect on the page, you don't need to do anything else, but what we already did. No need to add the CSS and JS files in our HTML code, this is all taken care of by Meteor.
You are ready to start using the different Bootstrap features directly in your HTML code.
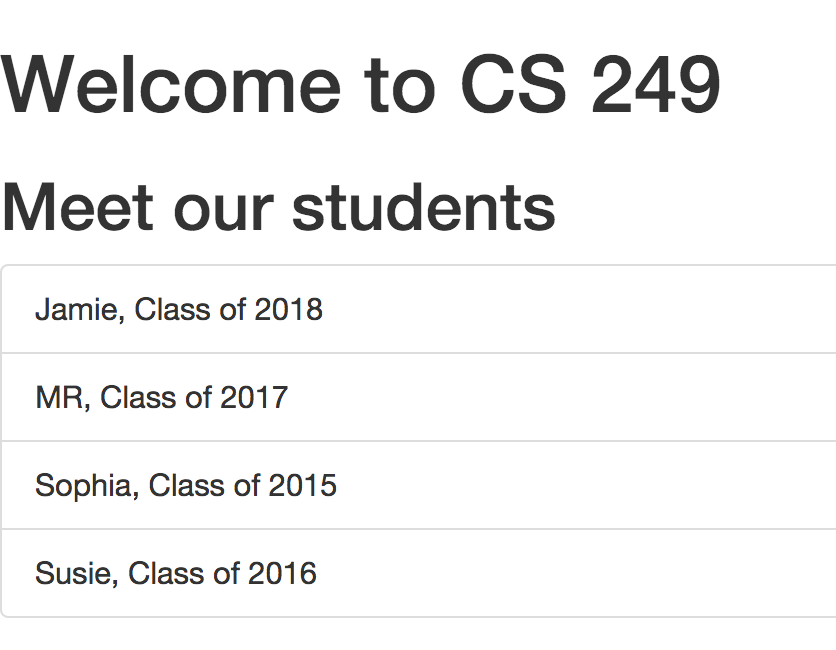
Let's add the class "list-group" to the ol element and the class "list-group-item" to the li element. After saving the HTML file, the page should look like this:
Some packages that you'll install will have a composite name such as: "twbs:bootstrap" and others will have simple names such as "accounts" or "accounts-ui". This refers to who develops and maintains the packages. If there is no prefix, that means that the Meteor team/community is in charge of that package, otherwise, the prefix indicates the developer(s).
Sending an email
An important feature of an app is to be able to send an email to users, for a series of reasons: to notify that something has become available (a new slot in a course has oppened), to remind of a goal (in a to-do list with dates), or to provide summary information. In this section, I explain how to send emails with Meteor. The code is very simple, but we'll need to deal with some other issues. Let's start.
Step 1: Initially, we will have to add the package email to our
project. This can be done easily with meteor add email.
Step 2: We need to look up the Meteor documentation about the package email. In addition to explanations, the documentation has a concrete example of how to use the email functionalities:
 // In your server code: define a method that the client can call
Meteor.methods({
  sendEmail: function (to, from, subject, text) {
    check([to, from, subject, text], [String]);

    // Let other method calls from the same client start running,
    // without waiting for the email sending to complete.
    this.unblock();

    Email.send({
      to: to,
      from: from,
      subject: subject,
      text: text
    });
  }
});

// In your client code: asynchronously send an email
Meteor.call('sendEmail',
            'alice@example.com',
            'bob@example.com',
            'Hello from Meteor!',
            'This is a test of Email.send.');
The first part of the code can go within Meteor.isServer block code
(as we discussed previously). The second part will go in the Meteor.isClient block.
We would have to change the strings to reflect information for our email.
Below is the code that I wrote in the client block to make it possible to send an email.
Step 3: Write HTML code that will allow a user to submit their email address and receive an email.
<form id="emailform">
 <p>Your email: <input id="address" required
                            type="email">
  <input type="submit" value="Notify by email">
 </p>
</form>
Notice that we are using a form with an ID value. The first input field is of type "email" instead of "text", and it has the attribute "required". Go on and try to input some random text. You'll see an error message to force you to input a real email address.
Step 4: Write JS code that will deal with the event of submitting the form (click on the input of type submit).
 Template.body.events({
    "submit #emailform": function(event){
                event.preventDefault(); // stops form from reloading page
                console.log(event);
                var address = event.target[0].value;
                console.log("address is: ", address);
                // send the email by invoking the server method "sendEmail"
                Meteor.call("sendEmail", address, "wellesleyCS@gmail.com",
                            "Welcome to us", "Great job everyone");
    }
  })
Notice that the code needs to be within Template.body.events, given
that the form element is in the body. Also, we use the event name and the selector that
refers to the form ID, "submit #emailForm" to indicate when the event
is going to be triggered. We can inspect the object event in the console,
in order to find out how to extract the value from the email field. Then, we invoke
the method sendEmail with its four argument values. Keep in mind that
all the string values can be set by some other process (look up values in the database,
or use a function to generate the content for the message).
Step 5: Setting up the MAIL_URL. When I tried the code above, I received the following message in the server console:

To set up the MAIL_URL, we need to add the following code within the Server block:
if (Meteor.isServer) {

   Meteor.startup(function () {
     process.env.MAIL_URL = 'smtp://ACCOUNT%40gmail.com:PASSWD@smtp.gmail.com:587'
  });
// rest of our code here
}
The symbol %40 is the hexadecimal representation of the @
symbol. We need this, because the URL uses @ as a separator between
the credentials part (account + passwd) and the protocol part. You can consult
this resource for a
list of all HTML entities
.
Notice that you'll need to replace ACCOUNT and PASSWD with some real values. However, after doing that, I got an email in my Gmail account:
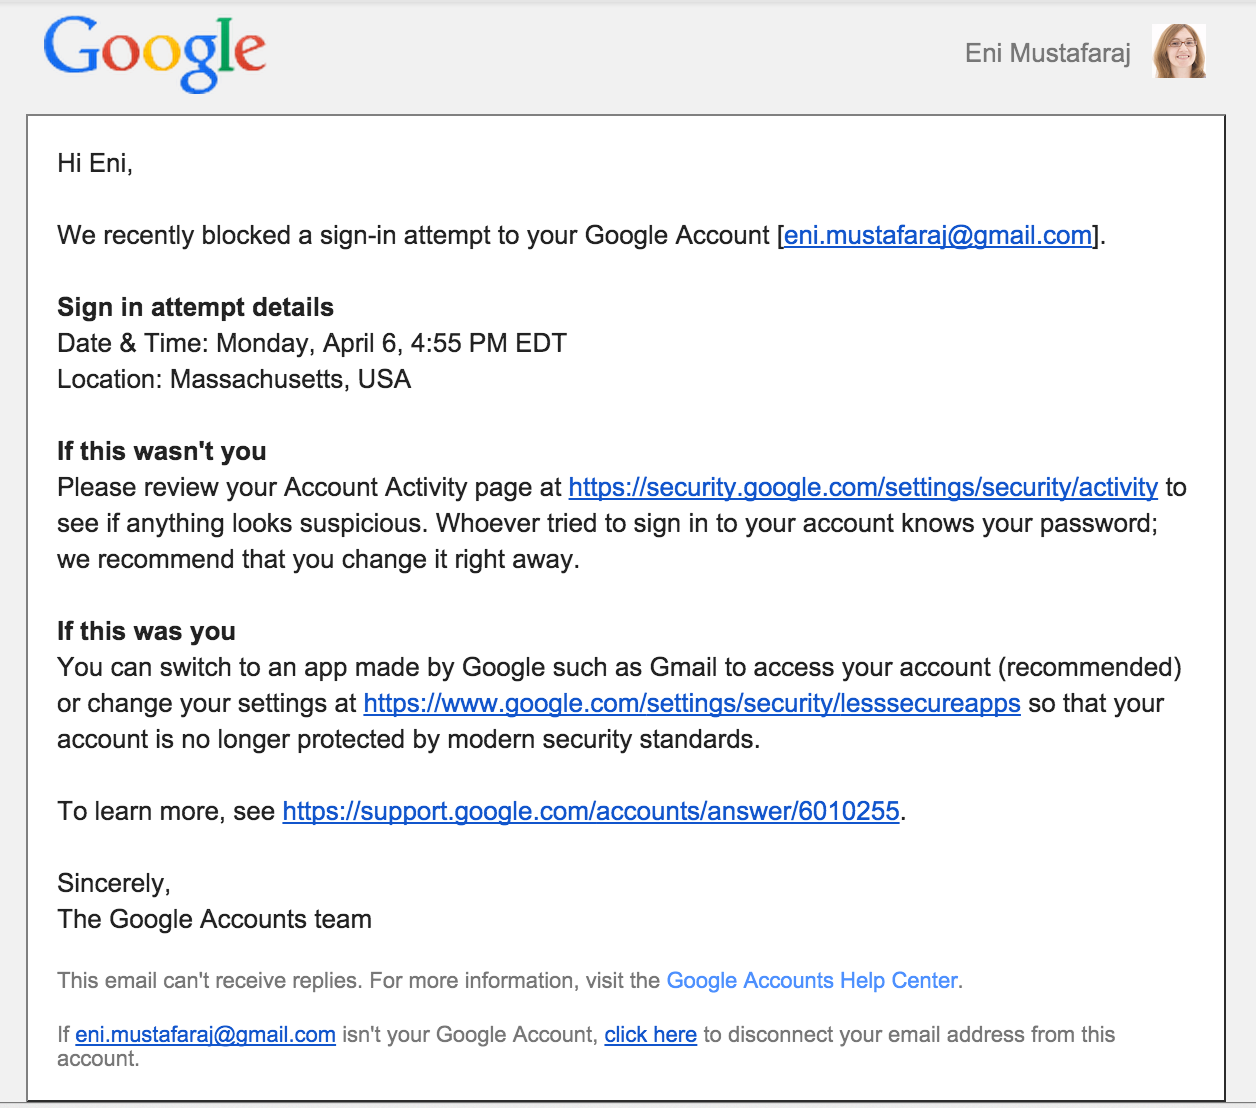
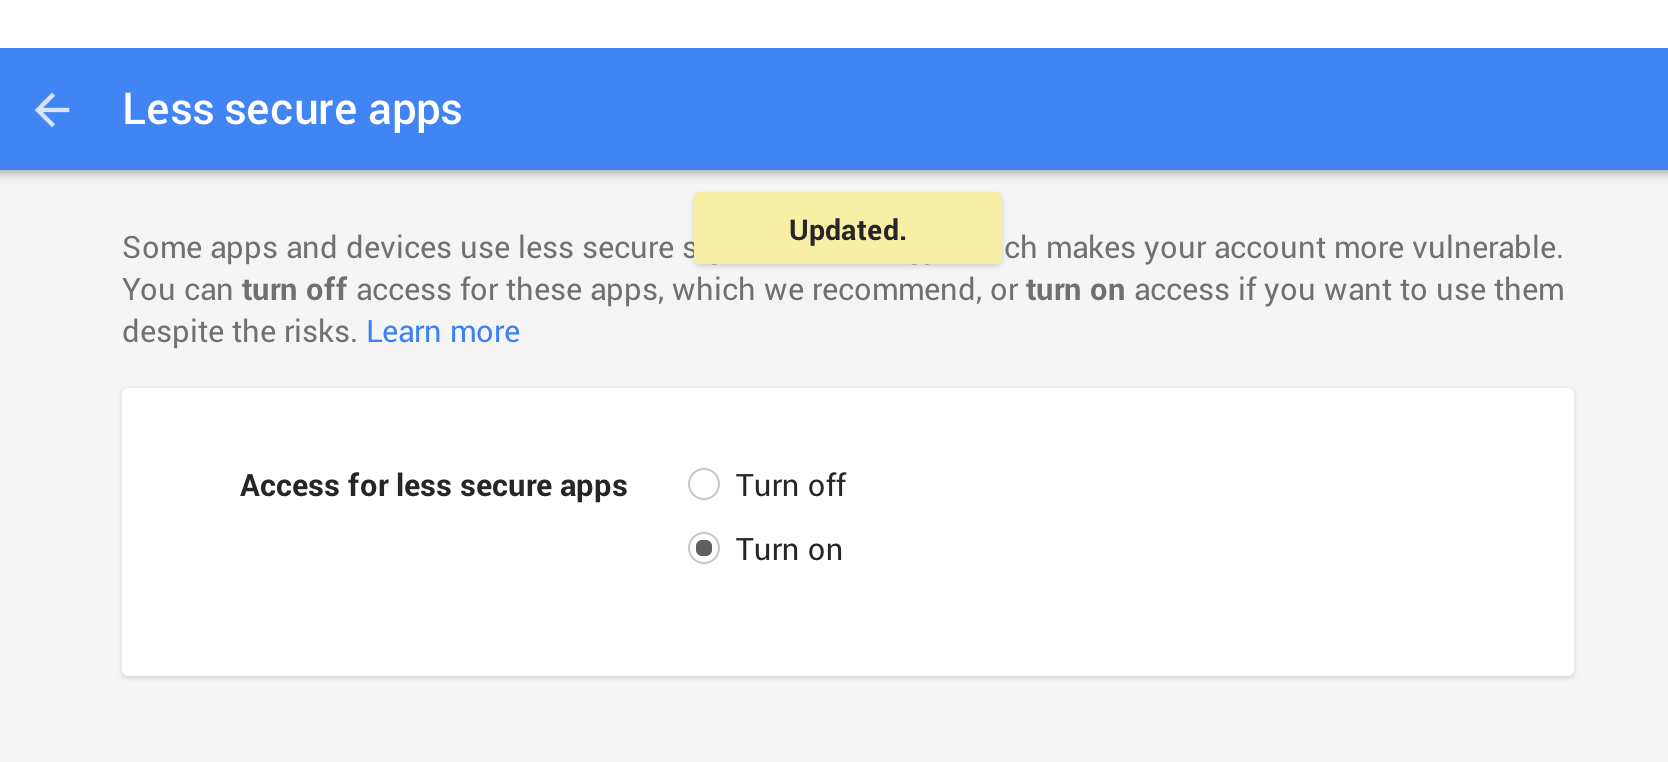
Step 6: Make your email setting less secure (you cannot do this with your Wellesley account). If you create a Gmail account that you'll use only for your Meteor app, you can change the Google settings to less secure, to allow the Meteor App to send emails through this account. The message that shows up if your account will support this (not Wellesley accounts) looks like below:
Once we make the email less secure, the next time we try to send the email, we will see both the email sent (in the Sent Mail folder) and the email received (see the screenshots below).


Food for Thought
Currently the code that contains our gmail account and password is in the JS file, inside the server block. Who can see the content of that file? Is that good? We will continue this discussion next time.
Something else to think about is the way in which we sent the email, without using a program like GMAIL. Instead we wrote a simple line to specify the MAIL_URL:
smtp://ACCOUNT%40gmail.com:PASSWD@smtp.gmail.com:587and then called a method with values for the To, From, Subject, and Body field.
This specifies that our app is going to use SMTP (Simple Mail Transfer Protocol) to send our message to the email server (in this case Gmail), which then will perform the email delivery. To learn about SMTP and other TCP/IP protocols, and concepts such as virtual ports and port numbers, you should take our CS 242 Computer Networks course.
Solution Code
The completed solution as a ZIP archive. First download it on your computer and unzip it. Open the JS File and add your credentials for an account that you don't mind making less secure. Then, "cd" to this folder and start "meteor". Try out sending an email from the web page on the browser.