GOOGLE DRIVE:
Google Drive is a great tool for creating, editing, and sharing documents. It allows you to easily work as a group on one document, edit a document from any machine (by logging onto your Google Account), and publically submit work for a class.
In Living in the Age of the Antihero this semester, you'll use Google Drive both for peer editing purposes and to submit your completed work. Several important skills for using Google Drive are creating documents, editing documents, accessing documents after they have been created, star-ing folders, and changing the sharing settings for a document.
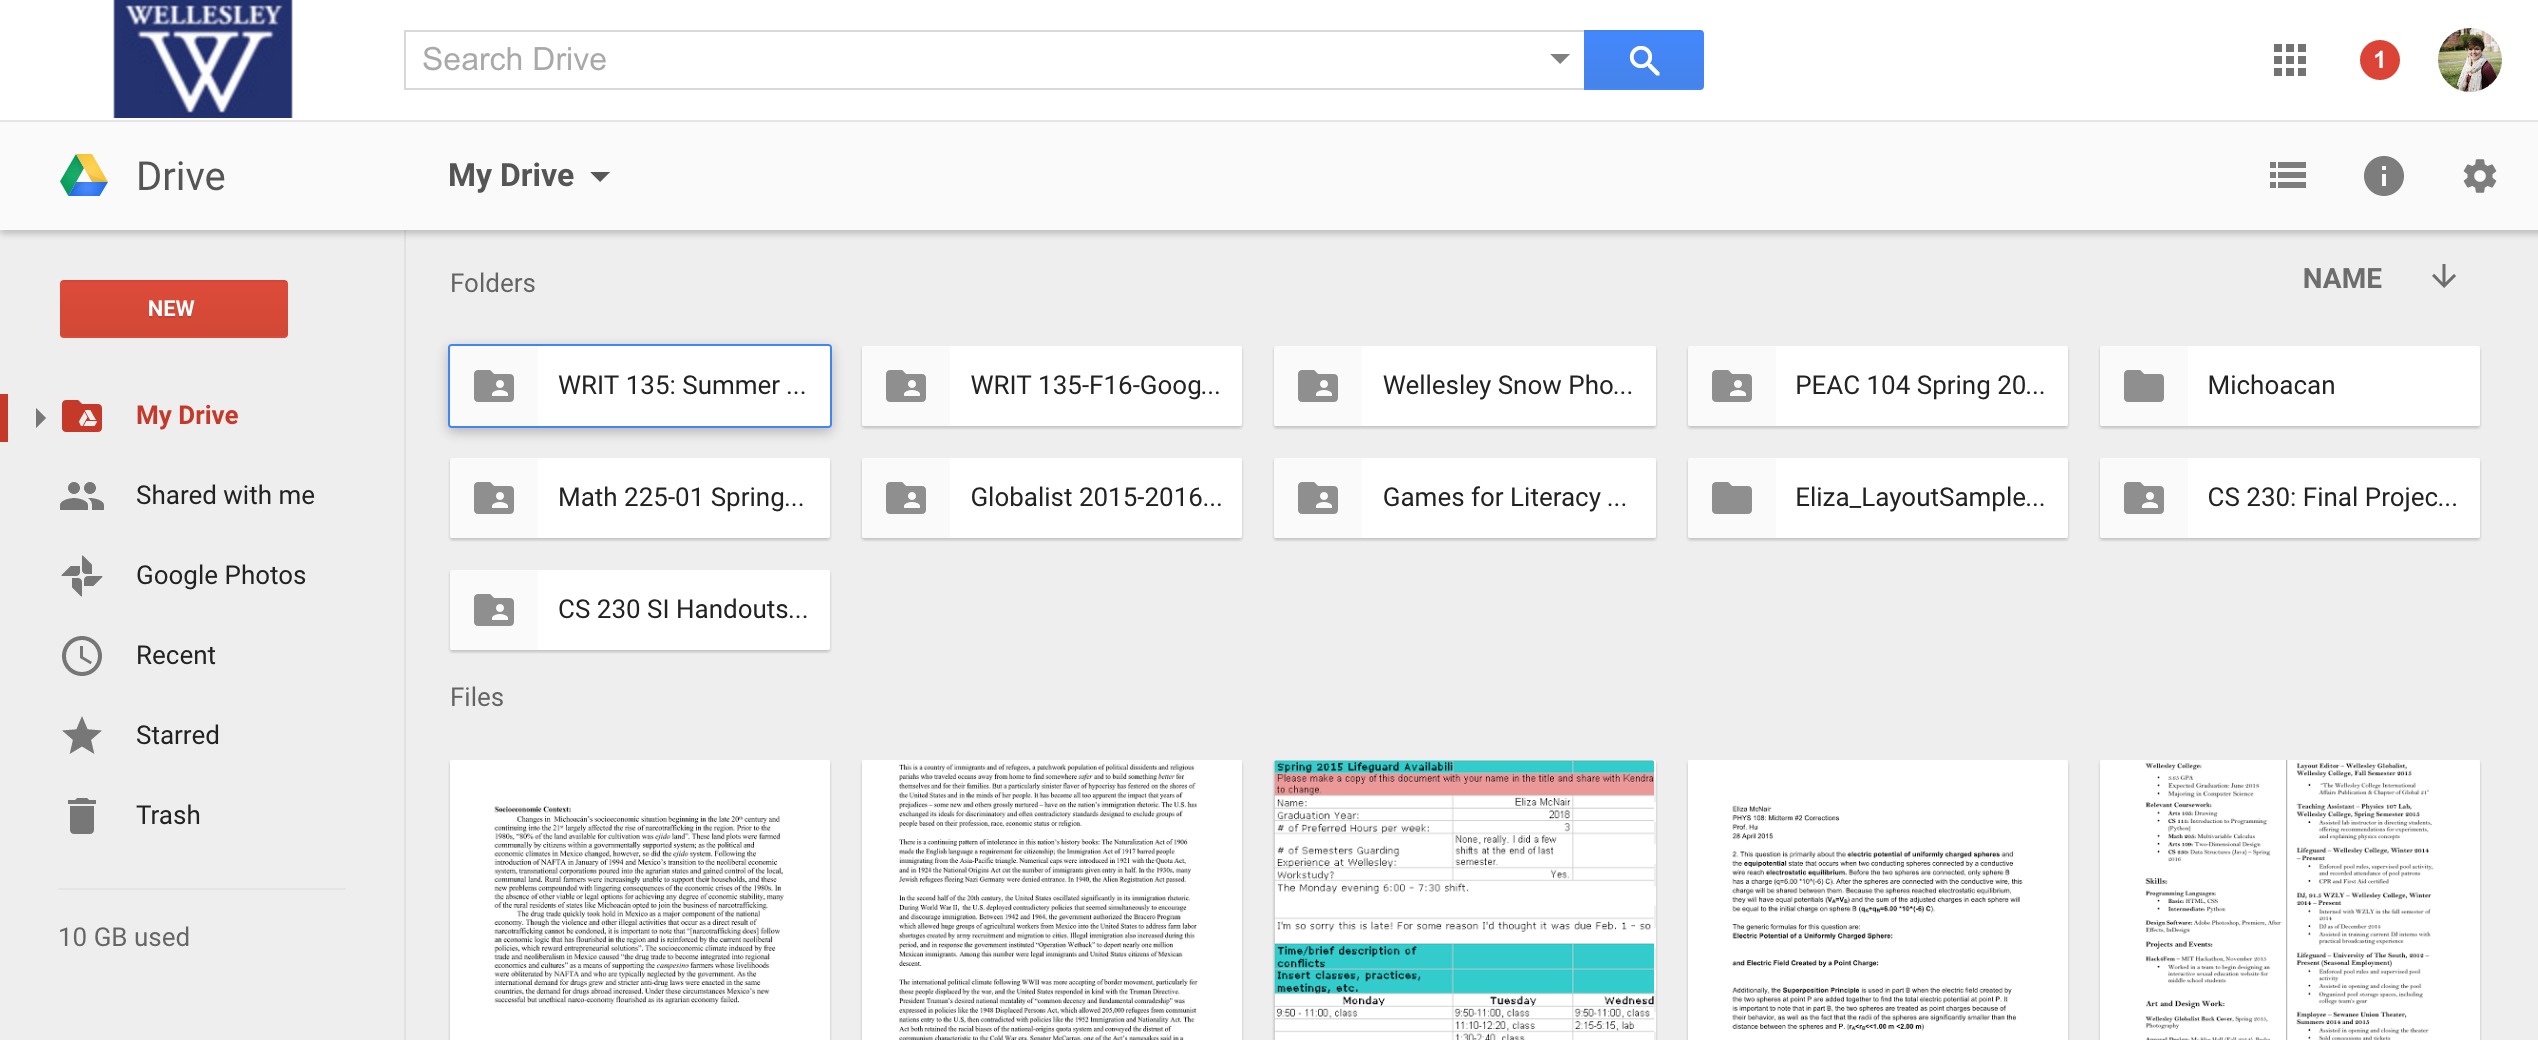
When you first log into your Google Account and open Google Drive, you'll see a home screen that looks something like this:

If your screen doesn't look like this, you are in List View instead of Grid View; to switch views find the grouping of three icons in the light gray bar at the top right corner of the screen, then click the leftmost (which looks like a bulleted list) icon.
The next step is to create a new document by clicking "NEW". You'll see this dropdown menu:

Your new document will look like this. Follow the instructions in red on the image by giving your document a name and deciding whether or not it should be marked as important, or starred. Familiarize yourself with the menus and organization of Google Docs. For editing purposes, Google Docs is organized much like Microsoft Word.

Find and explore the Navigation Pane on the left of the screen, as well as the Sharing and Comments menus. Pictured below are the Navigation Pane (left) and the Sharing Menu (right). The Navigation Pane is marked with the initial folder, "My Drive", and the "Starred" folder is circled in red. "My Drive" will contain all documents created in your Google Drive, as well as any class folders that you added to your Drive after they were shared with you. The "Starred" folder will contain all documents in which you clicked the star (which will be filled in with a yellow/gold color rather than remain an un-filled contour drawing). The Share menu, which appears if you click the "Share" button shown in the image above, shows that the document can be shared in a number of ways by entering another person's email address.


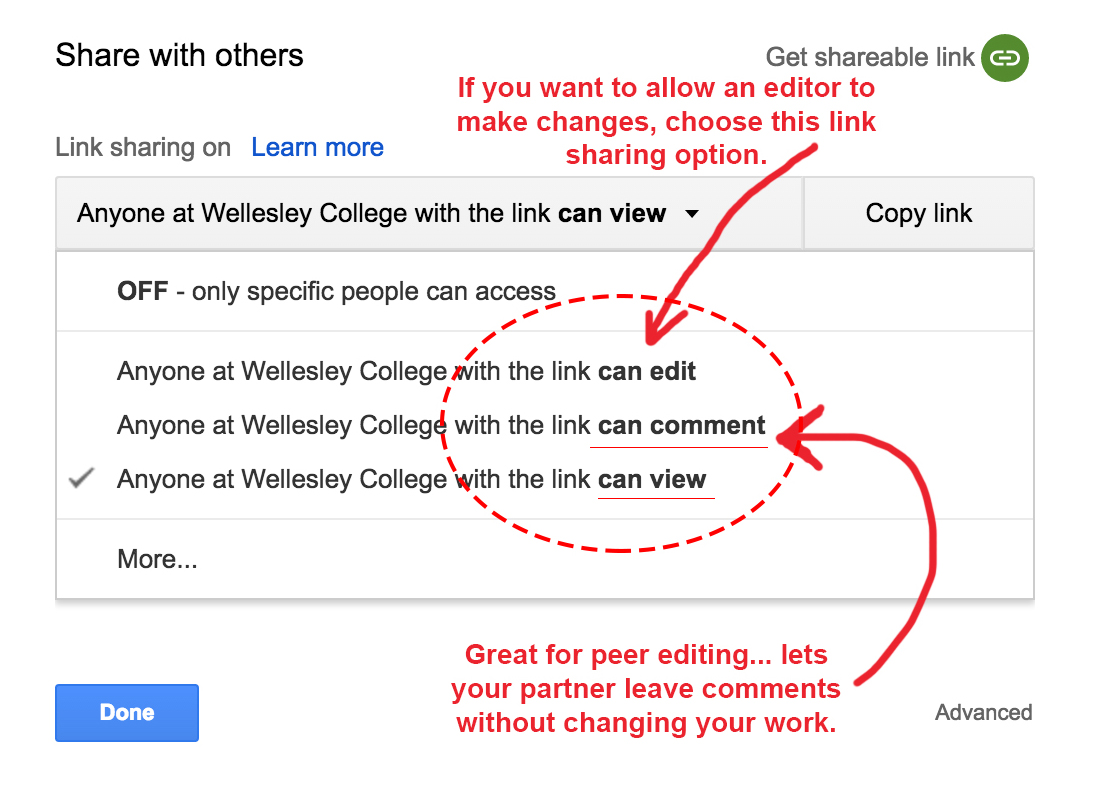
The next images show the different possiblities for sharing documents. The first image shows what happens if you click the dropdown menu indicated by the bolded text "can view". Documents can be shared so that recipients can only view the document, can add comments to the document, or can make changes to the document. They can also be shared by copying and sending a link rather than by entering individuals' emails. The email method is very helfpul, though, in that it sends an email to the editor/recipeient alerting them that they have permission to view, comment on, or edit a new document.

By clicking "More" at the bottom of the Share menu, you can expand the scope of your sharing beyond the Wellesley community.

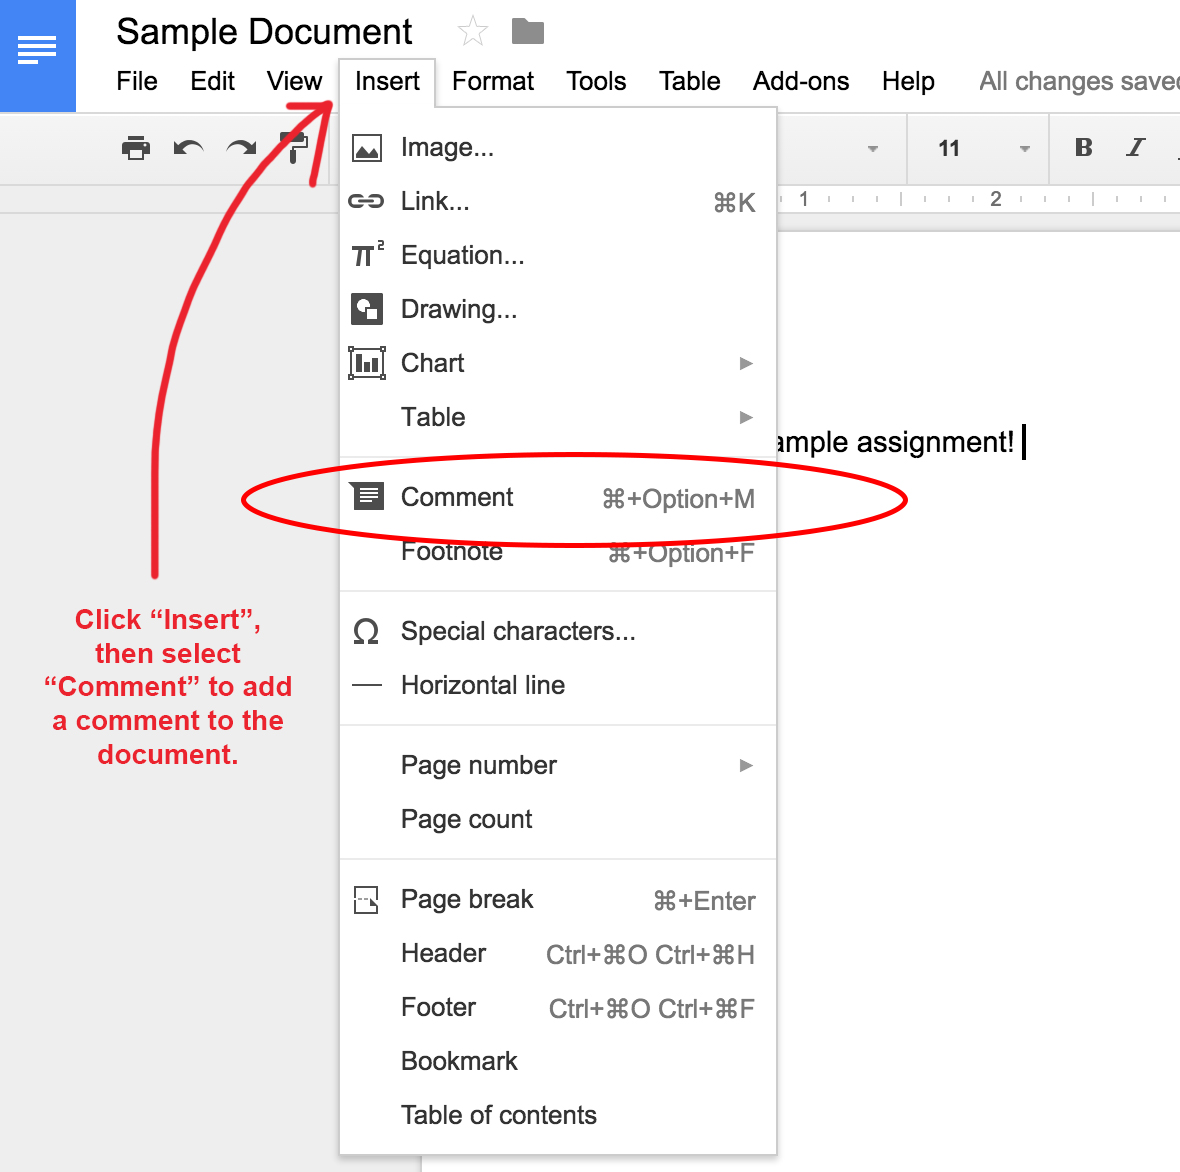
To add comments to a Google Document, first navigate to the "Insert" dropdown menu and click on "Comment":

Comments appear on the right side of your screen like this (see image above), and the commenting history can be accessed by clicking the "Comment" button on the top right side of the screen (see image below).


Assignment: Create and Share a Google Doc.
Congratulations! You've finished the Google Drive tutorial, now it's time to test your skills. Go into your Google Drive, create a new document, name the document, add a few sentences of text, then share the document with me (emcnair@wellesely.edu) so that I can add comments (but not edit) your document.
Congratulations! You're done!