
| The Game |
| Design Mechanics |
| Programming |
| Team Bios |
| Acknowledgements |
| Development Timeline |
 Jan. 9-19 Jan. 20-23 Jan. 24-27 Jan. 9-19 Jan. 20-23 Jan. 24-27
Sunday, January 9, 2005 Idea #1: LEGO sorter There were always random LEGO pieces floating around and it is so time consuming to sort all the pieces, so we thought it would be great if we could build a LEGO sorter for our final project that could put all the pieces back into the proper tubs. Thursday, January 13, 2005 Idea #2: Colosseum Sea Battle Reenactment Considering the age group of the audience, we thought it would be tons of fun if we could do something involving water and catapults for our final project. Perhaps we can reenact a sea battle and have 2 remote control cars and arm them with catapults that can launch Styrofoam balls. Idea #3: Water Obstacle Course Or we can build a water obstacle course and have 2 remote control boats race each other. It would be like slalom, except in water. Friday, January 14, 2005
Sunday, January 16, 2005 - Brainstorming for Ducky Polo Keeping boat afloat and motor We wanted to use rubber ducks to keep for the water vehicle because they would be good floatation devices for the motors and they are really cute. A propeller or waterwheel could be mounted to the back side of the rubber duck to move it. Rebecca Shapiro (an alum of the course) pointed out that if the rubber ducks were not stable enough we could add small wheels (like the SciBorg wheel) under the ducks for balance. If we use waterwheels it would make more sense to put them on either side of the ducks. This would also mean that we would need to use 2 motors so that the waterwheels can operate independently of one another (like the SciBorg). Catapult issues Since the catapults (a.k.a. poppers) are rather large we would need to have a pretty large rubber duck. It might be a better idea to have the catapults on land, that way we can build smaller water vehicles. Ball collecting mechanism The rubber ducks can come equip with a net that could scoop up the ping pong balls out of the water and reload the catapult. The net can scoop up the balls with an up down motion. Catapults reload Since the catapults are on land a reloading mechanism from the water is necessary to deposit the balls into the catapult. At first we came up with the idea of using a conveyor belt that would run parallel to the catapult and drop the balls down into the catapult. Then we realized that there would be a timing issue since the catapults would be running continuously. Also it would be very likely that the balls would pop out of the catapult. Instead of the conveyor belt we could use a trough to deliver the ping pong balls to a see-saw. The ball would wait at the bottom of the see-saw until the arm of the catapult comes down and tips the ball forward, making it roll onto the catapult. Game set-up Each duck will have its own goal and catapult. The ducks will have a net in the back to gather the ping pong balls and deposit them into a trough which will lead to the catapult. The ducks will also have a chance to defend their goals with a stop sign on their backs which the duck can raise to deflect an incoming goal. The catapults will be in line with the opponentsÆ goal. The first one to make 15 goals will win. Monday, January 17, 2005 - Changes after talk with Robbie Scooping mechanism Robbie thought the scooping mechanism may be too difficult and suggested that we used a plow-like mechanism instead. This way we would only need 3 motors instead of 4 motors. If we use the plow-like mechanism we will put the ball collecting mechanism in front of the duck. Stop sign We decided to leave the stop sign up instead of having it move up and down. Now we are down to 2 motors from the previous 3! This will also leave us with 2 extra ports. Scoreboard Instead of having a HandyBoard to display the score we wanted to use the display boards that come with the Crickets. Unfortunately, the Crickets and HandyBoard cannot communicate with each other. Robbie suggested that we use a LOGO chip instead and have LEDs light turn on whenever a goal is made. We can also have a song play whenever someone wins. Testing range of Catapult (a.k.a. popper - from http://www.pienetwork.org/a2z/m/modules/ only changed sides for one of the teams) It turns out the popper that we built from Challenge #7 doesn't throw that far (a foot a most). So we experimented with the popper and changed the arm length, rubber bands, and the release angle. Tuesday, January 18, 2005 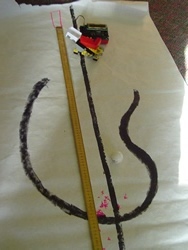   Increasing range of catapult Increasing the arm length didn't increase the range all that much. It turns out the release angle is too small and the ball was being released too soon, making the ball shoot really high instead of far. We figured the optimal release angle would be 45║, the change of the release angle dramatically increased the range of the catapult. After we got the catapult to launch far enough, we tested its consistency. We found that our catapult was pretty precise and launched ping pong balls about 78cm horizontally (distance meaured from the front of the catapult).  Blue dot Crickets Blue dot CricketsSince we were planning to use 4 crickets (2 on the ducks for the motors, and 2 for the remotes) we used the Blue Dot Crickets (older model). Now that we had the crickets, we had to figure out a way for the Crickets to communicate with each other via remote controls. We originally wanted to use IR signals, but then there would be the issue of miscommunication (i.e. one remote could potentially control two ducks). Also the IR signal seems to have a pretty short range, so there is the issue of unintentionally blocking a ping pong ball. Robbie suggested we use light sensors for eyes and had the ducks follow the flashlight. This way it would be more interactive and look less like a video game. However, after testing out the range of the Blue Dot Crickets we found out that they had pretty good IR range (much better than the new version)! We decided to use a remote system because it would be easier to control the ducks. Robbie then suggested that we could make our own remote using different resistors because the Blue Dot Crickets only have 2 motor ports and 2 sensor ports. We don't really know how this hooks up to the Crickets . . . we shall ask later. Wednesday, January 19, 2005 Breadboard for remote Robbie drew us a picture of the circuit for the breadboard and we had to figure out how to hook up all the wires, resistors, and switches to make our remote. This proved to be a lot more difficult than we originally anticipated. After several tries we finally got the connections right. The current arrangement of the switches makes it so the remote buttons are all lined up vertically. This remote will only take up one of the sensor ports on the Cricket! The four different resistors will make it so the Cricket sends out four different IR values. Under bed storage For our pool we are considering using an under bed storage container. However we think it may be too long and not wide enough. But weÆll have to wait until we build our ducks.
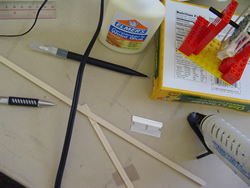 Waterwheel We didn't know how to go about building our water wheels, so we looked up some picture of waterwheels on Google to get some ideas. After looking at several pictures we decided to use a 40-tooth gear and glue the spokes in between the teeth and then these teeth will be reinforced by strips of wood on both sides. After going to the store to get our materials, we started to build the waterwheels. The wood glue doesn't seem like such a good idea now because it takes a very long time to dry and you have to hold it in place until it dries enough to stand on its own. This is extremely tedious, so we decided to use hot glue instead. It dries almost instantaneously and it is much more forgiving (i.e. if you mess up you can peel off the glue and try again) =) We will build the rest of the waterwheels tomorrow. |
 Idea #4: Ducky
Polo
Idea #4: Ducky
Polo