
| The Game |
| Design Mechanics |
| Programming |
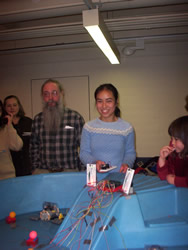
| Team Bios |
| Acknowledgements |
| Development Timeline |
 Jan. 9-19 Jan. 20-23 Jan. 24-27 Jan. 9-19 Jan. 20-23 Jan. 24-27Monday, January 24, 2005 - Back to work 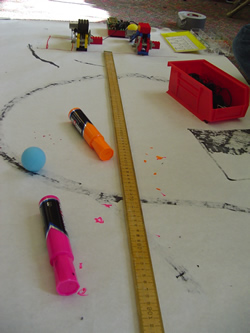 Change rubber bands on catapults After the modifications from the previous time, we still had to check the range of both of the catapults. On the first run, the yellow-black catapult fired about 10 cm further than the red-blue one, so we swapped the rubber bands. Now the red-blue one fires further. From this we can conclude that the rubber band is the cause of the difference in the range. We had to try a few different combinations of rubber bands before we found 2 that fired about the same range. We also had problems keeping the catapult in place. The catapult kept moving forward each time it fried. We will have to hot glue it to our platform in the end. This way all more of the mechanical energy can go into throwing the ping pong ball and not wasted on the movement of the catapult. 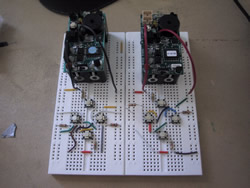 Finish breadboard remotes One of the remotes doesn't seem to be working properly, so we used an ohmmeter to see what the problem was. It turns out we had a pathway for the current to go from the positive terminal to the negative terminal without having to pass through any of the resistors or switches. Oops! No wonder we were getting the same resistance reading regardless of the switches we were pressing. =P Once we figured out what the problem was it didn't take very long to fix it and to finish the remote. 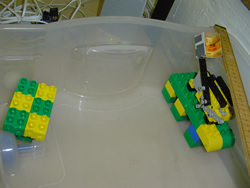 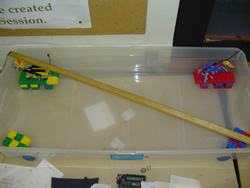
Building of platform Since most of the LEGO pieces are used up by various projects, we built our platform out of DUPLO blocks (thanks to Lyn!). We built four small platforms for the two catapults and two goals. The exact location will be determined once we get all the pieces together. 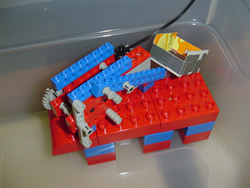
Change catapult side Once we built the platforms we realized that we had to change the arm of the red-blue catapult to the other side, so we can build our ball reloading mechanism later. We had to dissemble the catapult and build it as a mirror image of the yellow-black catapult. This proved to be a lot more difficult than we anticipated . . . it is really hard to get your brain to do something opposite to what your eyes see. =) Finalize remotes Now that we have both of our remotes done, we have to download the program we had written earlier into the Crickets mounted on the remotes. Seesaw prelims We started designing a seesaw to deliver the ping-pong ball to the catapult. For our first design we used two of the longest LEGO beams and stuck axles through the ends and the middle and held the beams in place with bushings. The seesaw seems to be a bit too long, so we may have to exchange the beams for shorter ones. Also we will need to build up the sides of the seesaw so that there is less of a chance that the ball will fall out. We need to work on the design more. LOGO chip lights by HB motor, "footballs" Robbie gave us a crash course on how the LOGOchip works and showed us how to reduce the voltage supplied from the HandyBoard (9V) to the 6V that the LOGOchip can handle. We used two 1k resistors in series to reduce the 9V to 4.5V. Once we reduced the voltage, we started to experiment with the LED and tried to figure out how to turn them on. After a couple of tries we correctly identified the positive and negative terminals. Then we plugged in 8 LEDs (the maximum amount that would fit on the breadboard). Next was the programming. (See the programming page for explanation.) Our program seems to be correct, but it doesn't work the way we anticipated. Once again Robbie came to the rescue and helped us fix the problem. The LOGOChip wasn't able to detect the HandyBoard motor-on's edges. After he took one look at the oscilloscope he realized that the voltage provided by the motor port on the HandyBoard fluctuates, making it seem like the motor was constantly on even though in actuality the the motor is switching rapidly between on and off. We fixed this by inserting a 47microfarad capacitor (which Agnes, having no idea what the brown lump was, had been calling a football the whole time) into the breadboard. Now our voltage doesn't fluctuate and the edge-detection works fine. Yay! =) Tuesday, January 25, 2005 - New Game! Back to the Catapult It turns out the catapult can't fire without the back of the box. The ping pong ball is released too soon and it shoots straight up. The ping pong ball launches forward when we put the back of the box back on. Also we just realized that there isn't enough room for the seesaw we made or any seesaw for that matter! Back to the drawing board! Since we don't really have room to put in another motor, we have to find a way to scoop up the ball from the water. If we could somehow attached a plastic spoon to the chain and have the arm of the catapult push down a lever to raise the spoon to deposit the ping pong ball into the box on the catapult arm, our conveyor belt idea could work. Next we ran our outrageous idea by Robbie, but we ran into all sorts of technical problems. Basically, this idea couldn’t possibly work due to mechanical and spacing issues. We thought we were really close to finishing, but now our game doesn't work at all! Yikes!!! With 25 hours left to go until the exhibition we had to come up with a new game! Panic time! We are now back to square one, all the work that we did this week is now useless. T_T 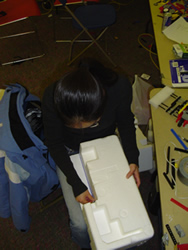
Changing Styrofoam Everything seems to be falling apart! We realized that we never tested out our latest version of the ducks and when we tested them out, it turns out they don’t turn at all. Also our ducks seem to be sinking! The Styrofoam we are using get really heavy after sitting in the water for too long . . . basically the floatation devices are turning into anchors over time. No good! After rummaging through abandoned computer boxes in the Science Center we found a different kind of Styrofoam. Instead of using the plastic Styrofoam, we are now using the foam kind that crumbles very easily. Since the Styrofoam falls apart pretty easily, we wrapped them in duct tape before inserting them on the ducks. Yay, now our ducks stay afloat and don’t drown over time! At least something is working. =) New Game Since our ducks work pretty well in the water, we could go back to our original idea of a race course. However, the under bed storage container is too small for two ducks to race side by side. So we went to the Wellesley Children's Center to look at their kiddie pools. Unfortunately, all their pools had been stored outside the shed, so we had to dig out these pools! This was the first time either of us had ever shoveled out snow and there was quite a bit of snow due to the blizzard 2-3 days earlier. We were quite enthusiastic about getting to shovel snow, but we didn't have mittens and our fingers froze. The pool turned out to be a lot bigger and heavier than we anticipated and we nearly got frostbite from carrying/kicking the pool back to the Science Center. On the way back to the Science Center we came up with a new idea for our game. Using what we had built, we could have a game where the ducks would race each other and push ping pong balls off towers. Originally we were thinking of a having a golf game in water and have the ducks push the ping pong balls into holes, but then we realized that it would be pretty hard to build "holes" given our time constraints. Less than 24 hours to go! = O It would be easier and a lot more fun if the ducks push the balls off of towers, so now the game would be more like reverse-golf. :-p Raincoats Armed with our new game, we rushed back to work on our new game. The first thing we did was give the ducks raincoats to keep the Crickets dry. We made raincoats out of a piece of plastic that came off a doll box (thanks to Toys'R Us). Towers, Light Sensors, Distance Sensors Next we built towers for the ping-pong balls to rest on. We had to weigh these towers down with LEGO weights so that the towers wouldn't float away. We didn't want to hot glue them down, because we wouldn't have enough time. At first we put light sensors in the towers, so that the HandyBoard could register when the ping pong ball is knocked off the tower. But this turned out to be not such a good idea because the reflectance reading in the shadow didn't change when the ball was knocked off . . . the ping pong balls are too translucent. Next we used distance sensors and that worked a lot better. So we hot glued all the distance sensors onto the towers. Good ole hot glue comes to the rescue once again. =) Finishing programming for LOGO chip Once we had glued all of our sensors down, we worked on finishing the programming of the LOGO chip. We needed to make it so the HandyBoard will communicate with the LOGO chip and light up a LED whenever a ball has been knocked off the tower. We also wanted the LOGO chip to sing a song when someone knocks off all six ping pong balls. We made it so that each duck has to knock the ping pong ball off of their own towers (towers are color coordinated with the ducks). Wednesday, January 26, 2005 - Exhibition Soldering (4.5 hours worth of it!); 2-way extension cord After setting up all of the towers in the pool we saw that we had to solder all of the wires to make them long enough so we could plug them into the HandyBoard sensory/switch ports. Originally, we were just extending the individual wires and soldering them together. But Robbie told us it would be faster if we made two-way extension cords instead. About 4.5 hours later we were finally done soldering! Time sure flies by when you are having fun. =) Use HandyBoard start button to reset LOGOchip If we had more time we would have programmed the HandyBoard to reset both the LOGOchip after someone won. But from the look of things, we won't have time to do that. Also it turns out that one team can't knock two balls off very fast because one of them won't be registered by the scoreboard. This is because the motor takes one tenth of a second to turn on. This won't be a problem in our game because it will take more than one second for the duck to knock off a second ping pong ball. 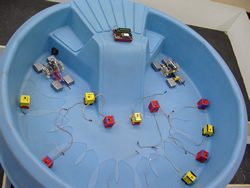
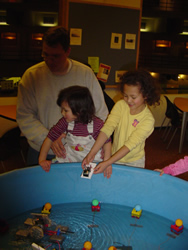
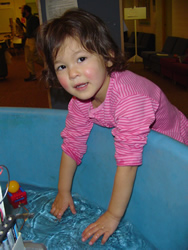
Set up . . . water filling, dry run. With less than half an hour to go we did a dry run for our game. Basically we hooked everything up and tested it out without water in the pool. Everything seems to be working perfectly! Yay! In our brilliance and panic we forgot that we had to turn the pool sideways to get fit through the door, Lyn had to point this out to us (hehehe). Oops. So we had to disassemble our project again and take it out to Sage Lounge to set up. Filling up the tube with 2 inches of water took a lot longer than we anticipated. By the time we had everything set up, the exhibition had already started. Poster board We realized we had to make a poster board for the exhibition, so we quickly dashed one out at the last minute since the exhibition already started and we were behind schedule. Exhibition The exhibition went really well. The only major problem we had was the fact that our scoreboard didn't really work because of the wires being underwater. We hypothesize that the 2-way extensions was cause of the problem because it turns out they are not suppose to be underwater. Oh well, we can fix that at a later time. One of our remotes ended up not working after an enthusiastic kid accidentally dipped the breadboard in the water. We also had a drowned cricket, but we were able to replace it. In the end we still had one duck that worked. The 2 hours passed by pretty quickly and the exhibition was over before we knew it. 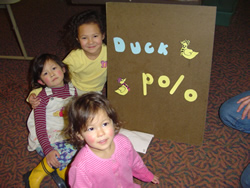 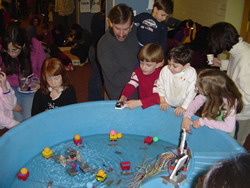
Thursday, January 27, 2005 - Lost Day Sleep-in day + nap day + slack-off day = don't start working on web page until 9pm. =( Friday, January 28, 2005 - Work Day Work day in Severance 008. We hope you had as much fun reading this blog as we did building this website! Enjoy!   
|